


- Tutto
- NEWTOP Storie di clienti
- NEWTOP Explorer Hub
- NEWTOP Approfondimenti sul settore
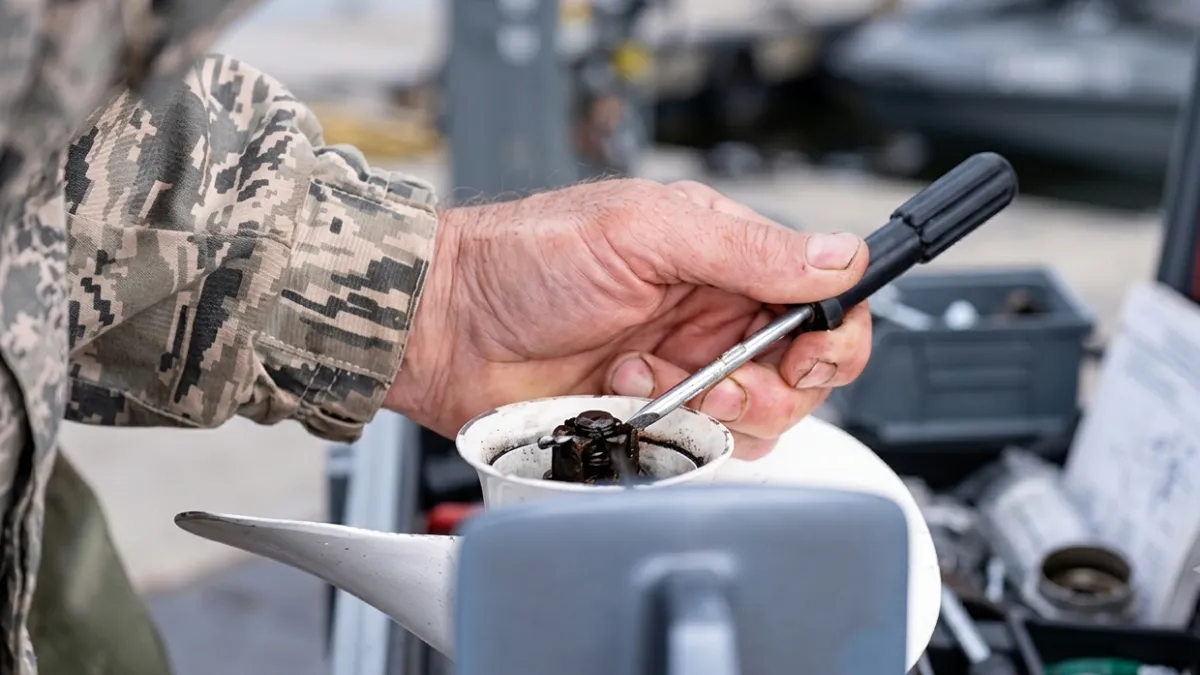
Molti proprietari di barche non si accorgono dei danni all’elica finché la loro barca non inizia a dare una sensazione diversa. Forse l'accelerazione diventa più lenta, aumentano i costi del carburante, oppure il volante inizia a vibrare dopo aver urtato una roccia nascosta o detriti galleggianti. Conoscere i primi segnali di allarme può aiutarti a evitare costose riparazioni e a mantenere il tuo fuoribordo efficiente.
In questa guida, spiegheremo il 5 i segni più comuni di un danno elica fuoribordo, perché contano, e quando è il momento di sostituire l'elica.
Perché un'elica danneggiata non dovrebbe mai essere ignorata
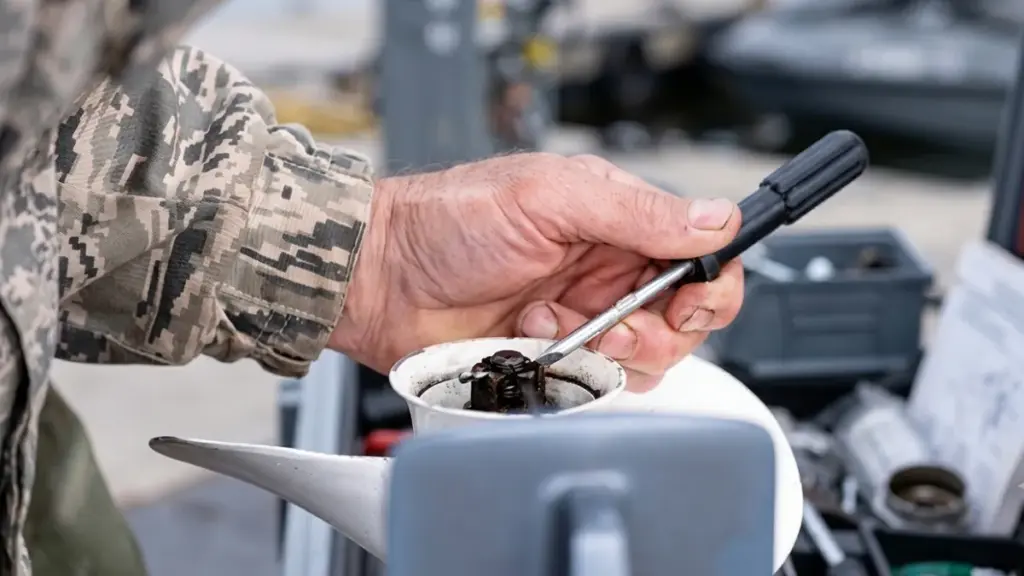
Ignorare un'elica danneggiata trasforma piccole perdite di efficienza in gravi danni alla scatola ingranaggi, costi del carburante alle stelle, e problemi di gestione pericolosi. Risolvilo presto per proteggere il tuo motore e il tuo portafoglio.
Degrado delle prestazioni e problemi di gestione
Un’elica danneggiata compromette immediatamente le prestazioni progettate della tua imbarcazione. Anche una minima distorsione della pala rovina il profilo idrodinamico necessario per convertire la potenza del motore in un efficiente movimento in avanti. Gli operatori di solito lo notano come un tiro lento e un notevole calo della velocità massima.
- Perdita di spinta: Le lame piegate o scheggiate interrompono la geometria, riducendo la spinta in avanti e causando una scarsa accelerazione.
- Gestire l'instabilità: Le superfici irregolari della lama creano una spinta irregolare, portando alla trazione dello sterzo, assetto instabile, e monitoraggio incoerente.
- Generazione di vibrazioni: La rotazione sbilanciata crea vibrazioni sotto carico, spesso avvertito come un tonfo ritmico attraverso il ponte a velocità di planata.
Aumento del consumo di carburante e dei costi operativi
Il funzionamento di un'elica compromessa danneggia direttamente il budget operativo. Le imperfezioni sulla superficie della pala distruggono il flusso laminare dell'acqua, sostituendolo con resistenza e turbolenza. Il motore deve bruciare molto più carburante solo per raggiungere la velocità di crociera standard.
- Aggiunto trascinamento: Le pale danneggiate inducono un flusso turbolento, costringendo il motore a lavorare di più per mantenere lo slancio.
- Maggiore consumo di carburante: Un'elica ammaccata o piegata normalmente aumenta il consumo complessivo di carburante di circa 10%.
- Compensazione dell'acceleratore: Gli operatori spingono naturalmente più forte l'acceleratore per compensare la spinta inefficiente, moltiplicando silenziosamente i costi di gestione quotidiani.
Grave stress meccanico sull'unità inferiore
I danni estetici all'esterno spesso nascondono gravi danni meccanici all'interno. Un'elica sbilanciata agisce come un martello contro la trasmissione. Invia costante, sollecitazione ciclica direttamente nell'unità inferiore, trasformando una riparazione economica dell'elica in una massiccia ricostruzione della scatola ingranaggi.
- Usura della scatola ingranaggi: Il carico irregolare trasmette lo stress direttamente all'unità inferiore, distruggendo gli ingranaggi, cuscinetti, e gli alberi prematuramente.
- Degrado della tenuta: Le vibrazioni persistenti danneggiano le guarnizioni dell'albero dell'elica, permettendo all'olio degli ingranaggi di fuoriuscire e all'acqua di entrare.
- Disallineamento dell'albero: Gli impatti pesanti che deformano le pale spesso piegano l’albero dell’elica, garantendo un fallimento catastrofico se lasciato senza controllo.
Rischi per la sicurezza e potenziale incaglio
Operare con un'elica danneggiata spinge i tuoi margini di sicurezza nella zona rossa. La perdita di spinta pulita rende la nave imprevedibile in spazi ristretti o in condizioni difficili. Spingere una trasmissione compromessa al largo provoca improvvisi guasti meccanici quando hai più bisogno di potenza.
- Pericoli di attracco: La perdita di spinta in retromarcia e la manovrabilità irregolare uccidono il tuo controllo di manovra su canali stretti e scivolate.
- Rischio di guasto: Correre con danni esistenti aumenta drasticamente le probabilità di un improvviso guasto meccanico durante la navigazione.
- Vulnerabilità meteorologica: La ridotta efficienza di propulsione compromette i margini di sicurezza durante la navigazione in mari agitati, venti forti, o forti correnti.
5 Segni di un elenco di eliche fuoribordo danneggiate
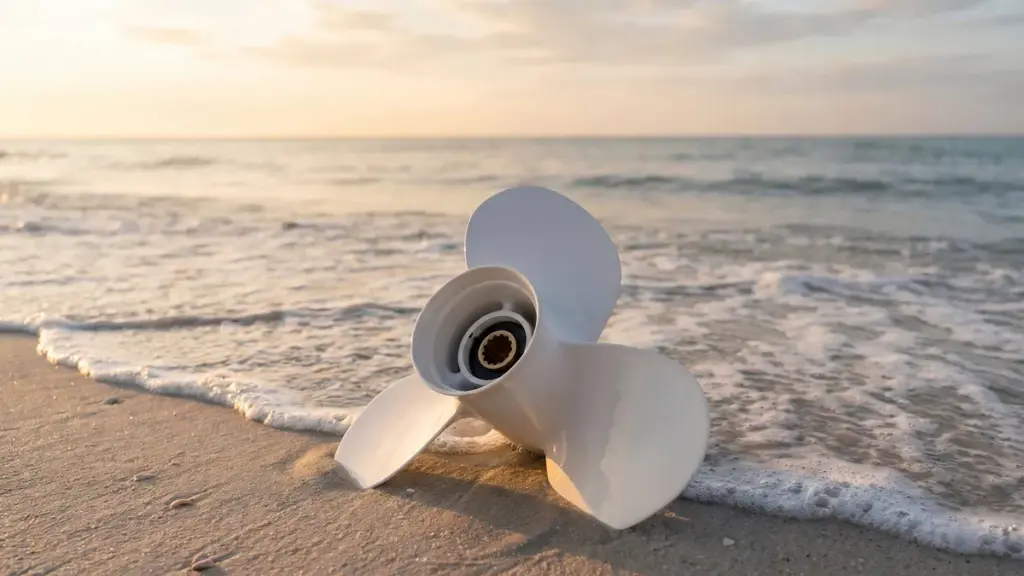
Se il tuo motore fuoribordo vibra improvvisamente, perde velocità, o consuma più carburante del solito, la tua elica potrebbe essere già danneggiata. La tabella seguente riassume i sintomi più comuni, le loro probabili cause, e come possono influenzare il tuo motore.
| Segnale di avvertimento | Causa primaria | Rischio immediato |
|---|---|---|
| Vibrazione | Lame piegate o mozzo allentato | Guasto alla tenuta della scatola ingranaggi |
| Perdita di velocità / Tiro in buca scadente | Mozzo filato o trascinamento della lama | Motore trascinato |
| Rumore / Instabilità dello sterzo | Lame asimmetriche o albero piegato | Danni all'ingranaggio dell'unità inferiore |
| Elevato consumo di carburante / Carico | Resistenza idrodinamica | Usura del pistone e del sistema di raffreddamento |
| Danni visibili | Colpi d'impatto | Carichi d'urto sulla trasmissione |
Cartello 1: Vibrazioni durante l'accelerazione o la navigazione
Un'elica danneggiata raramente gira correttamente. Noterai un tremore avvertito direttamente attraverso il timone, l'alloggiamento del motore fuoribordo, o lo scafo stesso della barca, soprattutto quando si accelera o si mantiene una velocità di crociera costante. Questa vibrazione riduce drasticamente l'efficienza dell'elica e sottopone a stress immediato i supporti del motore e le guarnizioni della scatola degli ingranaggi.
- Cause comuni: Lame piegate o deformate, un mozzo allentato, o detriti pesanti intrappolati attorno all'albero dell'elica.
- Controllo attuabile: Spegnere il motore e ispezionare l'elica. Osservare gli angoli della lama per assicurarsi che corrispondano, quindi ruotare manualmente l'elica per individuare eventuali oscillazioni o graffi contro la scatola ingranaggi.
Cartello 2: Perdita di velocità e tiro in buca scadente
Accelerazione lenta, un tempo notevolmente più lento per salire sull'aereo, e ridotto punto di velocità massima direttamente all'inefficienza della propulsione. Anche se il regime del motore rimane normale o elevato, un'elica compromessa non riesce a convertire quella potenza in spinta in avanti. Ciò spesso deriva dalla cavitazione attorno ai bordi delle pale danneggiati o da pesanti incrostazioni marine che creano una resistenza eccessiva.
- Indicatore del mozzo filato: Se la boccola interna si guasta, non può trasmettere l'intera coppia del motore all'acqua, causando regimi elevati con un movimento minimo della barca.
- Controllo attuabile: Confronta la tua attuale valvola a farfalla completamente aperta (WOT) RPM e velocità massima rispetto ai dati di base storici della tua imbarcazione.
Cartello 3: Rumore insolito o instabilità dello sterzo
Nuovo ronzio, tintinnio, o rumori stridenti indicano un grave disallineamento meccanico, soprattutto quando si gira o si attraversano intervalli di giri specifici. Potresti anche notare che il timone risulta più difficile da governare o tira pesantemente da un lato. Ciò accade perché asimmetrico, le pale piegate generano una spinta irregolare, forzando la barca fuori dal suo percorso naturale.
- Minaccia al riduttore: Lo stridore persistente di solito indica un danno all'albero dell'elica o all'ingranaggio dell'unità inferiore piegato a causa di un precedente impatto subacqueo.
- Controllo attuabile: Muovere l'elica avanti e indietro per rilevare il gioco eccessivo. Giralo a mano e ascolta attentamente eventuali suoni di raschiamento interni.
Cartello 4: Maggiore consumo di carburante e carico anomalo del motore
Un improvviso calo dell'efficienza del carburante significa che ti fermerai al distributore di carburante più frequentemente per gli stessi identici percorsi e carichi. La resistenza idrodinamica dovuta a danni alla lama o incrostazioni costringe il motore a lavorare di più solo per superare la spinta e le vibrazioni perse. Il motore sembrerà sotto sforzo e richiederà impostazioni dell'acceleratore più elevate per mantenere la normale velocità di crociera.
- Usura a lungo termine: Il funzionamento prolungato in queste condizioni di carico pesante accelera l'usura dei pistoni, cuscinetti, e sistemi di raffreddamento fuoribordo.
Cartello 5: Lama visibile, Centro, o danni ai bordi
I difetti fisici sono gli indicatori più evidenti di un impatto. Una rapida ispezione visiva spesso rivela ammaccature, sono suggerimenti, pezzi mancanti, o crepe sottili. Questi difetti solitamente derivano dall'incagliamento della barca o dall'impatto con rocce, banchi di sabbia, barriere coralline, o detriti sommersi. Anche un lieve danno fisico altera l'effettivo beccheggio e l'equilibrio dell'elica, trasmettendo carichi d'urto dannosi direttamente nell'unità inferiore.
- Controllo attuabile: Rimuovere l'elica per ispezionare attentamente tutte le superfici. Sostituire l'unità se si riscontrano gravi danni strutturali o se le stime di riparazione superano 50% del costo di un nuovo oggetto di scena.
Fonte Eliche fuoribordo OEM ad alte prestazioni

Come proteggere il tuo motore sostituendo l'elica giusta in tempo
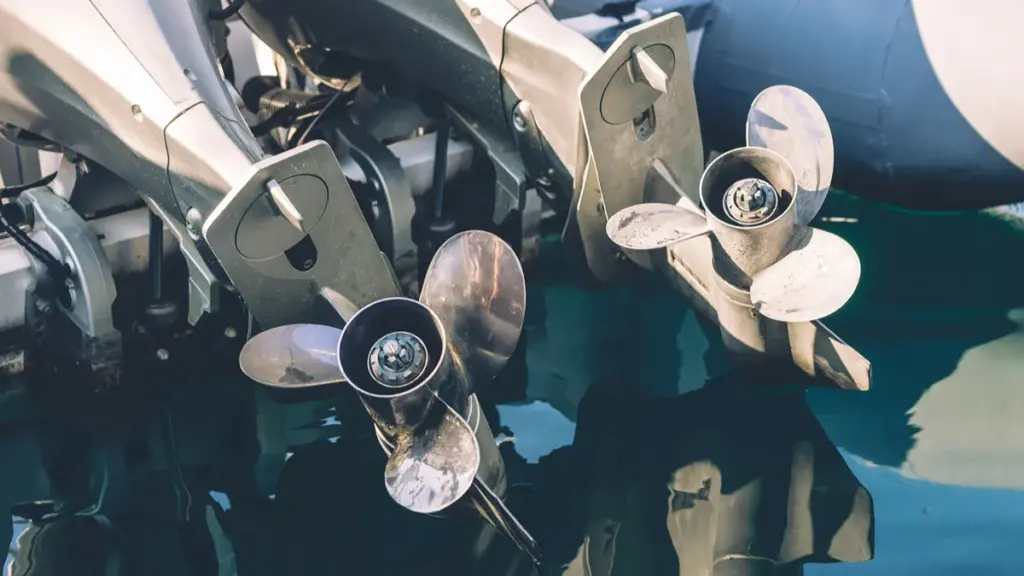
Un'elica danneggiata costringe il motore a lavorare di più e rischia di causare gravi guasti alla trasmissione. La sostituzione di un'unità compromessa protegge immediatamente la scatola ingranaggi e ripristina l'efficienza del carburante di base.
Individuare quando è il momento di sostituire
Sapere esattamente quando sostituire un'elica impedisce che una lieve usura si trasformi in un guasto meccanico. Le ispezioni visive e tattili fungono da prima linea di difesa. Qualsiasi colpo contro un oggetto sommerso richiede attenzione immediata, anche se la barca continua a muoversi.
- Danni strutturali visibili: Verificare la presenza di crepe profonde, grandi pezzi mancanti, lame fortemente piegate, o bordi assottigliati che compromettono la geometria della lama.
- Le prestazioni di base diminuiscono: Fai attenzione a un motore che improvvisamente non riesce a raggiungere l'acceleratore completamente aperto di base (WOT) RPM o velocità massima con carichi normali.
- Problemi di vibrazione e manovrabilità: Vibrazione persistente, tiro dello sterzo, o un tracciamento irregolare indica un'elica sbilanciata.
- Verifica post-impatto: Rimuovere sempre l'elica per ispezionare l'albero e la guarnizione dopo aver urtato rocce sottomarine, registri, o detriti.
Scegliere la giusta elica sostitutiva
Installare un’elica non corrispondente è dannoso quanto farne funzionare una rotta. È necessario allineare le specifiche di sostituzione al tipo di scafo e al carico operativo tipico.
- Passo e diametro corretti: La mancanza dell'intervallo di passo consigliato dal produttore costringe il motore a fuorigiri o a capocorda, distruggendo il risparmio di carburante e l'accelerazione.
- Alluminio per assorbimento degli urti: I puntelli in alluminio fungono da barriera sacrificale in acque poco profonde, acque pericolose. Si deformano all'impatto, trasmettendo molto meno shock nella costosa scatola ingranaggi.
- Acciaio inossidabile per una maggiore durata: Scegli l’acciaio inox quando hai bisogno della massima efficienza, resistenza alla flessione, e durata in acque profonde o prive di pericoli.
Controlli di installazione e post sostituzione
Una sostituzione riuscita richiede un'attenzione particolare al gruppo del mozzo e all'ambiente dell'albero. Prima di montare la nuova elica, pulire e preparare accuratamente l'area per garantire che la trasmissione funzioni correttamente.
- Preparazione dell'albero: Togli la lenza avvolta, erbacce, e detriti che potrebbero intaccare la nuova guarnizione.
- Sedute hardware: Applicare grasso marino alle scanalature. Fissare il dado dell'elica all'esatta specifica di coppia senza serrare eccessivamente, e inserire una nuova coppiglia se il progetto lo richiede.
- Test di attrito: Mettere il fuoribordo in folle e far girare manualmente la nuova elica. Deve ruotare liberamente senza inceppare o raschiare la scatola ingranaggi.
- Verifica di base: Far funzionare la barca con un carico normale per verificare che la nuova elica ripristini la velocità massima originale e il WOT RPM.
Conclusione
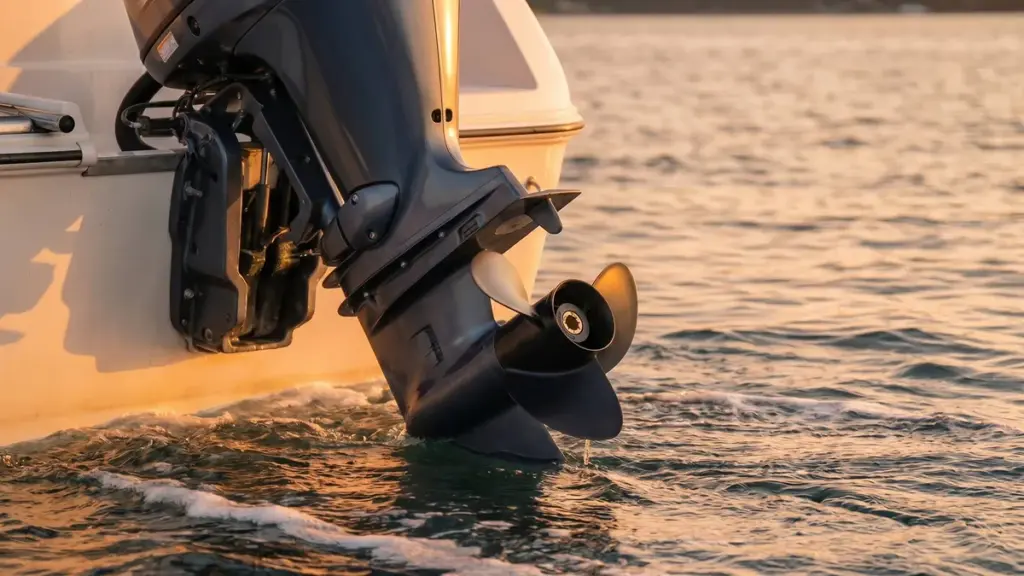
Ispezioni regolari e sostituzioni tempestive sono il modo migliore per proteggere il tuo motore fuoribordo, migliorare le prestazioni della navigazione, e ridurre i costi operativi a lungo termine. È altrettanto importante procurarsi le eliche dei motori fuoribordo con il passo corretto, diametro, e materiali di alta qualità per garantire un funzionamento affidabile ed efficiente.
Che tu stia sostituendo le eliche per la tua flotta o acquistando prodotti per la tua attività, la collaborazione con produttori esperti di eliche per motori fuoribordo può fare una differenza significativa nella qualità del prodotto, prestazione, e affidabilità a lungo termine. A NEWTOP, la nostra fabbrica integrata di eliche per motori fuoribordo combina una produzione avanzata con servizi OEM/ODM flessibili per aiutare i distributori e i marchi marini ad avere successo nei mercati competitivi.
👉 Contatta NEWTOP oggi stesso per discutere le vostre esigenze OEM o all'ingrosso e ricevere un preventivo competitivo per il vostro prossimo progetto di elica fuoribordo.
Domande frequenti
Quali sono i segni di un'elica fuoribordo danneggiata?
È possibile individuare i danni all'elica attraverso difetti visivi, cali di prestazioni, e sintomi meccanici. Cerca ammaccature, punte della lama piegate, pezzi mancanti, o crepe sottili vicino al mozzo. Sull'acqua, il danno si manifesta con velocità massime inferiori, tiri in buca lenti, e regimi del motore elevati con una bassa velocità di avanzamento dell'imbarcazione. Potresti anche sentire nuove vibrazioni ritmiche nel timone o sentire rumori sordo. Se si notano perdite di olio lattiginoso intorno all'unità inferiore, l'impatto probabilmente ha compromesso le guarnizioni dell'albero dell'elica.
Un'elica danneggiata può danneggiare il mio motore?
SÌ, un'elica danneggiata sottopone a grave stress l'intero motore fuoribordo e l'unità inferiore. Anche una minima piegatura della lama crea una rotazione sbilanciata. Questo squilibrio rotazionale trasmette continui, forti vibrazioni direttamente attraverso la trasmissione. Lasciato senza controllo, questo scuotimento martella le guarnizioni dell'albero dell'elica finché non falliscono, lasciando fuoriuscire il lubrificante degli ingranaggi e facendo entrare acqua. Far funzionare il motore in questo stato porta rapidamente a un'usura distruttiva metallo su metallo nei gruppi di ingranaggi e nei cuscinetti.
Perché la mia barca vibra dopo aver urtato qualcosa sott'acqua??
Colpire un oggetto sommerso fa perdere l'equilibrio alla trasmissione. L'impatto solitamente piega la pala di un'elica, scheggia il materiale, o piega leggermente l'albero dell'elica. Perché l'elica non mantiene più la sua forma simmetrica o gira perfettamente, orbita anziché ruotare senza intoppi. Questa oscillazione genera una forza di scuotimento ritmica che viaggia lungo la gamba esterna, attraverso i supporti del motore, e direttamente nello scafo.
I danni all'elica possono causare una scarsa accelerazione?
SÌ. I danni fisici alterano il passo della pala, campanatura, e tazza. Questa distorsione uccide l’efficienza idrodinamica dell’elica, costringendolo a perdere la presa sull’acqua e riducendo drasticamente la spinta in avanti. Anche, se un colpo forte danneggia il mozzo interno in gomma, comunemente chiamato a “mozzo filato”—il guscio dell'elica scivola sull'albero. Quando premi l'acceleratore, il motore gira a mille mentre la barca accelera a malapena o fatica a prendere la planata.
Una cattiva elica aumenterà il consumo di carburante?
SÌ. Il funzionamento di un'elica danneggiata costringe il motore a bruciare più carburante per miglio. Piegato, scheggiato, o pale molto sporche creano una resistenza idrodinamica aggiuntiva e aumentano lo slittamento dell'elica. Perché le pale danneggiate non possono convertire la coppia del motore in spinta in modo efficiente, il fuoribordo deve girare più velocemente e lavorare molto di più solo per mantenere la normale velocità di crociera. Nel corso di una stagione, questa inefficienza si traduce in bollette del carburante significativamente più elevate.
Per quanto tempo posso utilizzare in sicurezza un'elica danneggiata??
Dovresti far funzionare un'elica danneggiata solo per il tempo necessario a tornare zoppicando al molo a bassa velocità. Funzionamento vibrante, l'elica sbilanciata per un periodo prolungato rende anormale, sollecitazione ciclica sui cuscinetti e sulle guarnizioni dell'unità inferiore. Spingendo il motore in questa condizione si intensifica rapidamente un semplice, sostituzione economica dell'elica in una catastrofica ricostruzione della scatola ingranaggi.
Un mozzo danneggiato può far andare fuori giri il motore??
SÌ. I produttori progettano il mozzo interno in gomma in modo che scivoli durante un forte impatto per proteggere gli ingranaggi dell'unità inferiore dal taglio. Una volta che questo hub gira o si strappa, perde permanentemente la presa salda sul guscio esterno dell'elica. Quando si applica l'acceleratore, il mozzo danneggiato scivola invece di trasferire la coppia. Ciò consente ai giri del motore di aumentare rapidamente senza spingere l'imbarcazione in avanti, imitando la sensazione di una trasmissione slittante.
Dovrei tenere un'elica di riserva a bordo?
Si consiglia vivamente di tenere un'elica di riserva a bordo. Serve come assicurazione economica, in particolare se utilizzi un'elica in alluminio o navighi regolarmente in acque poco profonde, acque piene di ostacoli. Portare un'unità di riserva, insieme ad una chiave inglese, una rondella reggispinta sostitutiva, e una coppiglia nuova, ti consente di sostituire l'elica danneggiata sul posto. Ciò ripristina immediatamente una propulsione sicura e ti salva da un fine settimana rovinato o da una costosa fattura di traino.
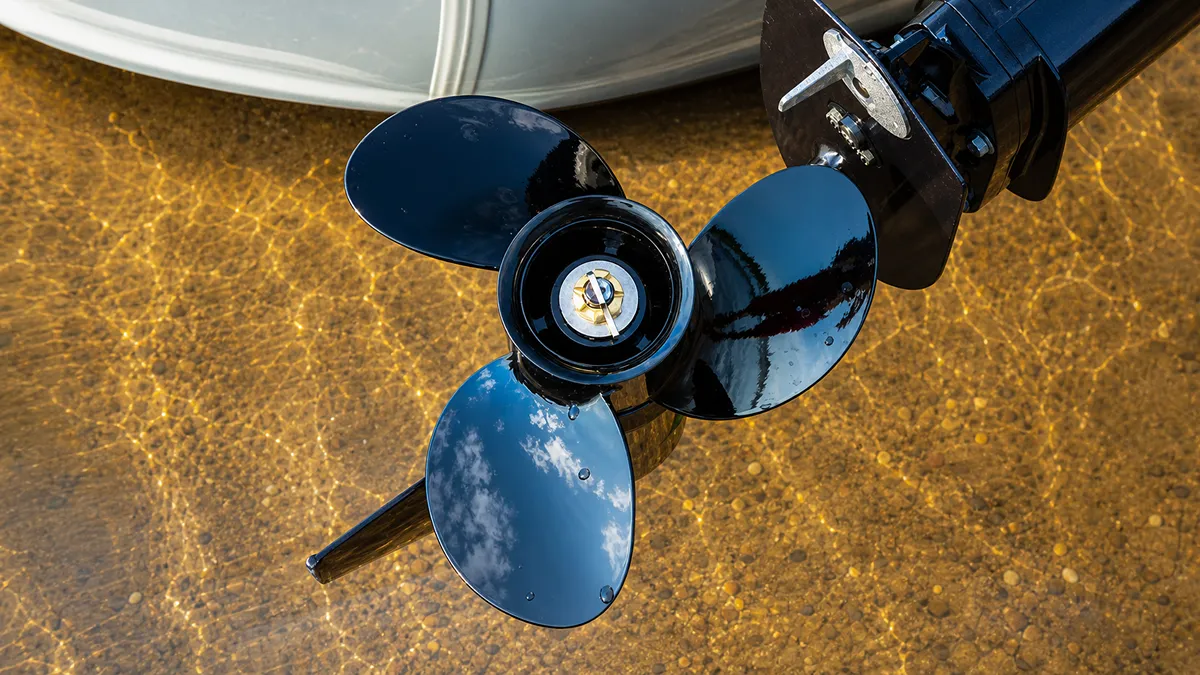
When a boat suddenly loses thrust, engine RPM rises without matching acceleration, or the elica shows unusual surface damage, many operators assume the propeller is simply worn out. In realtà, the problem may be propeller cavitation.
Cavitation is one of the most misunderstood issues affecting outboard motor performance. It reduces efficiency, increases fuel consumption, shortens propeller life, and may even lead to expensive repairs if ignored. Although it is often confused with ventilation, the two problems have different causes and require different solutions.
In questa guida, we’ll explain what cavitation is, what causes it, how it affects your boat, and the practical ways to prevent it by choosing the right propeller and setup.
What Is Cavitation in Outboard Motor Propellers?
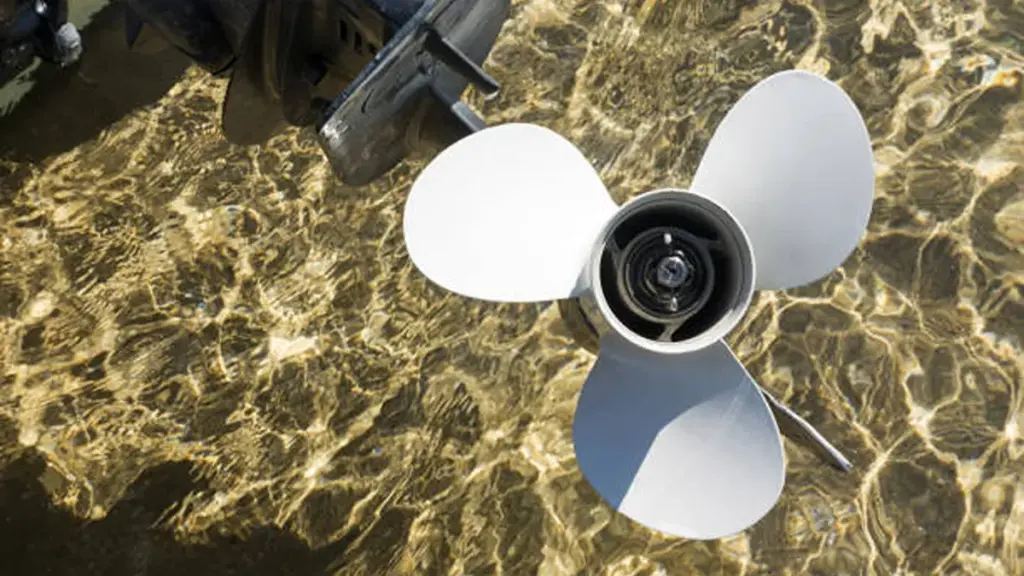
Cavitation in outboard propellers is a destructive hydrodynamic pressure issue. Vapor bubbles form and violently collapse on the blades, causing power loss and severe metal erosion.
The Physical Process of Cavitation
Cavitation starts when rapid propeller rotation forces local water pressure to drop below its vapor pressure. This extreme low pressure triggers an immediate phase change, creating vapor bubbles directly on the blade surface. The water essentially boils at ambient temperature due to the pressure drop.
As the spinning propeller drives these vapor bubbles into higher-pressure zones, they cannot sustain their form and collapse violently. These collapsing bubbles release intense micro-shock waves against the blade. Col tempo, these repeated impacts pound the metal surface, eroding the material and causing severe pitting.
Common Causes in Outboard Setups
Several setup and operational factors create the ideal environment for these damaging low-pressure zones to form.
- Incorrect mounting and trim: Setting the engine mounting height too high or trimming the motor out too far disrupts solid water flow across the blades.
- Poor propeller selection: Using a propeller poorly matched to the boat’s hull, load, or engine power forces the blades to carry excessive hydrodynamic load.
- Pre-existing damage: Bent blades, over-filed tips, or nicked edges create uneven hydrodynamics that trigger localized pressure drops.
- Disturbed inflow: Hull turbulence, transducers, or underwater obstructions prevent clean water from reaching the lower unit.
Symptoms and Performance Impacts
Operators usually identify cavitation through immediate handling degradation and eventual mechanical wear on the propulsion system.
- Loss of thrust: You experience a sudden decrease in power transfer efficiency, leaving the boat feeling sluggish under heavy throttle.
- RPM flaring: The engine speed surges rapidly without a proportional increase in forward acceleration.
- Audible disturbances: Collapsing bubbles create a distinct gravel-like rattling, accompanied by excessive vibration through the transom.
- Cumulative wear: Unchecked cavitation leads to visible blade erosion, pitting, and structural metal fatigue over time.
Distinguishing Cavitation from Ventilation
Boaters frequently confuse cavitation with ventilation, but they are entirely different mechanical events. Cavitation functions strictly as a hydrodynamic pressure issue resulting in vaporized water. Ventilation happens when the propeller physically pulls surface air or exhaust gases directly into the slipstream.
Both phenomena create nearly identical operator symptoms, including sudden RPM flare and an immediate loss of bite in the water. Accurate diagnosis dictates the repair path. Fixing ventilation usually involves basic trim adjustments or dropping the engine height. Resolving cavitation often requires repairing damaged blade edges or selecting a completely different propeller design to handle the engine’s output.
How Cavitation Differs from Ventilation
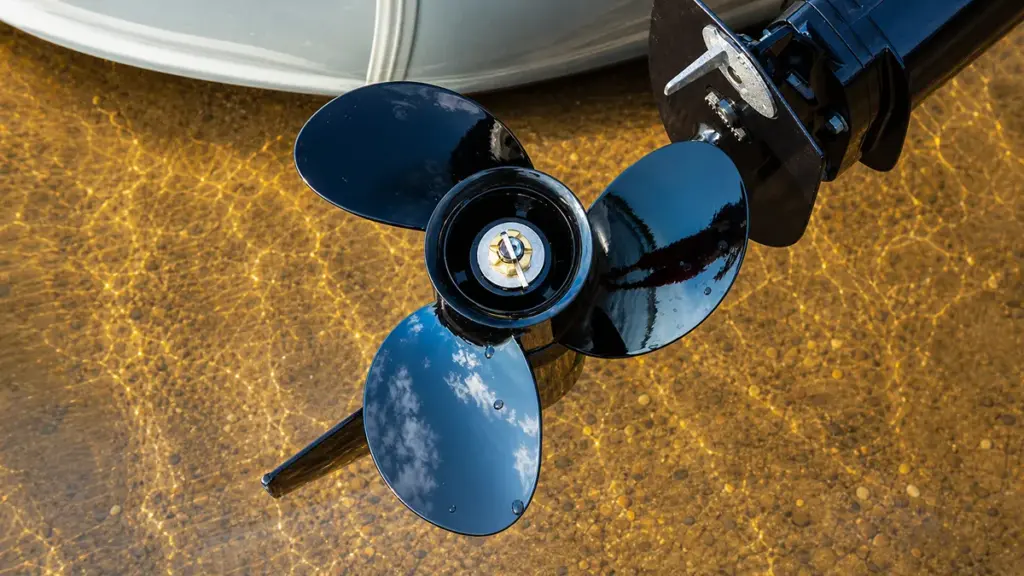
Cavitation is a pressure-induced phase change causing water to boil and erode propeller blades, while ventilation is external air getting sucked into the prop wash, causing sudden slippage.
Many boat owners use the terms cavitation E ventilation interchangeably, but they describe two different phenomena.
| Caratteristica | Cavitation | Ventilation |
|---|---|---|
| Cause | Water pressure drops below vapor pressure. | Air enters the propeller blades. |
| Medium Around Blade | Water vapor bubbles. | Air from above the water surface. |
| Main Symptom | Blade erosion and reduced propulsion efficiency. | Sudden engine RPM increase with poor thrust. |
| Blade Damage | SÌ, often causes pitting and surface erosion. | Usually no direct blade erosion. |
| Typical Causes | Incorrect blade loading, damaged propeller, poor blade design, or excessive pressure drop. | Engine mounted too high, sharp turns, rough water, or excessive trim angle. |
A simple way to remember the difference:
- Cavitation creates bubbles from water.
- Ventilation pulls air into the propeller.
Maximize Margins With Professional-Grade Garden Machinery

The Main Causes of Propeller Cavitation
Cavitation occurs when local water pressure drops below vapor pressure. Excessive speed, mismatched propellers, blade damage, and disturbed inflow from poor setup are the primary triggers.
| Cavitation Cause | Primary Mechanism |
|---|---|
| Speed & Loading | High RPM and heavy vessel loads drive local pressure below the vapor threshold. |
| Propeller Mis-Match | Wrong pitch or physical size creates extreme pressure imbalances across the blade. |
| Blade Damage | Nicks and bent edges prevent smooth water flow, causing localized low-pressure zones. |
| Setup & Inflow | Improper engine height or hull obstructions introduce turbulent, low-pressure water. |
Excessive Propeller Speed and High Loading
Propellers designed for standard operation struggle when pushed past their hydrodynamic limits. Spinning a blade too fast creates an extreme pressure drop on the back side. This sudden vacuum forces the water to vaporize instantly into gas pockets.
Operating parameters heavily influence this pressure shift. Specific stressors force the propeller into a continuous cavitation cycle.
- Heavy loads: Excess vessel weight forces the engine to work harder, multiplying blade stress.
- Hard acceleration: Rapid throttle spikes disrupt steady water flow and immediately drop local pressure.
- Extreme RPMs: Sustained high-speed operation with an overloaded vessel guarantees continuous vapor formation.
Incorrect Pitch, Sizing, and Propeller Mis-Match
Slapping any available propeller onto an outboard guarantees poor performance. Pitch directly dictates blade loading. Excessive pitch bogs down the engine and overloads the blades at lower speeds. Insufficient pitch lets the engine over-rev, accelerating the blades so fast that they tear the water apart and induce surface cavitation.
Proper matching requires aligning the propeller geometry with the specific vessel dynamics to maintain pressure equilibrium.
- Diameter constraints: Selecting a size that ignores hull weight and horsepower creates severe pressure imbalances.
- Blade geometry: The wrong blade count, rake, or cup strips the propeller of its grip, increasing slip and flow separation.
- Hull compatibility: A propeller style mismatched to the hull design fails to handle the specific water flow of that vessel.
Physical Blade Damage and Surface Imperfections
Water requires a perfectly smooth surface to maintain laminar flow. Minor impact damage alters the local hydrodynamics completely. Nicks, gouges, or missing chunks on the leading edge stop the blade from slicing cleanly. These defects act as turbulence generators, spawning localized low-pressure zones where vapor bubbles rapidly form.
Physical irregularities consistently trigger flow breakdown across the entire propulsion system.
- Bent blades: Asymmetric geometry causes uneven loading and violent pressure swings during every revolution.
- Altered edges: Overly sharpened or blunt leading edges detach the water flow prematurely.
- Lower unit fouling: Barnacle buildup or deep scratches on the gearcase destroy the clean water stream before it reaches the blades.
Disturbed Inflow, Setup, and Clearance Issues
A propeller operates efficiently only when fed a steady stream of dense, clean water. Mounting the outboard too high on the transom starves the system. This setup places the blades near the surface where the water is already aerated and low in pressure, accelerating the phase change into vapor.
Environmental factors around the transom dictate the quality of the inflow reaching the propeller.
- Clearance limits: Inadequate spacing between the propeller, hull bottom, and skeg amplifies local turbulence.
- Appendage drag: Poorly placed transducers or water pickups inject chaotic currents directly into the propeller path.
- Vessel attitude: Excessive stern weight or improper boat trim shifts the inflow angle, severely degrading water density.
How Cavitation Affects Speed, Fuel Use, and Blade Life
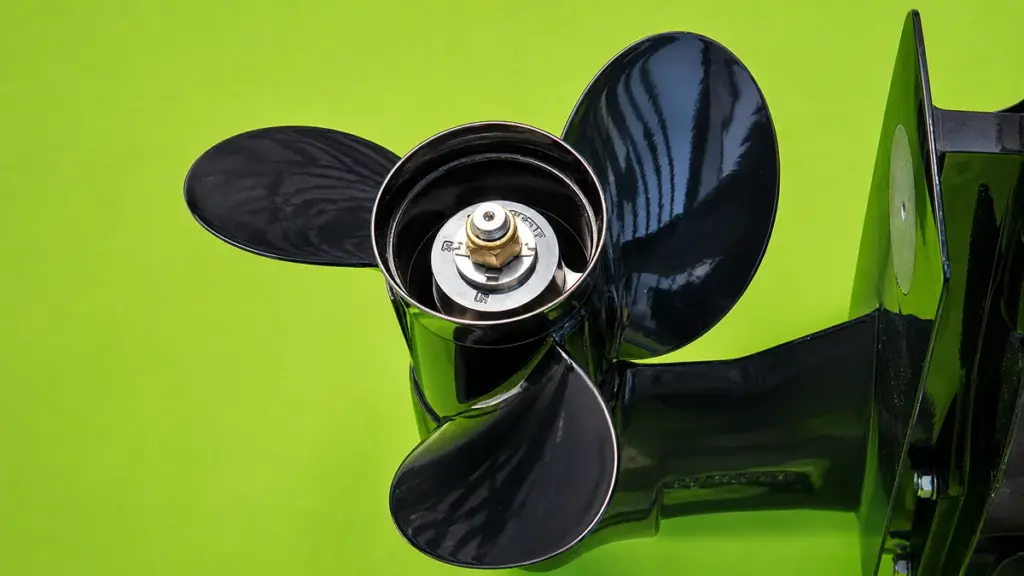
Cavitation cripples propeller efficiency. It kills top speed, burns up to 10% more fuel per mile, and destroys blades through violent micro-shock waves, forcing expensive premature replacements.
Impact on Boat Speed and Acceleration
When cavitation vapor bubbles form, they reduce effective blade lift. This breaks the propeller’s physical hook-up to the water and causes a massive drop in thrust. You will often feel this as a sudden RPM flare with barely any forward movement, forcing you to back off the throttle to let the blades regain bite.
- Hole-Shot Performance: Acceleration becomes sluggish, drastically extending the time it takes to get the heavy hull on plane.
- Top Speed Penalty: Even partial tip cavitation creates enough drag to cause a 2–5% loss in top speed on high-performance setups.
Increased Fuel Consumption and Reduced Efficiency
Vapor bubbles sticking to the blade surfaces act like a physical barrier. They increase friction and alter the effective thickness of the blade, destroying hydrodynamic efficiency. To compensate for the lost thrust, operators push the throttle further forward. This pushes the engine into a higher RPM band where it operates far outside its peak fuel efficiency range.
- Burn Rate: A chronic cavitation mismatch burns 5–10% more fuel per mile just to maintain the same hull speed.
- Lifetime Waste: Over the lifespan of a commercial or high-use outboard, this hydrodynamic drag wastes hundreds of gallons of fuel.
Structural Damage and Shortened Blade Life
Cavitation acts as a mechanical grinder on your hardware. When vapor pockets move into higher-pressure water, they collapse violently. These implosions generate localized micro-shock waves that mechanically hammer the metal, leading to severe pitting along the leading edges and low-pressure faces of the propeller.
- Vibration and Fatigue: The uneven collapse of bubbles creates high-frequency vibrations, subjecting the prop to continuous high-cycle fatigue.
- Cracking and Separation: Fatigue promotes micro-cracking at critical stress points like root fillets, which can quickly progress into complete blade separation under heavy loads.
- Collateral Damage: The constant oscillatory loads force premature propeller replacement and increase the risk of catastrophic bearing and seal failures inside the lower unit.
How to Fix Cavitation Through Setup and Prop Selection
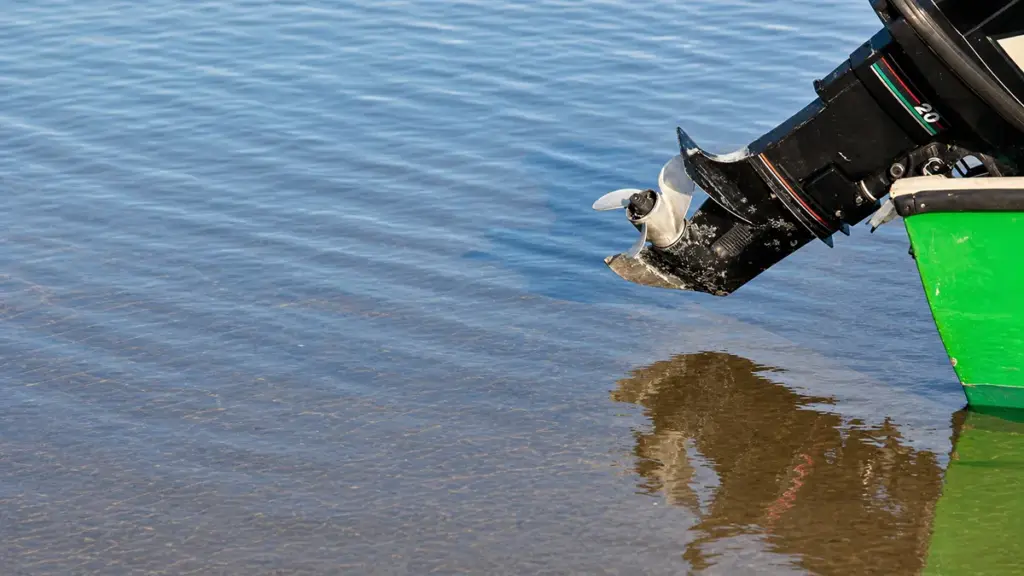
Most slipping issues are actually ventilation. Fixing engine height, adjusting trim, and selecting a cupped stainless-steel propeller will quickly restore grip and stop performance loss.
| Solution | Benefit |
|---|---|
| Repair Damaged Blades | Restores smooth water flow and improves propulsion efficiency. |
| Select Proper Pitch | Reduces blade overload and helps maintain optimal engine RPM. |
| Choose Correct Diameter | Improves thrust distribution and overall propulsion performance. |
| Adjust Engine Mounting Height | Optimizes water flow to the propeller and reduces pressure fluctuations. |
| Correct Trim Angle | Improves blade loading and enhances propulsion efficiency. |
| Clean Hull Regularly | Restores smooth water flow by eliminating marine growth and surface drag. |
| Balance the Propeller | Reduces vibration, uneven loading, and pressure imbalance. |
| Upgrade Propeller Design | Improves hydrodynamic efficiency and minimizes the risk of cavitation. |
Differentiating Ventilation from Cavitation
Operators often blame cavitation when their propeller loses grip. In realtà, most slipping issues are actually propeller ventilation. This happens when the blades pull in surface air or exhaust gas instead of solid water. True cavitation is a hydrodynamic pressure problem where extreme low pressure forms vapor bubbles on the blade surface. It is far less common in everyday troubleshooting.
Both conditions share identical symptoms on the water. You will experience the following performance drops:
- Rising RPMs: Engine speed flares without a proportional increase in boat speed.
- Loss of thrust: The propeller suddenly drops its grip on the water.
- Slipping: Forward momentum stalls during hard acceleration or tight turns.
Optimizing Engine Height and Trim
A poorly adjusted outboard is the leading cause of poor propeller bite. Start your troubleshooting by testing the boat with the trim fully down to establish a performance baseline. Adjust the trim up slightly to find your usable running range. If the propeller still breaks loose, lower the engine mounting position on the transom. This keeps the anti-ventilation plate deeper in the water, blocking surface air from reaching the blades.
You should also trim down when entering tight turns so the propeller stays submerged as the hull leans. Finalmente, inspect the hull ahead of the lower unit. Transducers, through-hull fittings, or debris can disrupt clean water flow and feed aerated water directly into your propeller.
Choosing a Propeller for Maximum Bite
Your propeller dictates how well your engine transfers power to the water. Always inspect the current propeller for nicks, crepe, or bent blades first. Even minor physical damage frequently causes slipping and breaks the water flow. If the blades are intact but the engine over-revs before generating forward thrust, lower the pitch to help the engine grab solid water.
You can switch to a propeller with increased cup and a larger blade area to maintain grip under heavy loads or in rough chop. Upgrading to a stiffer stainless-steel propeller prevents blade flex under load and enhances hold during aggressive maneuvers.
Utilizing Aftermarket Hardware Solutions
When height and trim adjustments fall short, aftermarket hardware can force the stern down and keep the propeller buried.
- Hydrofoils: Add a hydrofoil to the anti-ventilation plate to help lift the stern onto plane faster and reduce air ingestion.
- Transom wedges: Install a positive transom wedge to increase engine tuck and improve initial propeller bite during takeoff.
- Jack plates: Use a jack plate for precise height adjustments, ensuring the motor is not raised high enough to induce further ventilation.
Choose NEWTOP for Reliable, Precision-Built Outboard Motor Propellers
Reducing cavitation starts with choosing a propeller that is properly engineered, accurately manufactured, and matched to your application. A NEWTOP, we produce high-quality outboard motor propellers for a wide range of recreational and commercial boats, combining precision machining with strict quality control to deliver stable performance on the water.
Every propeller is manufactured using carefully selected aluminum or stainless steel materials and undergoes balancing, dimensional inspection, and performance testing to ensure smooth operation, improved fuel efficiency, and longer service life. Whether you need OEM replacement propellers or customized solutions for your own brand, our engineering team can help you select the right diameter, pece, and blade design for different engines and operating conditions.
As an experienced outboard motor propeller manufacturer and trusted outboard motor propeller factory, NEWTOP supports global distributors, grossisti, and equipment brands with reliable production capacity, consistent product quality, and responsive OEM/ODM services.
Contact our team today to find the right propeller solution for your market and improve your customers’ boating performance.
Domande frequenti
What causes cavitation in an outboard propeller?
Cavitation occurs when water pressure on the propeller blades drops below vapor pressure, causing vapor bubbles to form and violently collapse. Damaged blades, the wrong propeller size or pitch, excessive rotational speed, or disturbed water flow from the hull and lower unit typically trigger this pressure drop.
How do I know if my boat has cavitation or ventilation?
Cavitation creates a persistent whine, harsh vibration, and visible pitting on the propeller blades, even when running straight. Ventilation happens when the prop pulls in surface air or exhaust. You will feel a sudden RPM spike and loss of bite, usually during tight turns or when you trim the motor too high.
Can cavitation damage my engine?
Cavitation destroys propeller blades through erosion rather than directly damaging the internal engine block. It does cause indirect mechanical harm. When the propeller loses its grip, the engine over-revs. These rapid load fluctuations place heavy stress on your lower unit gears, cuscinetti, and the entire drivetrain.
Does engine height affect cavitation?
Engine height primarily drives ventilation, but it directly impacts cavitation. Mounting an outboard too high reduces propeller submergence and introduces aerated, unstable water flow. This disturbed inflow creates pressure anomalies that force vapor bubbles to form on the blades.
Will changing propeller pitch stop cavitation?
Adjusting pitch reduces cavitation only if your current propeller is over-loaded or under-loaded for your specific setup. If your engine struggles to reach its recommended wide-open throttle RPM, switching to a lower pitch helps balance the load. Pitch adjustments will not fix cavitation caused by physical blade damage, improper engine height, or hull irregularities.
Can a damaged propeller cause cavitation?
SÌ. Nicks, crepe, bent edges, or deep scratches disrupt the smooth flow of water across the propeller blades. These physical imperfections create localized low-pressure zones that trigger vaporization. The resulting bubble collapses cause further metal erosion, driving a cycle of worsening damage.
Is cavitation worse at high speed?
As boat speed and propeller RPM increase, water velocity over the blades rises. This lowers local pressure and significantly increases your cavitation risk. While true cavitation intensifies at higher speeds, operators often notice the most dramatic symptoms—like sudden blowout and RPM flares—during heavy acceleration or tight turns due to accompanying ventilation.
Does blade material affect cavitation resistance?
Material choice dictates how well your propeller survives cavitation, not whether it occurs in the first place. High-strength copper alloys and stainless steel resist the microscopic impacts of bubble collapses far better than standard aluminum. Stronger metals also allow manufacturers to cast thinner blade profiles, which helps manage pressure distribution and delays performance loss.

When the boating season ends, many owners focus on winterizing the engine but overlook one of the most important components below the waterline—the outboard motor propeller. Proper seasonal maintenance not only protects the propeller itself but also helps prevent hidden damage to the propeller shaft, gearbox, and seals.
Whether you use an aluminum or stainless steel propeller, spending a short amount of time on inspection and maintenance before storage can reduce unexpected failures, improve performance next season, and extend the service life of your outboard motor.
This guide explains exactly what to inspect, pulito, repair, and prepare before storing your outboard motor propeller, helping both recreational boat owners and commercial fleets reduce maintenance costs and downtime.
Why Seasonal Propeller Maintenance Matters

Routine seasonal propeller maintenance stops minor wear and hidden shaft debris from escalating into catastrophic lower-unit failures, protecting both fuel efficiency and drive-train longevity.
Ensuring Peak Performance and Fuel Efficiency
Eliche take the brunt of the marine workload. These high-impact components directly dictate your boat’s speed, fuel burn, and handling characteristics. A single bent blade or heavily nicked edge disrupts the hydrodynamic profile, forcing the outboard to work harder while delivering less thrust.
Routine seasonal maintenance restores the motor to its intended baseline efficiency. Catching minor deformations and correcting pece alignment early ensures you get the exact performance you expect every time you hit the throttle.
Preventing Costly Lower-Unit Damage
Fishing line, erbacce, and netting constantly find their way around the propeller shaft. Operators rarely see this debris from the outside, allowing it to tighten and harden over time. Removing the propeller at the end of the season exposes wrapped monofilament before it cuts into the prop shaft seal.
A compromised seal invites water intrusion directly into the gearcase, emulsifying the gear oil. Finding and clearing these hazards early prevents a basic maintenance step from turning into an expensive lower-unit and drivetrain overhaul.
Mitigating Corrosion and Cavitation Erosion
The marine environment attacks metal relentlessly. Propellers face continuous exposure to saltwater, localized impact damage, and cavitation erosion. Regular visual inspections reveal abnormal wear patterns, deep pitting, and structural issues with critical hardware like prop pins or thrust washers.
Pulling the prop also allows technicians to clean the shaft and apply fresh waterproof marine grease. This targeted lubrication protects the metal splines from long-term galvanic deterioration and ensures the hub never seizes to the shaft.
Identifying When Replacement Is Necessary
Not all damage can be filed out or welded. Inspecting the propeller every 50 A 100 ore, or during the seasonal layup, helps operators spot critical structural defects before they fail under load. Thorough maintenance routines reveal specific signs that warrant an immediate swap.
- Visible warping: Blades that no longer track true or show severe bending.
- Deep notching: Cracks radiating from the blade root or hub area.
- Blade damage: Significant material loss that destroys dynamic balance.
Timely evaluation protects the outboard’s resale value and guarantees you avoid sudden on-water failures caused by fatigued metal or spun hubs.
What to Inspect Before Storing an Outboard Propeller
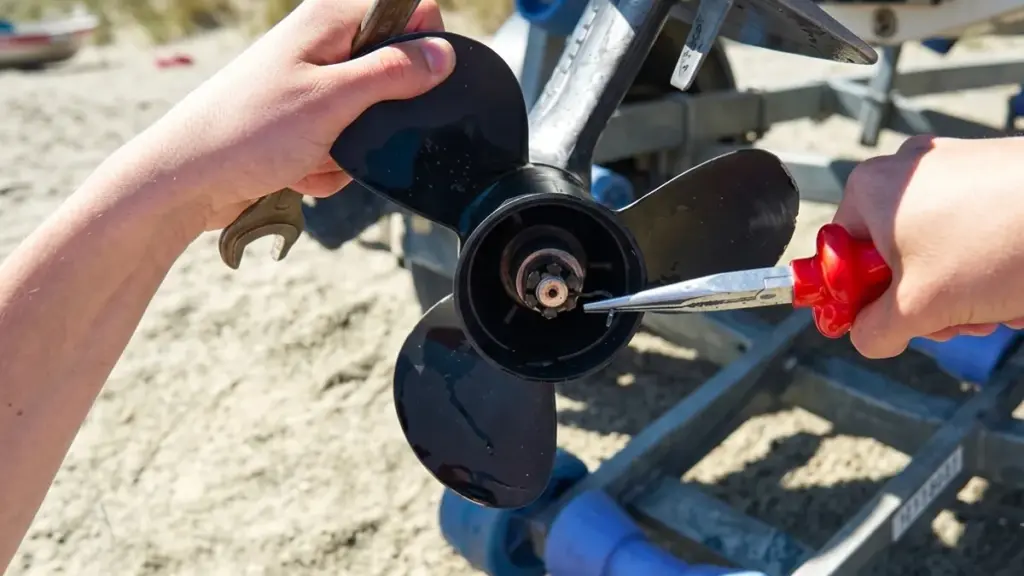
Ignoring your propeller before winter storage guarantees seized splines and compromised lower-unit seals next season. A systematic inspection now prevents catastrophic failure later.
| Componente | Inspection Focus | Primary Risk if Ignored |
|---|---|---|
| Lame & Surfaces | Cracks, bends, marine growth | Imbalance, vibration, speed loss |
| Lancia & Sigilli | Fishing line, seal intrusion, bare splines | Water in gearcase, seized propeller |
| Hub Assembly | Slippage, looseness, debris | Spun hub, poor thrust transfer |
| Hardware | Corroded washers, reused cotter pins | Hardware failure, lost propeller |
Propeller Blades and Outer Surfaces
The outer surfaces take the brunt of impact and environmental wear. Visual checks only reveal obvious defects. A physical inspection uncovers the hidden structural damage that worsens over a long storage period.
- Blade integrity: Check each blade for nicks, dents, scratches, bends, crepe, gouges, and wobble.
- Tactile inspection: Run fingers carefully along the edges to feel for hidden damage.
- Corrosion markers: Look for rust, oxidation, discoloration, and salt buildup, especially after saltwater use.
- Biological fouling: Remove weeds, algae, barnacles, and other marine growth before drying.
Prop Shaft, Splines, and Gearcase Seals
Removing the propeller exposes the critical junction between your propulsion system and the lower unit. Debris trapped here eats through seals, inviting water into the gearcase and causing massive internal failure.
- Debris removal: Remove fishing line and rope wrapped around the shaft to prevent lower-unit damage.
- Spline health: Inspect shaft splines for wear, burrs, or corrosion.
- Seal integrity: Examine the seal where the prop shaft enters the gearcase for compromise or water intrusion.
- Lubrication: Apply marine-grade grease to the prop shaft before storage to help prevent seizure.
Internal Hub Assembly
The internal hub absorbs shock and transfers torque. If the rubber or mechanical components start failing, your engine will over-rev while the boat barely moves. Storage prep is the exact time to diagnose these issues.
- Physical condition: Inspect the hub for looseness, slippage, or physical signs of a spun hub.
- Performance context: Connect hub condition to performance clues from the last outing, such as vibration, cavitation, or loss of speed.
- Cavity check: Check the internal cavity for trapped debris or residue that could harden during storage.
Nuts, Washers, and Locking Hardware
Mounting hardware keeps the propeller locked safely onto the shaft under intense load. Reusing fatigued metal components or ignoring thread wear introduces unnecessary risk for your next launch.
- Nut condition: Verify the propeller nut is intact and free of thread damage.
- Supporting parts: Inspect washers and locking rings for wear, deformazione, or corrosion.
- Pin replacement: Discard the old cotter pin and prepare a new one for reinstallation.
- Reassembly prep: Plan to reassemble the hardware using the manufacturer’s recommended torque.
Maximize ROI With Professional-Grade Garden Machinery
How to Check for Cracks, Bends, and Corrosion
A thorough propeller inspection requires a clean surface, good lighting, and tactile checks to catch hidden defects before they compromise your lower unit.
Preparation and Cleaning
Remove the propeller from the outboard to get an unobstructed view of the entire assembly. Wash away all marine growth, salt deposits, and oily residue. Dirt and algae easily hide fine stress lines or small chips. Once clean, dry the propeller completely. Moisture masks hairline cracks and subtle pitting that you need to spot with the naked eye.
Visual and Tactical Blade Inspection
Set up bright lighting and examine the leading edges, trailing edges, and blade tips. Look for missing material, deep gouges, and visible cracks. Your hands often catch what your eyes miss. Run a bare hand over every blade surface to feel for rough spots, raised metal, or subtle dents from minor impacts. Pay close attention to the metal condition itself. Inspect for white powdery oxidation, deep pitting, and general material loss. This step is critical for cast aluminum models, which degrade quickly once the protective outer coating fails.
Evaluating Blade Alignment and Geometry
Blades require perfect symmetry to deliver efficient thrust. Compare the pitch angle, tip height, and overall shape of each blade against the others. Look closely for visual inconsistencies that point to bending, twisting, or warping from submerged strikes. Do not ignore slight distortions. Even a minor bend throws the propeller out of balance. This rotational imbalance sends destructive vibrations straight into the gearcase, wearing out seals and bearings over time.
Centro, Lancia, and Rotation Checks
Inspect the inner hub assembly for cracking, rubber tearing, or looseness that signals it might slip under heavy load. Check the bare prop shaft for wrapped monofilament fishing line. Lasciato senza controllo, fishing line cuts directly through the prop shaft seal, letting water flood the lower unit and driving internal corrosion. Finalmente, slide the propeller back on and rotate it slowly by hand. Watch the hub and blade tips for uneven rotation or a visible wobble. A wobbling propeller often points directly to a bent prop shaft rather than isolated blade damage.
When Propeller Repair Is Possible and When Replacement Is Better
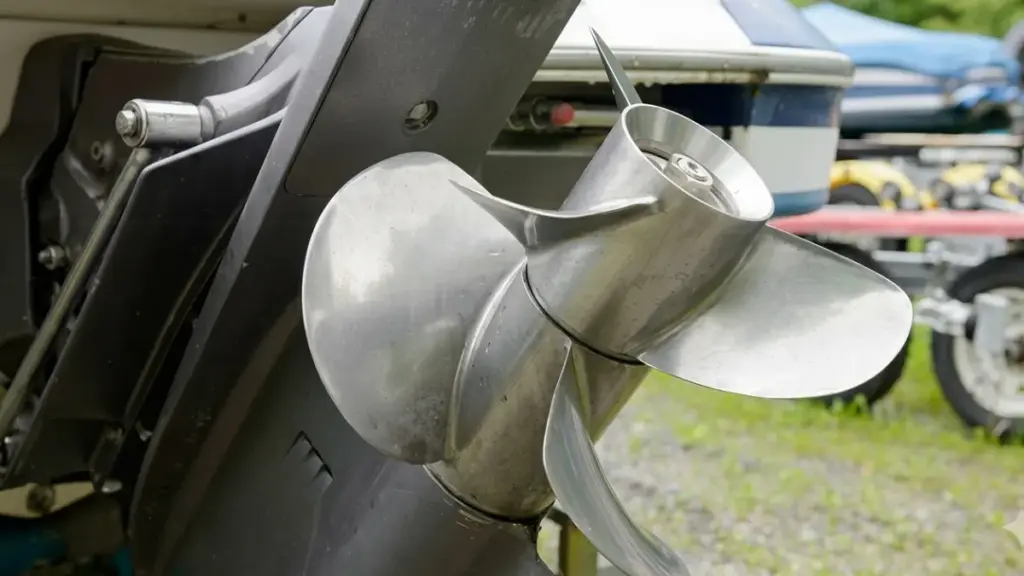
The decision depends on the severity of the damage, the propeller material, and the operating conditions.
| Damage Type | Repair Possible? | Replacement Recommended? |
|---|---|---|
| Small blade nick | SÌ | NO |
| Minor bend | Usually | Sometimes |
| Surface corrosion | SÌ | NO |
| Large crack | NO | SÌ |
| Broken blade tip | Sometimes | Often |
| Severe hub damage | Rarely | SÌ |
| Heavy corrosion | NO | SÌ |
Generally speaking:
Repair is suitable when:
- Damage is localized
- Blade geometry can be restored
- Structural strength remains intact
- Repair cost is significantly lower than replacement
Replacement is the better option when:
- Multiple blades are damaged
- Cracks continue growing
- Blade thickness has become too thin
- Repair costs approach the price of a new propeller
- The propeller repeatedly loses balance
Commercial operators often replace damaged propellers sooner because downtime costs far more than the propeller itself. For boat manufacturers, marine equipment distributors, and maintenance providers, having a reliable replacement source is essential to reduce waiting time and keep customers operating efficiently.
NEWTOP provides high-quality aluminum and stainless steel outboard motor propellers designed for reliable performance in different marine applications. With years of experience in outdoor power equipment manufacturing, NEWTOP combines precision production, strict quality control, and stable supply capability to support global partners with consistent propeller solutions.
Whether you need standard replacement propellers or customized solutions for specific outboard motor applications, working with an experienced outboard motor propeller ma
How to Remove, Clean, and Reinstall a Propeller Safely
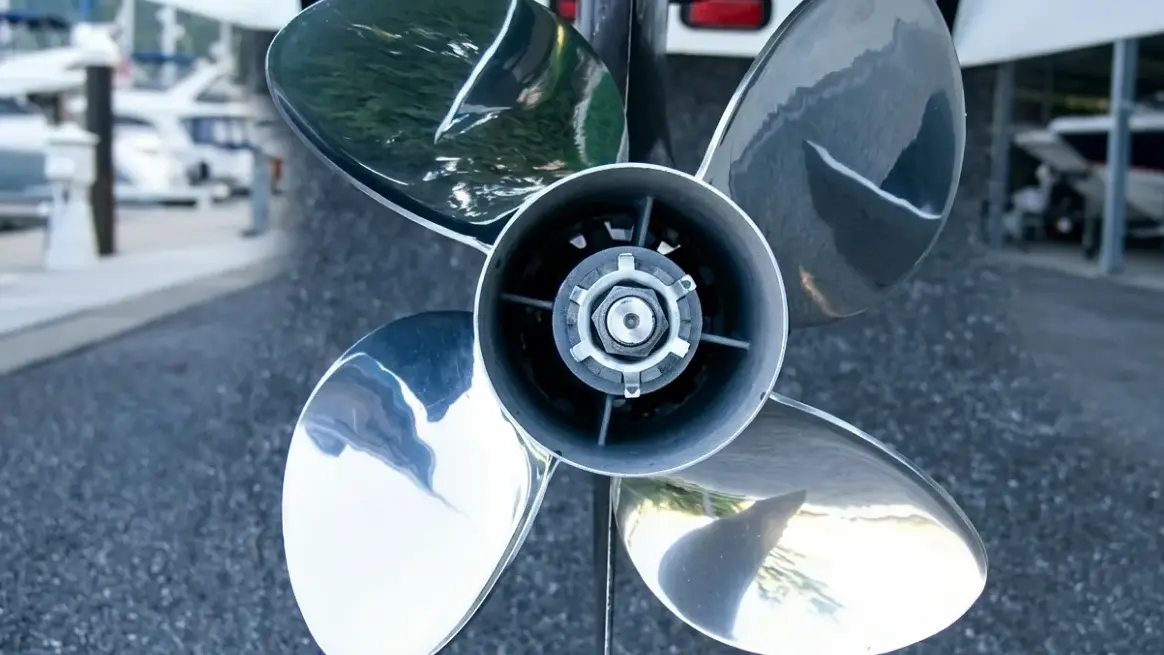
Removing and reinstalling an outboard propeller is a fundamental maintenance task that prevents seized splines, catches hidden fishing line damage early, and keeps the lower unit protected.
Safety Precautions and Tool Preparation
Working around sharp propeller blades requires strict safety protocols before you even touch a wrench. A sudden engine start or an unexpected blade rotation can cause severe injury.
- Engine disablement: Remove the kill-switch lanyard and disconnect the battery to eliminate any chance of an accidental start.
- Propeller immobilization: Wedge a solid block of wood between the blades and the anti-ventilation plate, or use a dedicated propeller holding tool to stop rotation.
- Essential toolkit: Keep a prop nut wrench (or socket set), needle-nose pliers for cotter pins, a flathead screwdriver, and marine-grade grease within arm’s reach.
Step-by-Step Propeller Removal
Once the setup is secure and the prop is locked in place, you can safely dismantle the assembly. Pay close attention to the order of the hardware as it comes off the shaft.
- Free the fastener: Use pliers to straighten and pull the cotter pin, or take a flathead screwdriver and hammer to gently flatten the lock-washer tabs.
- Loosen the nut: Turn the propeller nut counterclockwise with the appropriate wrench until it completely unthreads.
- Extract the propeller: Pull the unit straight outward along the shaft. If you meet resistance, wiggle it gently side-to-side. Avoid using excessive prying force against the lower unit.
- Check the thrust washer: Slide the washer off the shaft and inspect the surface for wear grooves, distortion, or stress cracks.
Cleaning and Inspecting the Propeller and Shaft
A removed propeller gives you a clear view of the lower unit’s most vulnerable areas. This is your primary opportunity to spot early signs of gearcase intrusion.
- Clear the shaft: Wipe away all old grease. Carefully pick out any braided or monofilament fishing line wrapped around the base, as this will eventually slice through the oil seal.
- Inspect the oil seal: Check the rubber seal itself for nicks and cuts. Look for emulsified, milky gear oil seeping out, which signals an active leak.
- Examine the propeller: Wash off marine growth. Check the blades for bends, impact chips, and cavitation pitting, and verify the rubber hub insert shows no signs of slipping or tearing.
Lubrication and Safe Reinstallation
Reassembly requires the right lubrication and precise torque. Skipping these details often leads to a seized propeller next season or a loose assembly under load.
- Grease the splines: Apply a light, even coat of waterproof marine grease to the bare prop shaft splines to block corrosion and ensure the prop slides off easily next time.
- Seat the thrust washer: Slide the washer back onto the shaft in its correct original orientation. Push the propeller on until it rests flush against it.
- Torque the nut: Replace all spacers in order, thread the nut on by hand to avoid cross-threading, and use your wood block to stabilize the prop. Tighten the nut to the manufacturer-specified torque.
- Lock the assembly: Thread a brand-new cotter pin through the shaft and bend the legs securely, or fold the retainer tabs flat against the nut. Spin the prop manually to confirm smooth, unobstructed rotation.
What Spare Parts to Prepare for the Next Season
A well-stocked spare parts kit minimizes downtime and prevents minor hardware failures from ruining your boating season.
Spare Propeller Selection and Storage
You need to match your replacement propeller’s diameter, pece, material, and hub system exactly to your current engine requirements to maintain baseline performance. A mismatched spare will compromise your fuel efficiency and engine RPM limits.
Keep at least one primary spare on board at all times. If you navigate shallow, rocky, or debris-filled waters, pack a secondary ‘get-home’ prop designed just to get you back to the dock safely. Store these spare propellers in a clean, dry area. Apply a light coat of marine grease to the hub splines and protect the blades from accidental impacts during rough weather.
Propeller Mounting Hardware
A spare propeller is useless if you lose or damage the mounting hardware during a swap. Your kit requires specific fastening components ready for immediate deployment.
- Thrust washers: Stock spares matched exactly to your specific outboard model to ensure proper prop seating and load transfer.
- Castle nuts and retainers: Keep extra nuts and locking retainers on hand. Inspect your existing hardware for corrosion or thread damage before the season starts.
- Cotter pins: Carry multiple new stainless-steel cotter pins. Used pins fatigue when bent, meaning you should never reuse them.
Marine Lubricants and Corrosion Prevention
Proper lubrication stops your hardware from seizing. Use a marine-grade propeller shaft grease to prevent spline galling. This simple step blocks saltwater intrusion and makes future propeller removals significantly easier.
Apply this lubricant directly to the shaft splines, the rear main seal area, and the mating surfaces between the thrust washer and the prop hub. Plan periodic propeller removals throughout the season. This routine lets you clean the shaft, renew the grease coating, and inspect the entire assembly for hidden corrosion before it causes mechanical failure.
Consumable Parts and Maintenance Tools
Field replacements require the right tools and small consumable components. For outboard setups that index the prop position, keep exact-match replacement shaft keys in your kit. While performing swaps, inspect the prop shaft seal area regularly. Look carefully for embedded fishing line to prevent costly water ingress into the lower unit.
To handle these tasks on the water, assemble a dedicated toolkit with the following items:
- Prop wrench: Sized specifically for your outboard nut to prevent rounding the edges.
- Torque wrench: Required to hit the manufacturer’s exact specifications and avoid overtightening.
- Needle-nose pliers: Essential for inserting, bending, and removing stainless-steel cotter pins.
- Block of wood: Place this between the blades and the anti-ventilation plate to stop rotation during installation.
How NEWTOP Helps Reduce Replacement Downtime
When selecting a replacement outboard motor propeller, product quality and manufacturing consistency directly affect operating reliability and maintenance costs. A dependable propeller supplier helps reduce replacement delays while ensuring stable performance after installation.
NEWTOP produces aluminum and stainless steel outboard motor propellers with strict control over materials, structure, and machining accuracy. I principali vantaggi includono:
- High-performance materials: Aluminum propellers use aluminum-magnesium alloy made from new aluminum ingots, providing excellent toughness and high strength. Stainless steel propellers use duplex stainless steel, offering higher yield strength and corrosion resistance than standard stainless steel.
- Strong one-piece structure: Propeller blanks are produced through dedicated molds with integrated forming technology, eliminating welding points and improving overall strength and durability.
- Better dynamic balance: The hub is pressed as an integrated part to ensure accurate positioning and smoother rotation, helping reduce vibration during operation.
- Precision blade processing: CNC machining centers with dedicated tooling ensure accurate blade dimensions, consistent blade curves, and stable propulsion performance.
NEWTOP helps global distributors, OEM customers, and marine equipment suppliers reduce replacement downtime with durable and consistent propeller solutions. Looking for a reliable outboard motor propeller supplier? Contact NEWTOP today to explore durable propeller solutions for your marine equipment needs.
Domande frequenti
How often should an outboard propeller be replaced?
There is no fixed timeline for replacing an outboard propeller. Replacement is driven entirely by condition, prestazione, e sicurezza. You should replace it when you notice structural damage like severe bends, pezzi mancanti, or deep cracks, or significant metal loss from corrosion. Unresolved performance issues such as reduced top speed, higher fuel consumption, or heavy vibration also indicate it is time for a new prop.
Should I remove my propeller before winter storage?
SÌ, removing the propeller before winter storage is highly recommended. It prevents the theft of valuable stainless-steel or high-performance props. It also allows you to inspect the propeller shaft for wrapped fishing line, which can destroy seals and cause water intrusion into the gearcase. While the prop is off, you can clean the shaft and apply fresh marine grease to prevent it from seizing over the winter.
How do I know if my propeller is damaged?
Visual signs include bent or warped blades, chipped edges, crepe, and heavy corrosion. You may also notice performance changes, such as a loss of top speed, sluggish acceleration, or increased fuel consumption. When running, a damaged propeller often causes unusual vibrations, steering pulling, or a slipping sensation where the engine over-revs without matching boat speed.
Can a bent propeller be repaired?
It depends on the material and severity. Minor bends or small dings in aluminum and some stainless steel propellers can often be reconditioned by a professional prop shop. But severe bends, deep cracks, distorted hubs, or damage to die-cast aluminum props usually require a full replacement. If structural integrity is compromised or the repair cost approaches the price of a new prop, replacement is the safer option.
What grease should be used on a propeller shaft?
Always use a high-quality, waterproof marine grease designed specifically for propeller shaft splines, such as a 2-4-C marine lubricant. This grease resists wash-out in fresh and saltwater, providing critical corrosion protection. Apply a thin, even coat to the shaft splines and threads at least once a season to ensure the propeller hub does not seize to the shaft.
How do I stop corrosion on a stored propeller?
Start by washing the propeller with low-pressure fresh water and a mild detergent to remove salt, grease, and marine growth. Dry it completely. For long-term storage, you can apply a two-part high-build epoxy primer to bare metal surfaces. Store the propeller indoors in a dry, well-ventilated area, avoiding direct contact with concrete floors or dissimilar metals.
What spare parts should I keep with a replacement propeller?
A spare propeller is only useful if you have the right hardware to install it. Keep a kit on board that includes a spare prop nut, several new stainless-steel cotter pins or lock washers, a thrust washer, and any required hub spacers. You should also pack a small tube of marine grease, a block of wood to stop prop rotation during the swap, and the correct size wrench or socket.
Can a damaged propeller affect the gearbox?
SÌ, a damaged propeller can severely affect the gearbox. Bent blades or missing material create a rotational imbalance that sends vibrations directly down the prop shaft. Col tempo, this constant vibration and potential shaft misalignment increase wear on gearbox bearings, gear teeth, and shaft seals. In severe impact cases, shock loads can chip gears or bend the driveshaft, leading to expensive lower unit repairs.
Most outboard propellers include important information such as diameter, pece, rotation direction, hub type, and manufacturer codes. While different brands may use slightly different marking formats, the basic sizing system is very similar across the industry.
In questa guida, you’ll learn what each number means, how to identify the correct propeller for your boat, and when changing propeller size makes sense.
Where Can You Find the Size Marks on an Outboard Propeller?
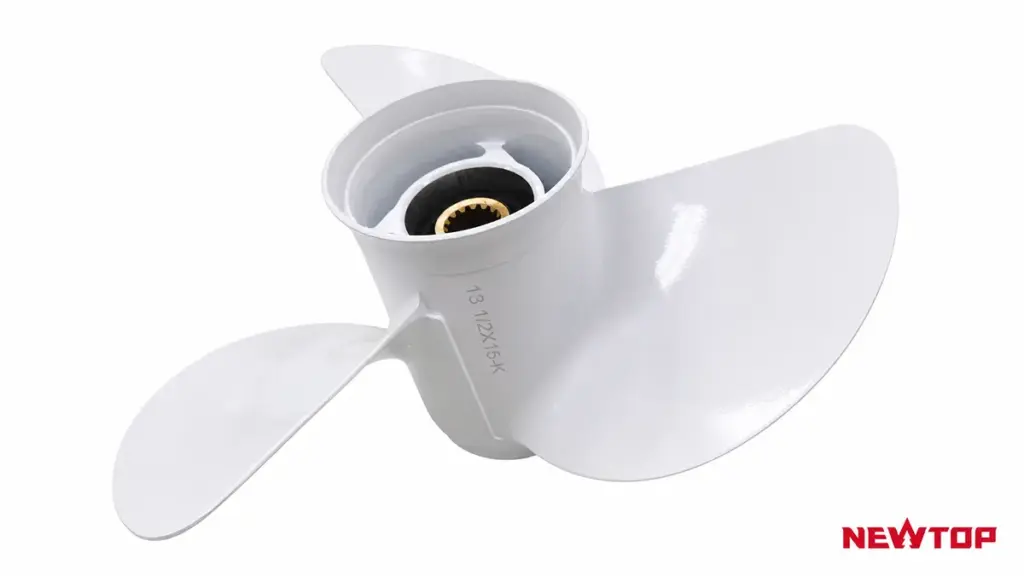
Elica size markings, indicating diameter and pitch, are typically stamped directly onto the outer hub, blade roots, or the rear face near the mounting nut.
Common Locations on the Hub and Blades
Outboard motor manufacturers do not follow a single universal standard for placing identification numbers, but they generally stick to a few accessible spots. You will usually spot these physical engravings pressed right into the metal housing.
- Outer hub surface: Stamped or engraved directly onto the outer surface of the propeller hub cylinder.
- Blade roots: Located at the base of a blade where it physically connects to the center hub.
- Hub faces: Positioned on the front or rear face of the hub assembly where the propeller meets the prop nut.
Decoding the Size Format
Once you locate the stamp, you need to read the numbers correctly. The marine industry relies on a specific numeric sequence to communicate the physical dimensions and capabilities of the equipment.
- Diameter x Pitch: The numbers are typically displayed in this exact order. A stamp reading “10 x 7” indicates a 10-inch diameter and a 7-inch pitch.
- Supplemental codes: Additional letters or numbers often follow the primary size to indicate blade type, rotation direction (such as ‘R’ for right-hand), or internal manufacturer-specific codes.
- Technical designations: These markings represent exact technical size measurements, not arbitrary brand model names.
How to Reveal Hard-to-See Markings
Older props or those used in harsh saltwater environments often have obscured numbers. A quick visual check might fail to confirm the exact specifications without a bit of surface prep.
- Clean the surface: Thoroughly clean the hub area to remove salt buildup, marine grime, heavy oxidation, or old layers of anti-fouling paint.
- Use angled light: Carefully rotate the propeller and inspect the blade roots and cylinder collar under direct light to catch the shadows of shallow engravings.
- Check documentation: Consult the original packaging, purchase receipts, or manufacturer catalogs using the part number if the physical size stamps are completely worn away.
Why Knowing Your Propeller Size Matters
Operating a boat with an incorrect propeller size causes poor performance and accelerates engine wear. Getting these two specific numbers right dictates exactly how your outboard interacts with the water.
- Power transfer: Diameter and pitch determine how effectively the propeller matches the raw engine power to the physical weight of your boat.
- RPM control: The pitch rating directly influences the engine’s ability to operate within its recommended wide-open throttle (WOT) RPM capabilities.
- Performance tuning: A smaller pitch reduces engine load and allows it to reach higher RPM for faster acceleration, while a larger pitch drops overall RPM and favors top-end speed.
How to Read Diameter and Pitch Markings
The first number on a propeller marking is always diameter, dictating thrust. The second is pitch, controlling your outboard’s RPM and top speed. Mismatching these specifications damages engines. Marking Position Measurement Primary Function First Number (per esempio., 10) Diameter (Pollici) Dictates thrust, load-carrying capacity, and water resistance. Second Number (per esempio., 7) Pece (Pollici) Determines top speed, acceleration, and engine WOT RPM.
Deciphering the Standard Marking Format
Manufacturers typically stamp propeller markings directly on the hub or near the blade root. Finding these digits is the first step in replacing or upgrading your boat’s hardware. You will see standard industry codes like 10 x 7 O 14 x 19. These numbers represent two specific measurements that define the propeller’s geometry. The first number always defines the overall diameter in inches, while the second number always defines the theoretical pitch in inches.
Interpreting the First Number: Diameter
Diameter signifies the total width of the circle created by the blade tips during a full rotation. It determines how much water the propeller actually sweeps. A larger diameter increases the blade surface area, generating stronger thrust to move heavier boats and heavy cargo loads effectively. On the other end of the spectrum, a smaller diameter creates less drag in the water, suiting lighter hulls built specifically for higher top speeds.
Interpreting the Second Number: Pece
Pitch measures the theoretical forward distance the propeller travels through the water in one full 360-degree rotation. Think of pitch as the gearing system for your outboard. Lower pitch numbers act like a low gear, offering better acceleration, quicker planing, and strong low-speed control. Higher pitch numbers function like a high gear, pushing the boat farther forward per revolution to achieve greater top speeds.
Applying Markings to Engine Performance
Your selected pitch directly controls the outboard motor’s wide-open throttle (WOT) giri al minuto. Dialing in the correct pitch ensures the engine runs efficiently without suffering mechanical strain.
- RPM Calibration: Adjusting the pitch by one inch typically changes the engine speed by roughly 200 giri al minuto.
- Under-Revving Fix: Selecting a lower pitch helps an overloaded engine reach its recommended operating RPM without lugging.
- Over-Revving Fix: Switching to a higher pitch prevents the engine from exceeding its maximum recommended RPM limits under light loads.
Maximize ROI With Professional-Grade Garden Machinery
What Do Other Numbers and Letters on a Propeller Mean?
Beyond basic size, extra letters and digits identify blade count, hub dimensions, and specific manufacturer series codes required to source exact replacement parts.
Diameter, Pece, and the ‘X’ Separator
Most marine propellers follow a universal naming convention. The core specification always appears as a simple sequence stamped onto the casting.
- Diameter: The first number in a standard sequence denotes the propeller’s overall diameter, measuring the full width of the blade sweep.
- Pece: The second number represents the pitch, indicating the theoretical forward travel distance per single revolution.
- The ‘X’: This character functions simply as a ‘by’ separator, dividing the diameter and pitch measurements.
Series Letters and Additional Digits
Manufacturers rarely stop at just diameter and pitch. You will frequently find extra alphanumeric codes that define the physical geometry and compatibility of the unit.
- Series Letters: Letters such as J, K, or L signify the specific design, serie, or type of the propeller within a brand’s lineup.
- Extra Digits: These trailing numbers often represent the total number of blades or specify the exact bore and hub size for mounting.
- Internal Codes: Certain short number combinations serve purely as internal manufacturer codes for catalog referencing.
Where to Locate Propeller Markings
Finding these specifications requires knowing exactly where brands stamp their hardware. Dirt, oxidation, or heavy marine growth can easily obscure these details.
- Blade Roots: Manufacturers often stamp the measurements directly at the root of a blade or deep between the blades.
- Central Hub: The outer surface of the central hub barrel is a common location for visible specification codes.
- Assembly Faces: Some brands engrave these critical details on the front or rear face of the center assembly, which may require removing the propeller nut to read clearly.
How Do Propeller Size Marks Differ Between Major Brands?
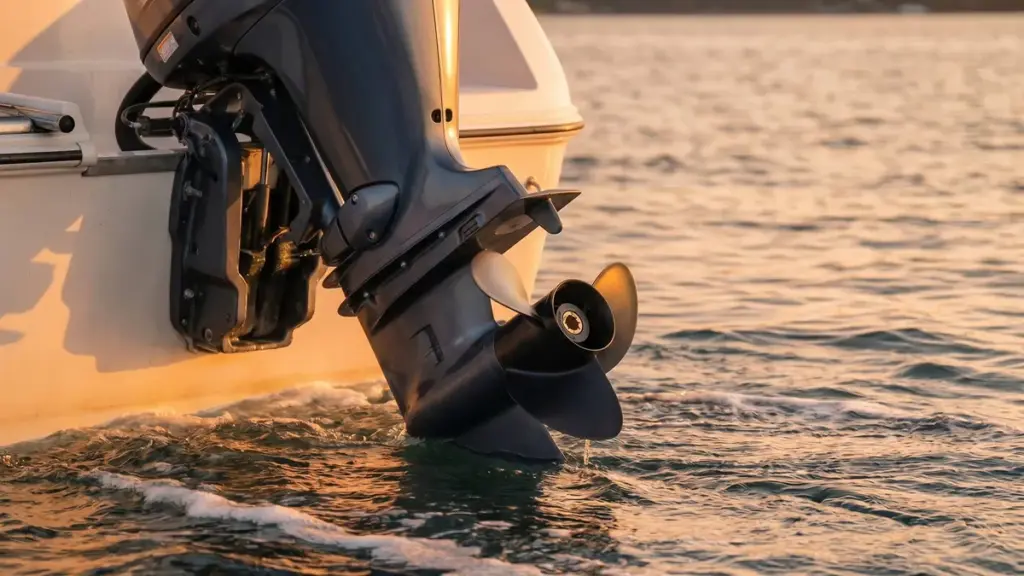
Every major outboard brand follows the standard diameter-by-pitch format, but proprietary suffixes, rotation letters, and hub codes create distinct marking styles you must decode before swapping propellers.
The Universal Baseline: Diameter and Pitch
Outboard manufacturers agree on one core sizing convention across the industry. The first number stamped on a propeller always represents the diameter, while the second number represents the pitch. A base stamp of 10 x 7 indicates a 10-inch diameter and a 7-inch pitch, regardless of the manufacturer.
Brand-Specific Suffixes and Extra Codes
While the base dimensions are universal, brands add unique suffix codes to identify specific propeller features. You have to read past the first two numbers to understand the exact design.
- Rotation: Letters typically denote the turn direction, con “R” for standard right-hand (clockwise) E “l” for left-hand (counterclockwise).
- Blade Count: Trailing numbers often indicate the blade setup, such as a 3 O 4 for three-blade or four-blade designs.
- Model Codes: Internal model codes or specific hub series identifiers are frequently appended to the size block.
Marking Examples from Top Manufacturers
Each manufacturer applies these codes differently on the hub or blade root. Knowing what to expect from specific brands speeds up the identification process.
- Yamaha: Generally uses a straightforward layout, printing the size simply as 14 x 19.
- Mercury: Often includes a “P” to denote pitch alongside general marine props, formatted as 14.6 x 17P.
- Suzuki: Frequently groups the size, rotation, and blade count together, resulting in detailed stamps like 14 x 19 R 3.
What to Verify When Swapping Brands
Relying solely on the base diameter and pitch numbers is insufficient for an exact brand-to-brand replacement. Even with identical size stamps, propellers from different manufacturers deliver varying performance. This happens because competing brands use distinct blade shapes, rake angles, cupping, and material compositions to achieve their thrust profiles.
Always confirm rotation, blade count, and hub system compatibility before installing a different brand’s propeller. Matching the spline count and ensuring the thrust washer seats properly prevents gearcase damage and keeps the outboard running safely.
How Can You Verify the Correct Propeller Size for Your Boat?
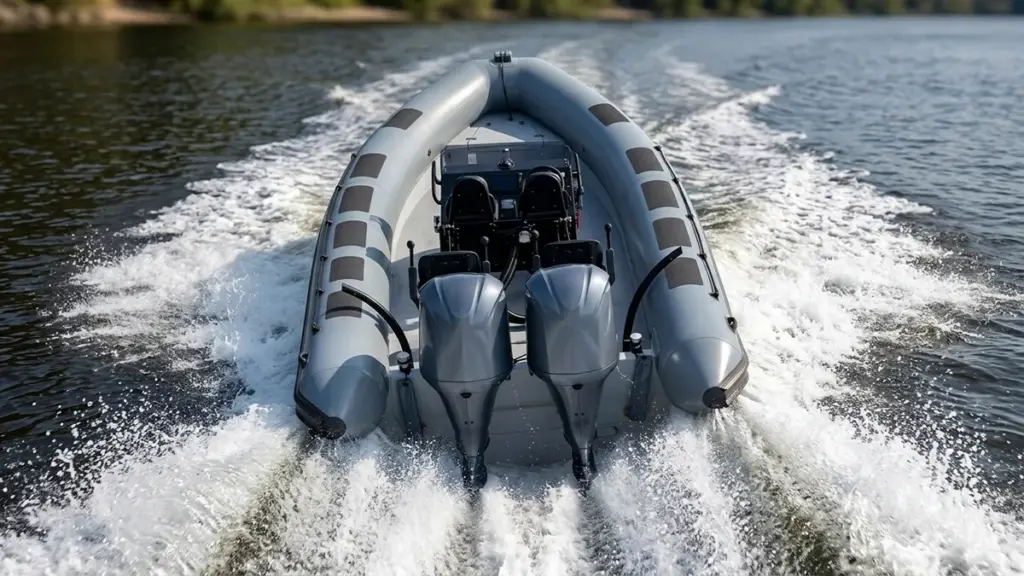
To verify your propeller size, test your wide-open throttle (WOT) RPM under a normal load. The correct pitch keeps your engine within the manufacturer’s recommended RPM range.
Identify Current Prop Specs and Target WOT RPM
Before hitting the water, establish a baseline for your boat and engine. You need to know what propeller you currently run and the exact performance window the outboard requires.
- Check the propeller hub: Inspect the outer surface or the base of the blades for stamped diameter and pitch markings to confirm your current sizing.
- Find the WOT RPM target: Consult your outboard owner’s manual to identify the manufacturer’s recommended Wide-Open Throttle (WOT) RPM range.
- Establish a baseline: Use manufacturer prop selectors or online calculators factoring in engine horsepower and typical operating weight to set your starting point.
Perform an On-Water WOT Test Under Normal Load
The real proof of propeller sizing happens on the water. A structured wide-open throttle test provides the exact engine RPM data needed to determine if your pitch is accurate.
- Simulate real-world conditions: Load the boat with the typical number of passengers, gear, and fuel you carry during regular operation.
- Start the run: Trim the engine fully down in open water and advance the throttle to maximum capacity.
- Optimize and record: Slowly trim up to the optimal running angle, return to neutral trim, and record the highest steady RPM and GPS speed achieved.
Compare Test Results Against Manufacturer Specifications
Once you record your GPS speed and tachometer readings, cross-reference them with your engine manual. The resulting RPM tells you exactly how the propeller loads the engine.
- Optimal match: If the measured WOT RPM falls within the manufacturer’s specified range, the current propeller size is correct for your exact rig and typical load.
- Engine over-revving: If the engine spins past the maximum RPM limit, it lacks resistance. The propeller pitch is likely too low.
- Engine under-revving: If the engine struggles and fails to reach the minimum recommended RPM, the load is too heavy. The propeller pitch or diameter is too high.
Adjust Pitch to Correct Under-Revving or Over-Revving
If your test results fall outside the acceptable range, you must change the propeller pitch. Pitch directly dictates the mechanical load on the engine, acting like the gearing in a transmission.
- The standard rule: A 2-inch change in pitch alters your WOT RPM by approximately 300 A 400 giri al minuto.
- Dropping high RPMs: Move to a higher-pitch propeller to lower excessively high RPMs. This prevents mechanical strain and keeps the engine off the rev limiter.
- Raising low RPMs: Switch to a lower-pitch propeller to increase RPMs, improve acceleration, and prevent the engine from lugging under heavy loads.
Common Mistakes When Reading Propeller Size Marks
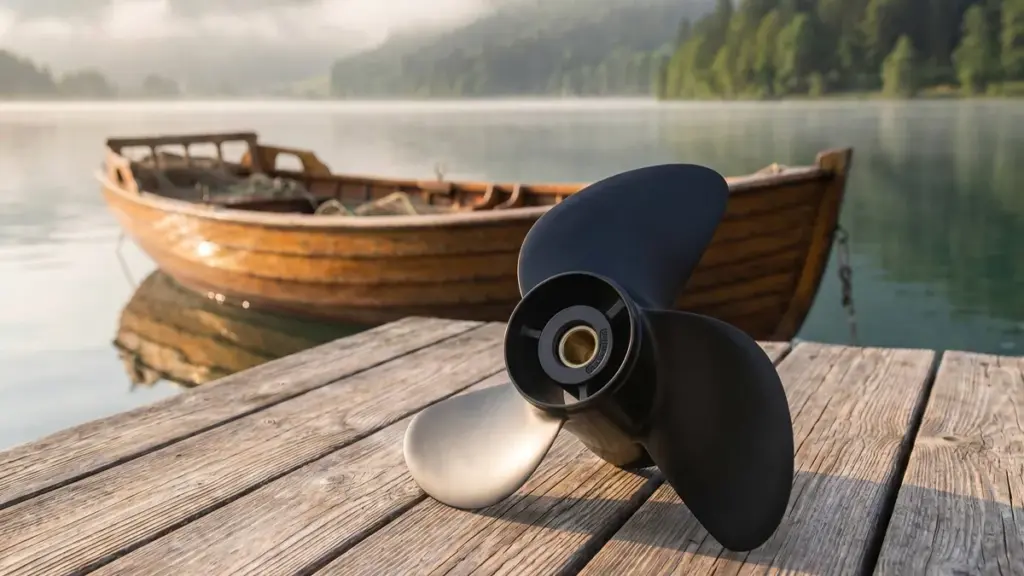
Misreading a propeller mark leads to poor performance, engine strain, and wasted money. Always read diameter first, pitch second, and factor in real-world boat dynamics.
Reversing Diameter and Pitch Numbers
Flipping these numbers is the fastest way to buy the wrong prop. The industry standard always lists diameter first, followed by pitch. When you mix them up, you completely alter how the prop interacts with the water.
- Reading backward: Assuming the first number is pitch instead of diameter.
- Interchanging specs: Failing to recognize that diameter and pitch affect performance differently and are not interchangeable.
- Size misinterpretation: Misinterpreting a 10×7 mark as a 7-inch diameter rather than a 10-inch diameter.
Misinterpreting Rotation and Blade Count
The primary numbers dictate the size, but the trailing letters control fitment and operation. Ignoring these extra characters leads to physical mismatches or dangerous handling on the water.
- Overlooking rotation marks: Missing the R (right-hand) or L (left-hand) indicators, which is critical for single and dual-engine setups.
- Confusing blade count: Assuming the trailing number (like 3 O 4) adds another size dimension rather than just counting the blades.
- Installing incorrectly: Mounting a prop with the wrong rotation that physically fits the shaft but runs incorrectly under power.
Equating Theoretical Pitch to Actual Speed
Pitch measures the theoretical distance a propeller moves forward in one revolution through a solid medium. Water is not solid. Expecting a direct conversion from pitch to actual boat speed ignores the reality of marine physics.
- Ignoring water slip: Assuming the stamped pitch equals exact forward travel without factoring in the inevitable slip loss.
- Forgetting physical variables: Overlooking how hull shape, boat weight, and load change the real-world performance of the propeller.
- Unrealistic expectations: Expecting two entirely different boats with the same 10×7 prop to achieve identical speeds.
Ignoring Engine Limits and Boat Usage
You do not pick a propeller based entirely on the boat hull. You pick it based on what the engine can safely handle. The propeller must allow the engine to operate within its defined mechanical limits.
- Skipping WOT checks: Selecting a propeller without checking the engine’s recommended wide-open-throttle (WOT) rpm range.
- Forcing extreme rpms: Choosing too much pitch causing the engine to under-rev, or too little pitch causing it to over-rev.
- Mismatched application: Failing to match the pitch profile to the boat’s primary purpose, such as prioritizing heavy-load acceleration versus top speed.
When Should You Replace Your Propeller with the Same or a Different Size?
Replace with the identical size if your engine hits the correct WOT RPM. Change pitch or diameter only to fix RPM limits, boost hole shot, or increase cruising speed.
Replacing with the Same Size: Wear, Danno, and Material Upgrades
Stick with the same diameter and pitch if your engine currently operates within the manufacturer’s recommended wide-open throttle (WOT) RPM range. The baseline size works. Swap out identical sizes to correct bent blades, chipped edges, or a slipping hub that causes vibration and kills thrust. If you run in abrasive or sandy water, upgrade from aluminum to stainless steel in the exact same size. This improves durability and rigidity while keeping your RPMs consistent.
Adjusting Propeller Pitch for RPM Correction
Pitch acts like gearing. Move to a higher pitch if the engine over-revs past the upper limit. This added load lowers the RPM and improves cruising speed on light boats. Drop to a lower pitch if the engine under-revs and struggles to build speed. Reducing the pitch frees up the engine to reach higher RPMs, delivering a stronger hole shot and aggressive heavy-load acceleration. Remember that changing the pitch by just 1 A 2 inches noticeably shifts engine loading and RPM, even on small outboards.
Changing Propeller Diameter for Thrust or Speed
Diameter dictates total blade surface area. Increase the diameter to gain more blade area for low-speed thrust. This extra grip helps push heavily loaded dinghies and gives you tight control during precise dock maneuvering. Conversely, reduce the diameter to minimize drag on high-speed, lightweight hulls. Whenever you upsize the diameter, you must verify your physical clearance. Maintain a strict minimum clearance of 5/8 A 3/4 inches between the blade tips and the outboard lower unit to prevent contact under load.
Practical Steps to Evaluate Your Replacement Needs
Do not guess your propeller size based on top speed alone. Perform a sea trial at WOT with your typical everyday load, including passengers, gear, and fuel, to establish a realistic baseline RPM. Compare your recorded baseline RPM directly against the engine manual’s WOT specification to identify over-revving or under-revving conditions. Once you have the data, select a replacement based on your primary objective: drop to a lower pitch for towing and acceleration, or step up to a higher pitch for fuel-efficient cruising.
OEM Outboard Motor Propellers and Replacement Solutions from NEWTOP
As an experienced outboard motor propeller manufacturer, NEWTOP supplies OEM and aftermarket propellers for a wide range of outboard engines used in recreational, commerciale, and professional marine applications.
Our product range includes:
- Aluminum outboard propellers
- Stainless steel outboard propellers
- Three-blade and four-blade designs
- OEM replacement propellers
- Custom propeller development for private-label brands
Every propeller is manufactured with strict dimensional control to ensure accurate diameter, pece, blade geometry, and dynamic balance. This helps deliver smooth operation, efficient power transfer, and reliable performance on the water.
As a trusted outboard motor propeller factory, NEWTOP also provides comprehensive OEM and ODM services for global distributors, grossisti, and marine equipment brands. From mold development and logo customization to packaging and quality inspection, our production process is designed to support consistent quality across large-volume orders.
Whether you need a direct replacement for popular outboard brands or a customized propeller solution for your own product line, our engineering and manufacturing teams can help you identify the right specifications for your market.
Conclusione
Understanding outboard motor propeller size marks makes selecting the correct replacement much easier. In most cases, the first number indicates diameter, while the second number indicates pitch, with additional letters identifying rotation direction, material, or manufacturer-specific information.
When evaluating a propeller, don’t rely solely on the stamped numbers. Always consider your engine’s recommended RPM range, the boat’s weight, operating conditions, and intended use. A properly matched propeller improves acceleration, fuel efficiency, engine longevity, and overall handling.
If you’re sourcing reliable OEM replacement propellers or looking for an experienced outboard motor propeller manufacturer, NEWTOP offers precision-engineered solutions backed by advanced manufacturing capabilities and extensive OEM experience. Our team can help you select or develop propellers that deliver dependable performance across a wide range of outboard applications.
Domande frequenti
What does 10×7 mean on an outboard propeller?
These numbers indicate diameter and pitch measured in inches. The first number (10) represents the diameter, which is the total width of the circle the blades sweep. The second number (7) is the pitch, indicating the theoretical forward distance the propeller moves in one full revolution. A 10×7 size fits small outboards where strong thrust and low-speed control matter more than top speed.
How do I know if my propeller size is correct?
A correctly sized propeller allows your engine to consistently reach its manufacturer-recommended wide-open throttle (WOT) RPM range under a normal load. The boat will accelerate smoothly, get on plane without excessive delay, and maintain cruising speed efficiently without over-revving or lugging the motor.
Can I change propeller pitch without changing diameter?
SÌ. Swapping to a propeller with the same diameter but a different pitch (like moving from a 10×7 to a 10×9) is the standard way to adjust engine RPM and boat performance. Marine shops can also re-pitch existing aluminum or stainless steel props slightly to fine-tune your setup without altering clearance.
What happens if the propeller pitch is too high or too low?
If the pitch is too high, the engine will struggle to reach its recommended RPM range, causing sluggish acceleration and increased mechanical strain. If the pitch is too low, the engine will likely over-rev past its maximum limit, which risks internal damage, wastes fuel, and reduces your top-end speed.
Do all outboard brands use the exact same size marking system?
Major outboard manufacturers all use the core ‘diameter x pitch’ measurement in inches, but their exact stamping methods vary. Brands place the numbers in different spots, such as inside the hub or on the barrel. They also add unique letters and codes to indicate blade count, rotation direction, and specific design series.
How do I read old or worn propeller size markings?
Start by cleaning the hub and blade root areas to reveal any stamped numbers. Most old props still use the standard diameter x pitch format (like 11.25 x 13). If you only find a single number with a letter (like 17P), it usually represents the pitch. For complex or partial codes, check the manufacturer’s parts catalog or have a marine shop measure the prop directly.
Outboard motors are widely used in small fishing boats, passenger vessels, barche da lavoro, and recreational craft around the world. When selecting an outboard engine, one question continues to dominate purchasing decisions:
Should you choose a 2-stroke or a 4-stroke outboard motor?
The answer depends on your market, customer expectations, operating environment, fuel availability, maintenance capabilities, and budget. While 4-stroke outboard motors have gained popularity in many developed regions, 2-stroke outboard motors remain highly competitive in commercial fishing, transportation, and remote-area applications.
This guide compares the two outboard motor types across performance, fuel efficiency, requisiti di manutenzione, operating costs, and market suitability to help distributors, dealers, and fleet operators make informed decisions.
Difference Between 2-Stroke and 4-Stroke Outboard Motors
2-strokes offer a better power-to-weight ratio and faster acceleration. 4-strokes are quieter, more fuel-efficient, and have lower emissions.
A 2-stroke outboard completes a power cycle in just two piston movements (one crankshaft revolution), while a 4-stroke outboard requires four piston movements (two crankshaft revolutions).
| Caratteristica | 2-Stroke Outboard | 4-Stroke Outboard |
|---|---|---|
| Combustion Cycle | 2 strokes | 4 strokes |
| Power Stroke Frequency | Every revolution | Every two revolutions |
| Engine Weight | Lighter | Più pesante |
| Mechanical Complexity | Semplice | More complex |
| Lubrication | Fuel-oil mixture | Separate oil system |
| Maintenance Difficulty | Easier | More involved |
| Efficienza del carburante | Moderare | Più alto |
| Emissioni | Più alto | Inferiore |
Combustion Cycle and Mechanical Design
The core difference comes down to how they make power. A 2-stroke motor completes a full power cycle in just two piston strokes, firing on every single crankshaft revolution. This is a very direct way to generate force. A 4-stroke needs four piston strokes—intake, compression, energia, and exhaust—meaning it only fires on every other revolution of the crankshaft.
This fundamental difference dictates their construction. The 2-stroke design is simpler, using ports in the cylinder walls to manage fuel intake and exhaust. Al contrario, a 4-stroke engine requires a much more complex valve train, complete with valves, alberi a camme, and timing systems, similar to what you’d find in a car.
Power Delivery, Peso, and Performance
Because they fire twice as often and have fewer parts, 2-stroke outboards have a much higher power-to-weight ratio. This translates to explosive acceleration and a quicker “hole shot,” getting the boat on plane faster. This is a massive advantage for certain applications.
The extra components make 4-stroke outboards significantly heavier. On a smaller boat, this added weight on the transom can negatively affect balance, increase the draft, and make it harder to get on plane. The power delivery from a 4-stroke is much smoother and more linear, which is often preferred for steady-speed applications like trolling or long-distance cruising where raw acceleration isn’t the priority.
Fuel Efficiency and Emissions
Four-stroke outboard motors are inherently more efficient. Their distinct four-stroke cycle ensures fuel is burned more completely, resulting in better fuel economy and significantly lower emissions. They are the cleaner technology, hands down.
Traditional 2-strokes work by mixing oil directly with the gasoline for lubrication. During their rapid cycle, some of this unburned fuel and oil mixture can escape with the exhaust, which increases both fuel consumption and pollution. It’s important to recognize that modern direct-injection (DI) 2-stroke engines have dramatically improved on this front, getting much closer to 4-stroke levels of efficiency and cleanliness.
Manutenzione, Rumore, and Operating Experience
There is a big difference in the on-water experience. Four-stroke engines run much quieter and produce far less vibration. This makes a huge difference in comfort, especially during long days on the water. Maintenance is similar to a car, requiring scheduled oil and filter changes.
Two-strokes are louder and have a reputation for being a bit rougher. Their maintenance schedule involves continuously adding 2-stroke oil to a reservoir or pre-mixing it with the fuel. While this is an ongoing task, the engines have fewer moving parts, which can simplify certain types of repairs and reduce potential failure points.
Best Applications and Market Position
Four-stroke outboards have taken over the majority of the market. They are the standard for offshore fishing boats, family cruisers, and larger vessels where fuel range, funzionamento silenzioso, and low emissions are top priorities. Rental fleets and commercial operators also lean heavily on 4-strokes for their reliability and lower running costs.
Still, 2-strokes maintain a strong position in high-performance niches. You’ll find them on bass boats, flats skiffs, and other lightweight, fast hulls where their superior power-to-weight ratio and instant acceleration are key advantages. Stricter environmental regulations continue to push the market, favoring either 4-stroke technology or the newer, cleaner direct-injection 2-stroke models.
Rapporto potenza-peso: Why 2-Strokes Still Win for Acceleration
A 2-stroke’s simpler, lighter design provides a superior power-to-weight ratio, delivering faster acceleration and a quicker hole shot than heavier 4-stroke outboards.
How Engine Design Creates a Higher Power-to-Weight Ratio
A 2-stroke engine completes its power cycle in just two piston strokes. This design is inherently simpler and requires far fewer moving parts than a 4-stroke.
Fewer components mean the engine is more compact and significantly lighter for any given horsepower output. With less engine mass to carry, more of the boat’s thrust goes directly into moving the hull, not just hauling the outboard.
The Impact on Hole Shot and Throttle Response
This advantage in power-to-weight translates directly into a quicker hole shot—the boat’s initial burst of acceleration from a dead stop. Boats with 2-stroke outboards typically get on plane faster, which is critical for activities like water skiing.
Users also get a more immediate, snappy throttle response. This is especially noticeable in the low-to-mid RPM range where quick adjustments are common.
How 4-Stroke Engines Compare on Weight
Four-stroke outboards are heavier by design. They need a full valve train with valves and camshafts, plus a dedicated oil sump, all of which add significant weight. The four-stage cycle—intake, compression, energia, exhaust—demands more complex mechanics and more physical components.
All this extra weight hurts their power-to-weight ratio when put up against a 2-stroke with the same horsepower rating.
When a Better Power-to-Weight Ratio Matters Most
The benefits of a high power-to-weight ratio are most obvious in specific applications where acceleration and minimal weight are key.
- Performance Boats: For racing or water-ski tow boats, rapid acceleration isn’t a luxury—it’s the entire point.
- Lightweight Hulls: Small fishing boats, skiff, and tenders are highly sensitive to engine weight. Less weight on the transom means better balance and handling.
- Shallow Water Operation: Anyone running in skinny water needs to get on plane fast with minimal effort to avoid digging in. The quick punch of a 2-stroke is a major advantage here.
Motore fuoribordo T40G
Reliable 2-stroke outboard, ideal for small fishing boats and workboats. Lightweight yet powerful 40 HP engine.
Motore fuoribordo T40J
Durable 2-stroke engine designed for heavy-duty applications. 40 HP performance with easy maintenance in remote areas.
Motore fuoribordo T40X
Compact 2-stroke outboard delivering reliable 40 HP. Perfect for small boats requiring both power and portability.
Fuel Economy Comparison: Are 4-Strokes Really Worth the Premium?
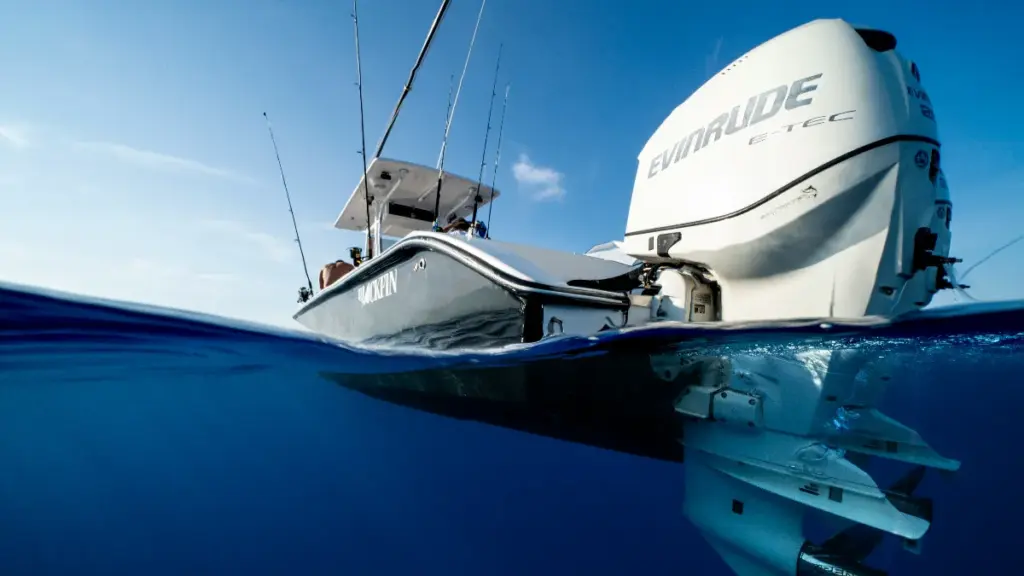
Modern DI 2-strokes and 4-strokes are surprisingly close on fuel burn. The real savings come from upgrading any old carbureted engine to a modern one, regardless of type.
Overall Efficiency: Modern Engines Are Closer Than You Think
The old debate about thirsty 2-strokes is mostly dead. Today’s direct-injection (DI) 2-strokes and modern 4-strokes offer very similar overall fuel economy for the same horsepower. Both technologies are about 35% more fuel-efficient than the carbureted 2-strokes they replaced. When you look at fuel burn across the entire RPM range, the difference between the two modern types is often too small to declare a clear winner based on efficiency alone.
How Your Boating Style Affects Fuel Burn
Where one engine pulls ahead often depends on how you use the throttle. At very low RPMs, like idling out of the marina or slow trolling, a DI 2-stroke can actually be slightly more efficient. Its ability to meter fuel so precisely at low loads gives it a small edge.
But in the mid-range—between 2,500 E 5,000 RPM—4-strokes often have a real fuel economy advantage. This is the cruising sweet spot where most boats spend their time, so this is where the 4-stroke’s efficiency really shows. At the top end, running near full throttle, the tables can turn again. A DI 2-stroke can often match or even beat a 4-stroke on fuel burn while delivering more top-end speed.
The Real Fuel Savings: Upgrading from Legacy Engines
The most significant jump you’ll see in fuel economy comes from replacing any older, carbureted 2-stroke. It doesn’t matter if you replace it with a modern DI 2-stroke or a 4-stroke; the improvement will be huge. A carbureted clunker can burn nearly double the fuel of a modern engine doing the same work. The fuel-sipping reputation of the 4-stroke was built on its comparison to those old engines, not today’s efficient DI 2-strokes.
Calculating the Payback on Fuel Savings Alone
So, does the small fuel savings of a 4-stroke pay for its higher upfront cost? For a casual recreational boater with low annual hours, the answer is almost always no. The math just doesn’t work out. But for a high-hour commercial guide or charter captain, the 4-stroke’s mid-range efficiency can lead to thousands in annual savings, easily justifying the initial premium. The decision really hinges on your usage. If you spend all day cruising at a steady speed, the 4-stroke’s economy is a strong argument. For mixed use or performance applications, the difference is often a wash.
Maintenance and Repairability in Remote Markets
In remote markets, 2-strokes are typically easier to maintain and repair in the field. 4-strokes are more sensitive and often depend on service networks, increasing downtime risk.
2-Stroke Simplicity and Field Service Advantages
The core advantage of a 2-stroke in a remote setting is its simple mechanical design. With fewer moving parts, things are just less likely to go wrong, and when they do, repairs in the field are far more practical.
- Routine servicing is minimal, often just spark plugs and gearbox oil changes at very long intervals.
- They are generally more tolerant of variable or poor-quality fuel, which is a constant challenge in isolated locations.
- An operator can usually service the engine with a basic toolkit, which cuts the reliance on specialized technicians.
4-Stroke Maintenance Requirements and Sensitivities
Four-strokes demand a much stricter preventive maintenance schedule. Missing a service interval can have a bigger impact on reliability, which is a serious risk when you’re hours away from help.
- They require regular oil changes, filter checks, and sometimes valve adjustments.
- The fuel system is highly sensitive to clean, fresh fuel. Poor fuel management is a primary cause of failure.
- Cooling systems need consistent upkeep, from water pump impellers to thermostats.
- They have a greater reliance on authorized service centers and specific parts that are rarely available in remote areas.
Direct Comparison of Key Repairability Factors
When you put them side-by-side, the operational differences in a low-support environment become clear.
- Service Complexity: 2-strokes have far fewer scheduled service items compared to the more intensive needs of a 4-stroke.
- Parts Dependence: A 4-stroke requires a higher inventory of specialized parts just for routine maintenance.
- Field Practicality: The simple design of a 2-stroke makes it much better suited for on-the-spot repairs where resources are limited.
- System Sensitivity: 4-stroke fuel and cooling systems are less forgiving of neglect or harsh operating conditions.
Cost and Downtime Impact
The financial penalty for a complex engine in a remote market goes beyond the simple cost of parts. Downtime is the real killer.
- Maintenance costs for a 2-stroke can be significantly lower, particularly in the first few years of operation.
- Engine downtime is extremely disruptive. Transporting parts and technicians to isolated areas is slow and expensive.
- The simpler service schedule of a 2-stroke means there’s less risk of a missed maintenance item causing a critical failure.
- Fewer required service visits directly translate to lower logistical costs and more operational uptime for the vessel.
Rumore, Emissioni, and Regulatory Considerations
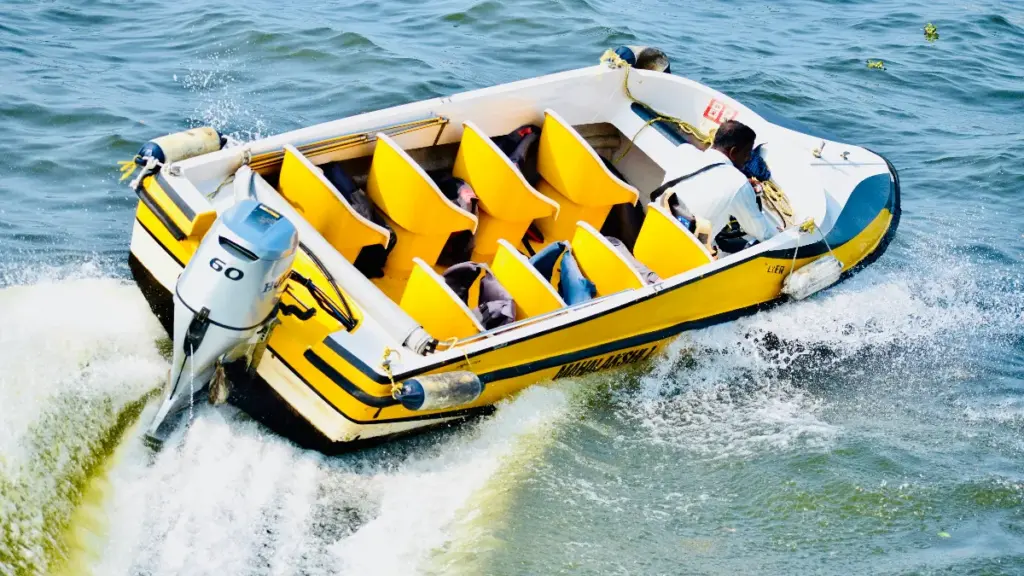
4-stroke outboards are quieter and cleaner, giving them a significant edge in regulated waterways and for any buyer who prioritizes user comfort over raw performance.
Noise Levels and User Experience
Four-stroke outboards generally run much quieter and with less vibration. This makes them the clear choice for recreational boating and fishing, where a peaceful experience matters. Older carbureted 2-stroke engines are famous for their loud, high-pitched whine and harsh exhaust. For anyone operating in noise-sensitive areas like residential lakes or crowded marinas, the quieter operation of a 4-stroke is a deciding factor.
Exhaust Emissions and Environmental Impact
The design of a 4-stroke engine leads to a more complete and efficient fuel burn. The result is lower emissions of hydrocarbons and less visible smoke. Traditional carbureted 2-strokes are inefficient by comparison, releasing a noticeable amount of unburned fuel and oil directly into the air and water. While modern direct-injection 2-strokes are a massive improvement over their predecessors, 4-strokes usually maintain an advantage in lower overall emissions.
Regulatory Compliance and Waterway Access
Once the EPA and California Air Resources Board (CARB) established stricter regulations, the market quickly moved away from older, high-emission 2-strokes. It’s not just about federal rules. Many specific lakes, reservoirs, and protected waterways have local rules that ban or severely limit the use of these older carbureted engines. Four-stroke engines reliably meet current emissions standards and are positioned to meet future ones, ensuring you have broader access to regulated bodies of water without issue.
Total Cost of Ownership: Upfront Price vs Long-Term Costs
The sticker price is just the beginning. Real ownership cost includes fuel, olio, maintenance, and resale value, where a pricier four-stroke often wins long-term.
| Cost Factor | 2-Colpo | 4-Colpo |
|---|---|---|
| Initial Purchase Price | Inferiore | Più alto |
| Efficienza del carburante | Inferiore | Più alto |
| Maintenance Complexity | Inferiore | Più alto |
| Repair Costs | Inferiore | Più alto |
| Spare Parts Cost | Inferiore | Più alto |
| Long-Term Fuel Savings | Limited | Significant |
| Typical Lifespan | Bene | Often Longer |
Regional Recommendation: Which Engine Type for Your Market?
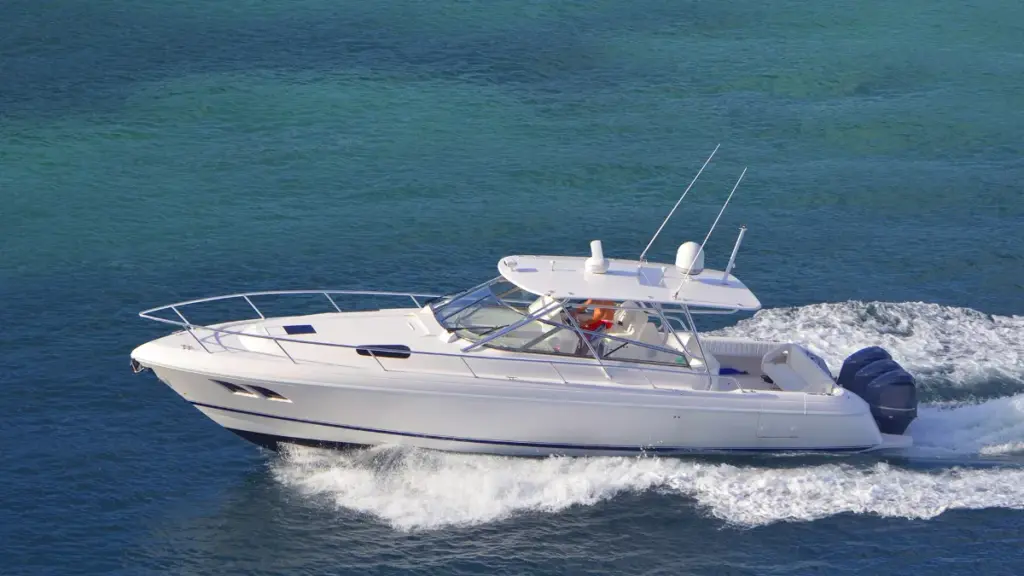
The right outboard choice is market-dependent. Regulations and user comfort drive developed regions to 4-strokes, while cost and field serviceability keep 2-strokes relevant elsewhere.
| Market Profile | Primary Driver | Recommended Engine |
|---|---|---|
| North America, W. Europe, Australia | Regulations & Emissioni | 4-Colpo (Default), Modern DI 2-Stroke (Niche) |
| SE Asia, South Asia, Africa | Upfront Cost & Service Simplicity | 2-Colpo (Default), 4-Colpo (Commerciale) |
| High-Hour Commercial Fleets (Global) | Total Cost of Ownership (Fuel & Longevity) | 4-Colpo |
| Specialized (Remote Islands, Urban Tourism) | Fuel Range & User Experience | 4-Colpo |
Markets Driven by Regulation and Emissions Standards
In developed economies, the choice is often made for you. Strict environmental laws and customer expectations for quiet operation have pushed the market heavily toward 4-stroke technology.
- In North America, Western Europe, and Australia, strict environmental laws make 4-stroke engines the standard choice for compliance.
- Quiet operation is a major factor in these regions, making 4-strokes preferable for recreational boating near populated areas.
- High fuel costs also make the superior efficiency of 4-stroke engines an important economic advantage.
- Modern direct-injection 2-strokes serve a niche market for high-performance applications where regulations permit.
Markets Driven by Cost and Service Simplicity
Where upfront cost and the ability to fix an engine with basic tools are the primary concerns, the simple, classic 2-stroke still holds significant ground. Access to a dealer network isn’t a given in these markets.
- For many users in Southeast Asia, South Asia, and Africa, the lower initial purchase price of a 2-stroke is the primary consideration.
- The simple mechanical design of 2-strokes allows for easier field repairs with basic tools, which is vital where professional service is scarce.
- Lighter weight makes 2-strokes suitable for small boats where the engine must be removed and carried frequently.
- 4-strokes are a strong choice for commercial operators in these regions who prioritize long-term fuel savings over initial cost.
Recommendations for High-Hour Commercial Fleets
For any business that runs boats all day, every day, the math almost always points to a 4-stroke. The initial investment is paid back through lower fuel bills and longer engine life.
- For fishing, trasporto, or patrol fleets that operate daily, the fuel savings from a 4-stroke can quickly offset its higher purchase price.
- 4-stroke engines typically provide a longer service life and better reliability under continuous, heavy loads.
- Across most global markets, 4-stroke engines represent the better long-term economic choice for commercial users with access to service networks.
Recommendations for Specialized and Niche Applications
Specific operational needs can make one engine type the only practical option, regardless of other factors. User experience for tourists is very different from the needs of a lone fisherman.
- In remote island communities with very high fuel prices, the range and efficiency of 4-stroke outboards are critical.
- For urban water taxis and tourist boats, the quiet, low-smoke operation of a 4-stroke is essential for customer experience.
- Subsistence fishermen in remote locations may still find the simple maintenance and lower weight of a 2-stroke more practical for their needs.
Why Choose NEWTOP Outboard Motors?
For distributors and importers looking for dependable marine power solutions, NEWTOP provides a balanced portfolio designed for different market needs.
I principali vantaggi includono:
- Comprehensive range of 2-stroke and 4-stroke outboard motors
- Strong OEM and ODM customization capabilities
- Stable production capacity and quality control
- Global export experience across Africa, America Latina, Sud-est asiatico, and other emerging markets
- Affidabile outboard motor spare parts supporto
- Professional technical documentation and after-sales assistance
Whether your customers prioritize affordability, fuel efficiency, durabilità, or ease of maintenance, NEWTOP can help you build a product lineup that fits your local market requirements.
Domande frequenti
Which is better, a 2-stroke or 4-stroke outboard?
Neither is universally better; the right choice depends on your boat and how you use it. Two-stroke outboards are often preferred for their light weight, faster acceleration, and lower initial cost. Four-stroke outboards are generally the better option for fuel economy, funzionamento silenzioso, low emissions, and long-distance reliability.
Are 2-stroke outboards being phased out?
Older, traditional carbureted 2-stroke outboards are being phased out in many regions due to emissions regulations. Modern direct-injection (DI) 2-stroke engines that meet current environmental standards are still available and remain a competitive choice for specific applications, particularly where a high power-to-weight ratio is critical.
Which outboard motor lasts longer?
Four-stroke outboards generally have a longer service life. Their advanced lubrication systems and lower mechanical stress per revolution contribute to greater durability, especially in high-hour commercial or frequent recreational use. A properly maintained 2-stroke can be very reliable, but 4-strokes are typically engineered to achieve higher total operating hours.
Are 2-stroke outboards more powerful than 4-strokes?
A 2-stroke engine has a better power-to-weight ratio, meaning it delivers more power for its size and provides faster, ‘snappier’ acceleration. This makes it feel more powerful, especially when getting a light boat on plane. A 4-stroke of the same horsepower rating will produce the same peak power but delivers it more smoothly and is better at handling sustained loads on heavier boats.
Do 4-stroke outboards use less fuel?
SÌ, 4-stroke outboards are significantly more fuel-efficient than traditional 2-stroke models. Their combustion process is more complete, wasting less fuel and providing longer range from the same tank of gas. This advantage is most noticeable at trolling and cruising speeds. Modern direct-injection 2-strokes have improved efficiency, but 4-strokes still generally lead in fuel economy.
What are the main disadvantages of a 2-stroke outboard?
Compared to 4-strokes, the primary disadvantages of traditional 2-stroke outboards are higher fuel and oil consumption, louder and rougher operation, and higher emissions that can restrict their use on certain lakes and waterways. They also tend to have a shorter overall lifespan and may have a lower resale value.
For distributors looking to grow their business, choosing the right petrol lawn mower supplier is often about more than adding one more product. It is about finding a supplier that can support category expansion, match existing customer demand, and make long-term cooperation possible. That was exactly the case with one of NEWTOP’s customers in Lithuania.
The customer first contacted us with an inquiry for decespugliatori. During the communication, Tuttavia, it became clear that the business also had demand for lawn mowers. The goal was not to replace its original product direction, but to continue serving the existing customer base while adding small garden machinery as a new business line. After a long period of communication on product details and pricing, the customer finally placed the order.
One Inquiry Opened Up a Broader Product Opportunity
In B2B export business, the first inquiry does not always reveal the full opportunity. A buyer may begin by asking about one product, but the real value often appears during deeper communication.
That was the turning point in this case. The discussion started with brush cutters, yet as the communication continued, the customer’s lawn mower demand became clearer. This made the cooperation more meaningful, because it was no longer just about quoting one machine. It became a discussion about category expansion and how to support the customer’s next stage of business growth.
For suppliers, this kind of shift matters. A buyer looking for only one item may place a one-time order. A buyer preparing to add a new category is usually thinking more seriously about future sales and longer-term cooperation.
Why Lawn Mowers Matched the Customer’s Business Direction
Per molti distributori, adding lawn mowers is a practical move when they already serve customers in For distributors looking to grow their business, choosing the right petrol lawn mower supplier is often about more than adding one more product. It is about finding a supplier that can support a wider product range, match existing customer demand, and make expansion more practical. That was exactly the case with one of NEWTOP’s customers in Lithuania.
The customer first contacted us with an inquiry for brush cutters. As communication continued, Tuttavia, it became clear that lawn mowers were also part of the customer’s business plan. The goal was not to change the original customer base, but to keep serving it while adding small garden machinery as a new product line. After a long process of confirming product details and pricing, the customer placed the order.
A Wider Product Opportunity Behind the First Inquiry
In B2B export business, the first inquiry does not always show the full opportunity. A buyer may begin with one machine category, while the more important demand only becomes clear later.
That is what happened in this case. The original brush cutter inquiry opened the conversation, but the more valuable discussion turned out to be about lawn mowers. Once that need became clearer, the cooperation was no longer just about quoting a single product. It became a discussion about how to add a new category in a way that made sense for the customer’s existing business.
For suppliers, that kind of shift matters. A customer asking about one item may be making a simple purchase. A customer thinking about category expansion is usually looking at the business more strategically.
Why Lawn Mowers Fit the Customer’s Existing Business
What made this case practical was the customer’s growth logic. The business was not trying to build a new market from zero. Invece, it was working from an existing customer base and looking for a suitable way to broaden the product offering.
That made lawn mowers a natural fit. Rather than introducing a random category, the customer was adding a product line that could sit alongside the existing business and create more value from the same market relationships. Per molti distributori, this is one of the most realistic ways to grow. It reduces risk, makes sales planning easier, and allows the company to expand without abandoning what already works.
This is also why choosing the right petrol lawn mower supplier matters. The decision is not only about the product itself. It is about whether the new category can be introduced smoothly and supported properly from the start.
Why the Order Took Time to Confirm
This order did not move quickly from inquiry to confirmation, and that is not unusual when a buyer is adding a new category. In cases like this, time is often needed because the customer is not simply testing one machine. The buyer is judging whether the product can become part of a workable business structure.
Several points needed to be aligned before the order could move forward:
- product details
- prezzi
- suitability for the customer’s market
- the practicality of future cooperation
That kind of longer communication usually means the customer is taking the decision seriously. A distributor adding lawn mowers to an existing business has to think beyond the first order. The product needs to make sense in resale, fit the local market, and work within the company’s broader product plan.
What Buyers Usually Compare in This Type of Cooperation
When a distributor evaluates a new supplier, the decision is rarely based on price alone. A more practical comparison often looks like this:
| What the Buyer Compares | Perché è importante |
|---|---|
| Product details | Helps confirm whether the mower fits local market demand |
| Price level | Determines whether resale remains commercially workable |
| Communication efficiency | Shows whether cooperation can move smoothly |
| Long-term support potential | Matters if the buyer wants to expand the product line later |
In this case, those were exactly the issues that required time to confirm. Once the details and pricing were aligned, the order became much easier to finalize.
Why This Type of Expansion Matters
One of the most meaningful parts of this customer story is that the expansion came from the existing market, not from a completely new direction. That makes the case more practical and more typical of how real dealers often grow.
Many importers do not expand by jumping into unfamiliar categories all at once. They grow by adding related products that fit the customers they already serve. In outdoor power equipment and small garden machinery, this kind of step-by-step expansion is often more sustainable than trying to build a new segment from zero.
For a supplier, that is an important reminder. The first product a customer asks about may not be the full opportunity. Sometimes the real value appears only after the conversation develops and the buyer’s broader business plan becomes clearer.
NEWTOP’s Role in the Cooperation
Per NEWTOP, this case was not simply about responding to a brush cutter inquiry. It became an opportunity to understand the customer’s wider business direction and support a more suitable product path.
That is where a dependable petrol lawn mower supplier adds real value. The role is not limited to sending quotations. It also includes helping the buyer confirm product fit, align on details, and move toward an order that works commercially. In longer communication cycles, that kind of support often matters just as much as the product itself.
So what does a case like this really show?
It shows that customer demand often becomes clearer during communication, not only in the first inquiry. A buyer may begin with one product, but the more important opportunity may turn out to be a new category that fits the same customer base and supports broader business growth.
It also shows that serious orders often take time. When a distributor is adding a new business line, detailed discussion on product details and pricing is part of the process. Once those points are aligned, the order becomes much easier to confirm.
Per NEWTOP, this customer story reflects how real B2B cooperation often develops. A single inquiry can lead to a broader product discussion, and a buyer looking for one machine category today may become a longer-term partner across more small garden machinery lines tomorrow. That is why choosing the right petrol lawn mower supplier is not only about today’s order. It is also about building the right foundation for future growth.
