


- 모두
- NEWTOP 고객 사례
- NEWTOP 익스플로러 허브
- NEWTOP 산업 통찰
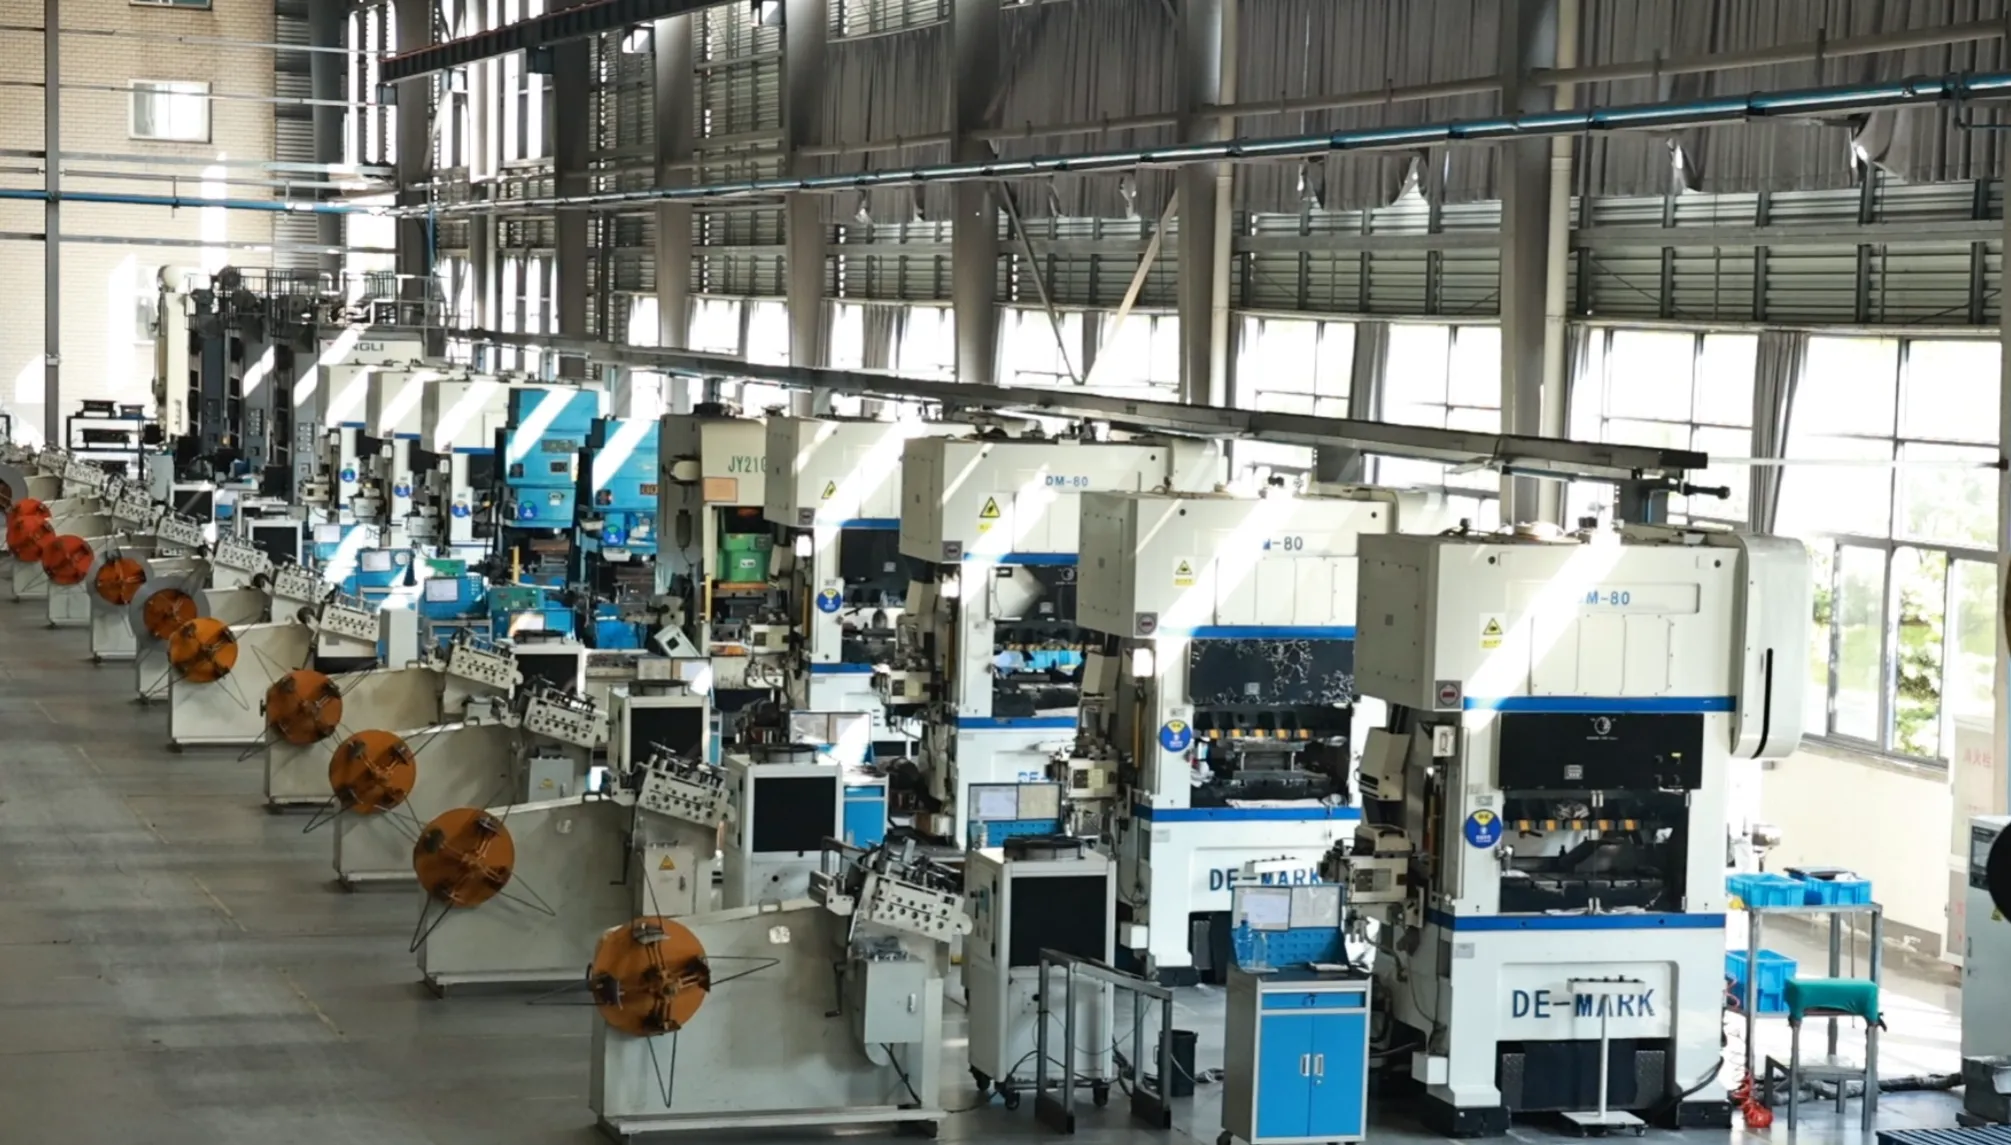
Every sourcing trip produces the same folder: a business license, a catalog, a list of certificates, and a quotation that looks ten percent better than the last one. None of it tells you whether the company on the other end actually manufactures what you are about to buy. This guide walks through the verification process experienced importers run before placing a bulk order with outdoor power equipment manufacturers in China — five steps, in the order that catches the most problems cheapest.
The stakes are lopsided. Verification costs days and a few hundred dollars; skipping it risks a container of machines that cannot clear your market’s paperwork, a factory that disappears between the deposit and the shipment, or a “manufacturer” that was brokering from three different workshops the whole time.
Know Who You Are Actually Talking To
The first distinction is not factory versus fraud — it is factory versus trading company, and neither is automatically wrong. A trading company can consolidate SKUs, handle communication smoothly, and consolidate several small workshops into one container. The problem is misrepresentation: paying a trading margin while believing you have factory pricing, factory engineering, and factory accountability.
China’s business license states the registered business scope. A manufacturer’s scope includes production activities — manufacturing, processing — while a pure trader lists wholesale, import, and export. Ask for the license early, read the scope, and cross-check the registered company name against everything that follows: the certificates, the audit report, the bank account. If the certificate says Company A and the quotation says Company B, you have found your first answer before any travel.
단계 1 — Verify the Business License and Export Track Record
With the license in hand, three checks take an afternoon. 첫 번째, the registration itself: company name, legal representative, scope, and how long the entity has existed. A company registered last year presenting itself as an established factory is not automatically disqualified, but it changes the questions you ask next. 두번째, export history: customs data services can show which markets the company actually ships to and at what volumes, which is harder to fake than a reference list. 제삼, market presence: a manufacturer that claims Africa and Latin America as core markets should be able to name exhibitions attended, distributors served, and models adapted for those markets — generically “we export worldwide” is not an answer.
단계 2 — Audit the Factory On-Site or Through a Third Party
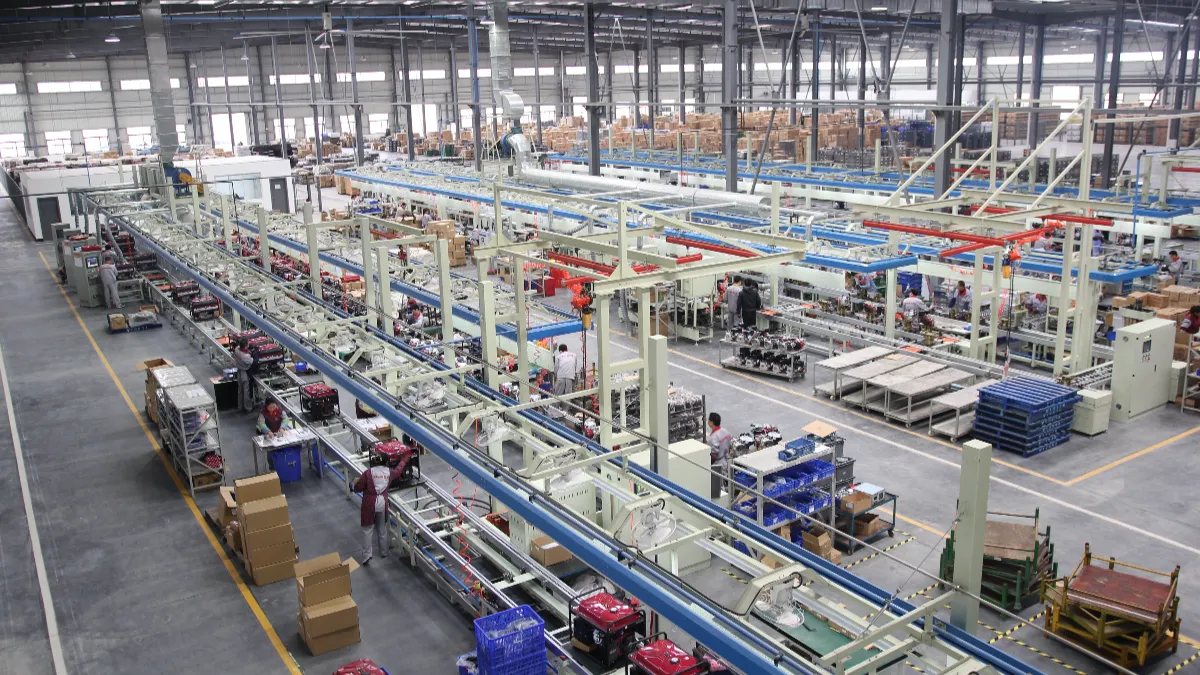
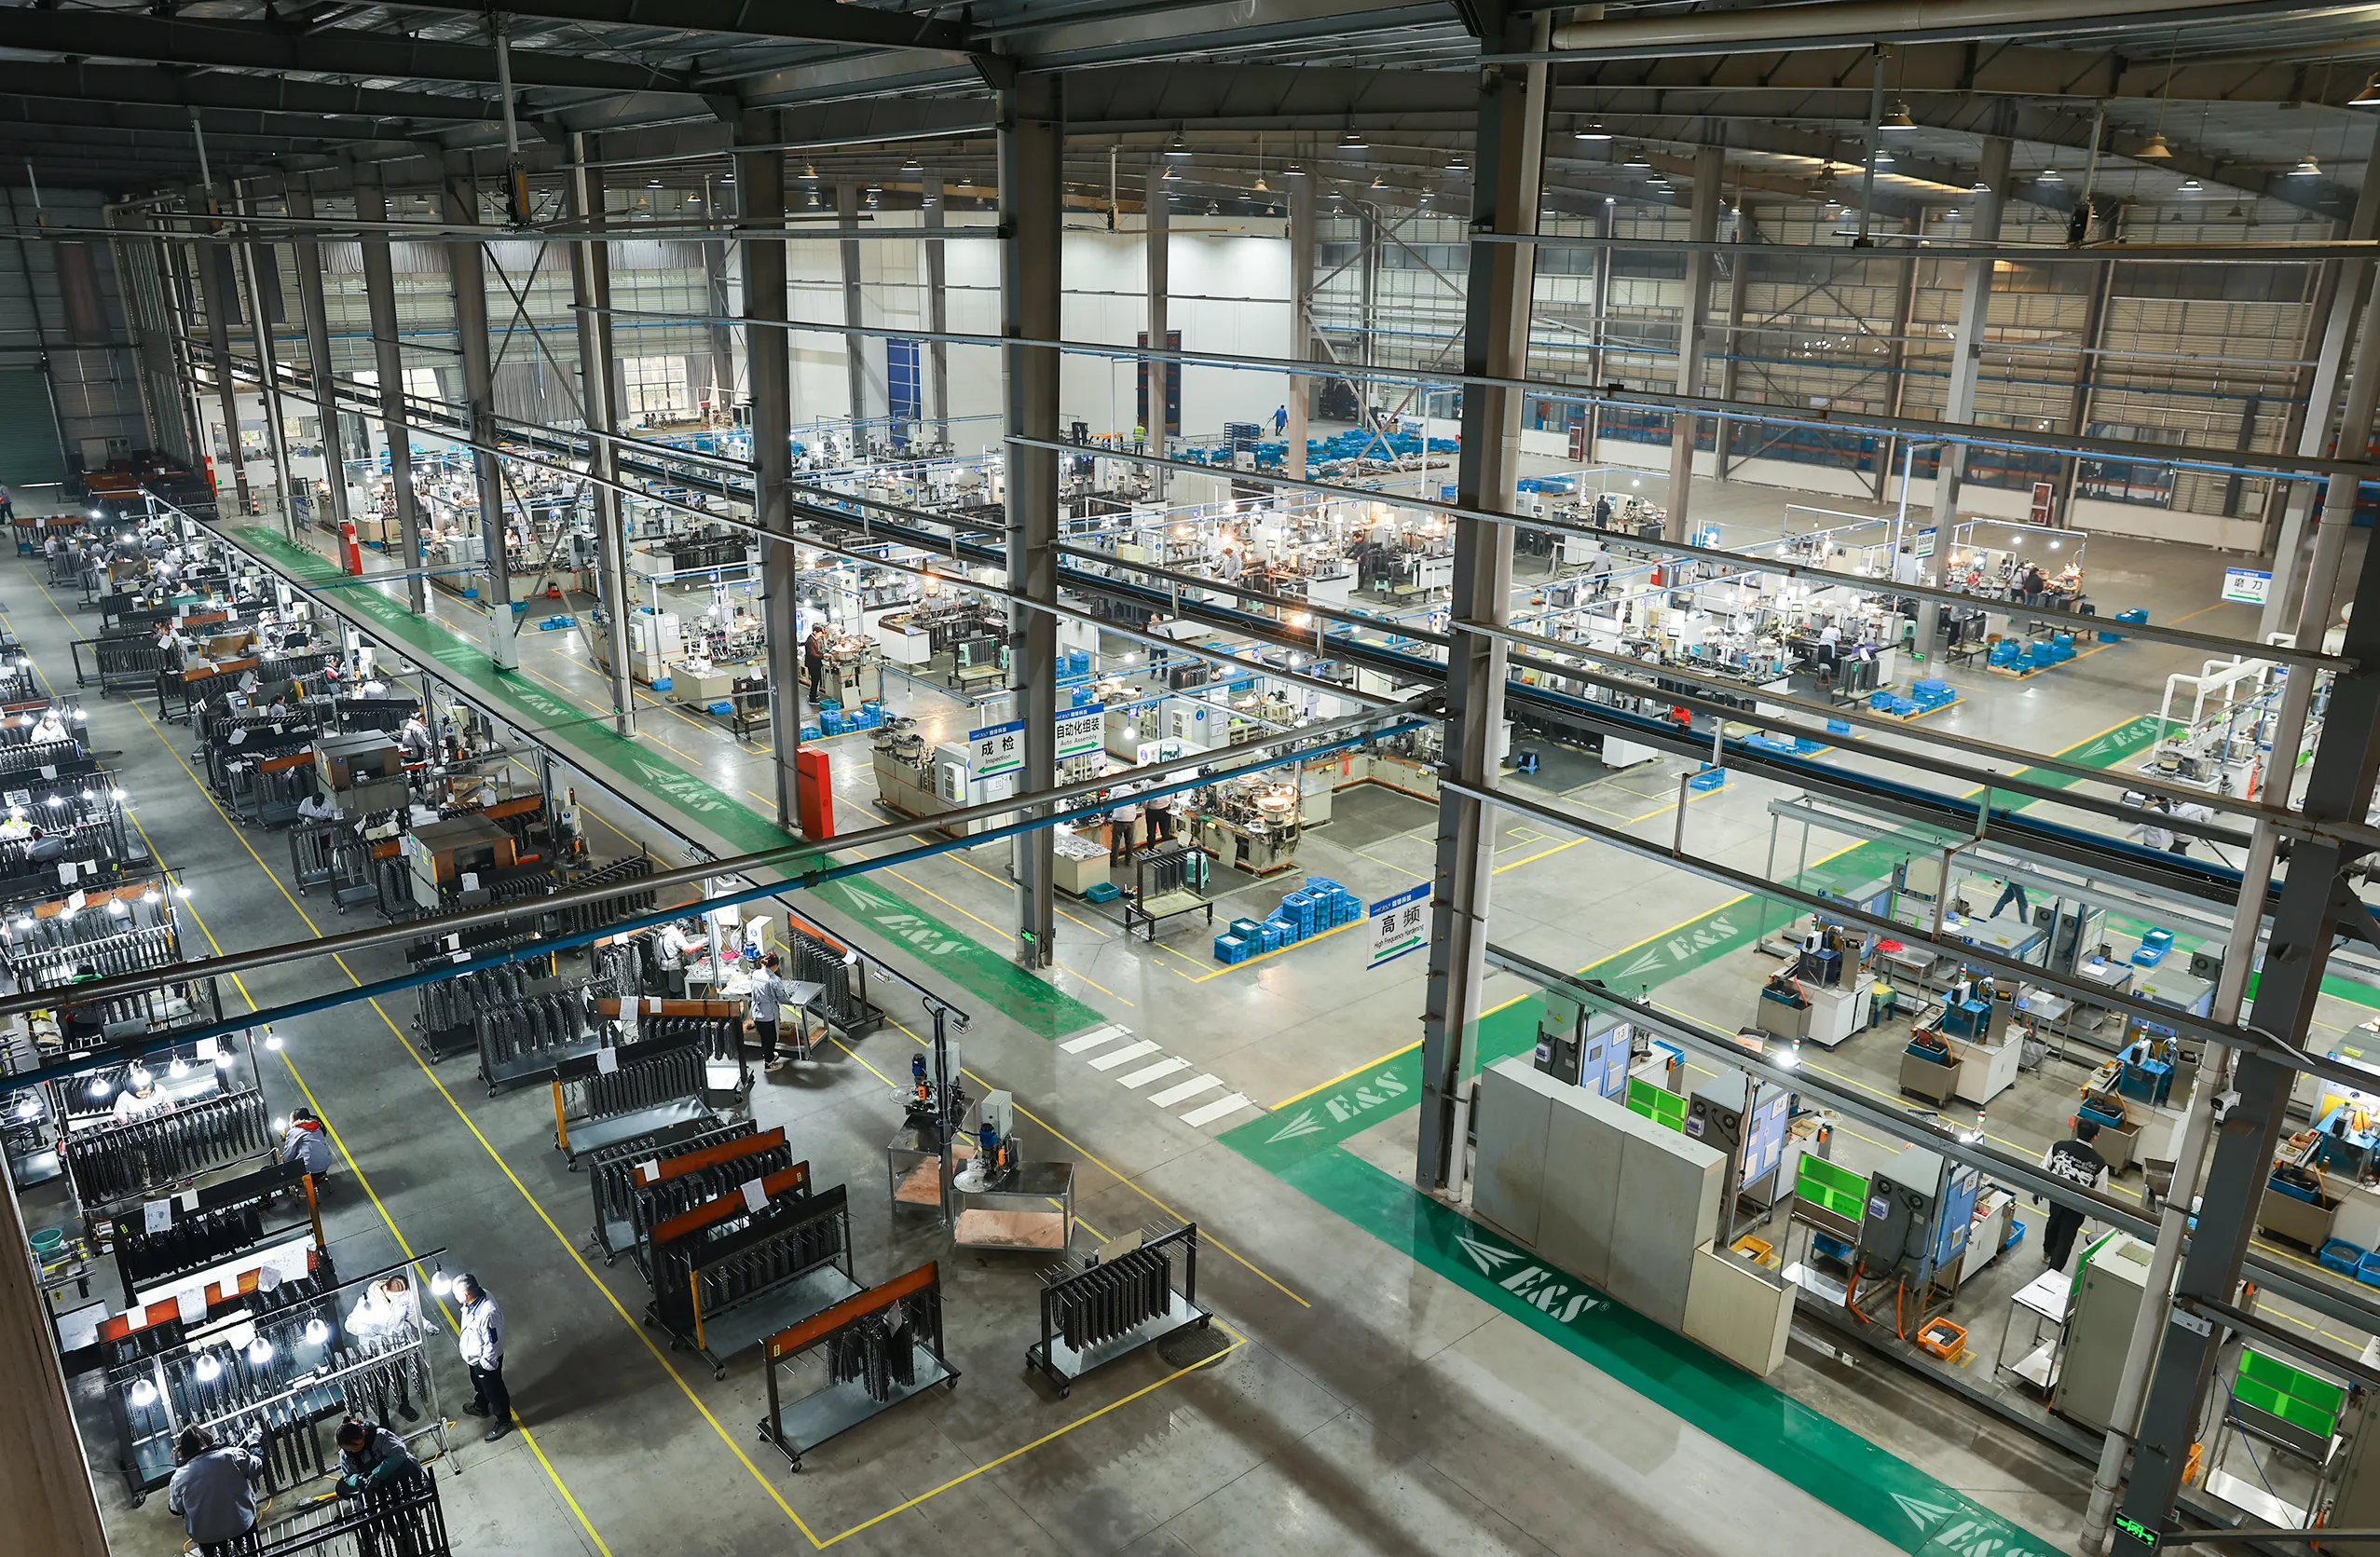
An audit is where catalog claims meet production reality. Whether you walk the floor yourself or hire a third-party inspection firm for a one-day audit, the checklist is the same, and it reads very differently from a sales visit. You are looking for evidence of manufacturing depth, not just activity.
- Assembly lines actually running — not a showroom line staged for visitors. Ask to see the line for the specific model family you are buying.
- In-house capability where it matters — machining centers, plastic injection, or winding shops indicate a factory that controls its own quality instead of assembling purchased kits.
- Testing stations — engine test benches, brake test rigs, and final inspection stations. A factory without testing equipment is shipping whatever its suppliers ship.
- Warehouse and production flow — work in progress on the floor, finished goods staged for real orders, and traceability between batches and inspections.
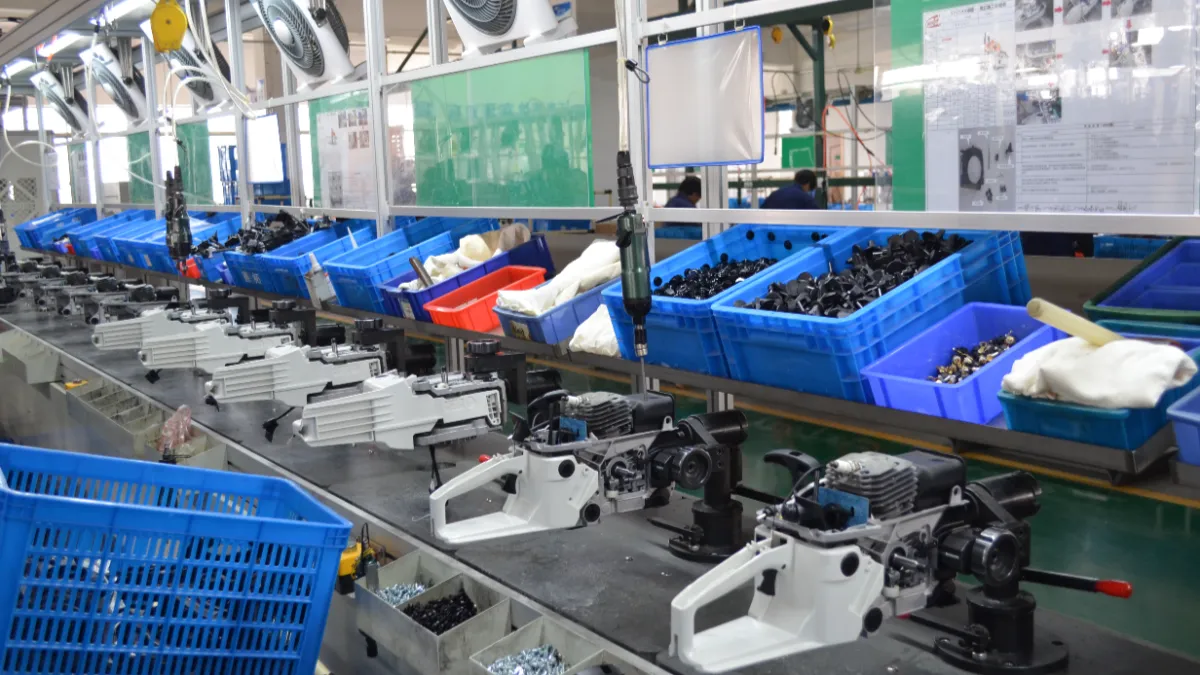
When travel is not an option, a live video audit is a workable substitute if you control the camera: ask for an unscheduled video call, walk the production line for your model, and have the host open testing stations and the warehouse on camera. What a supplier refuses to show on video usually matches what an auditor would find on site.
단계 3 — Verify Certificates Against the Models You Are Buying
Certificate verification deserves its own step because borrowed paperwork is the most common failure in this industry. The compact version of the check: request the Declaration of Conformity and the certificate for your exact model, look the certificate number up in the issuing body’s public database, confirm the model list on the certificate includes your SKU and engine configuration, and check the validity dates. A genuine certificate survives all four; a borrowed one usually fails at the model match, because factories legitimately hold certificates for their best-selling configurations and let the halo extend to everything in the catalog.
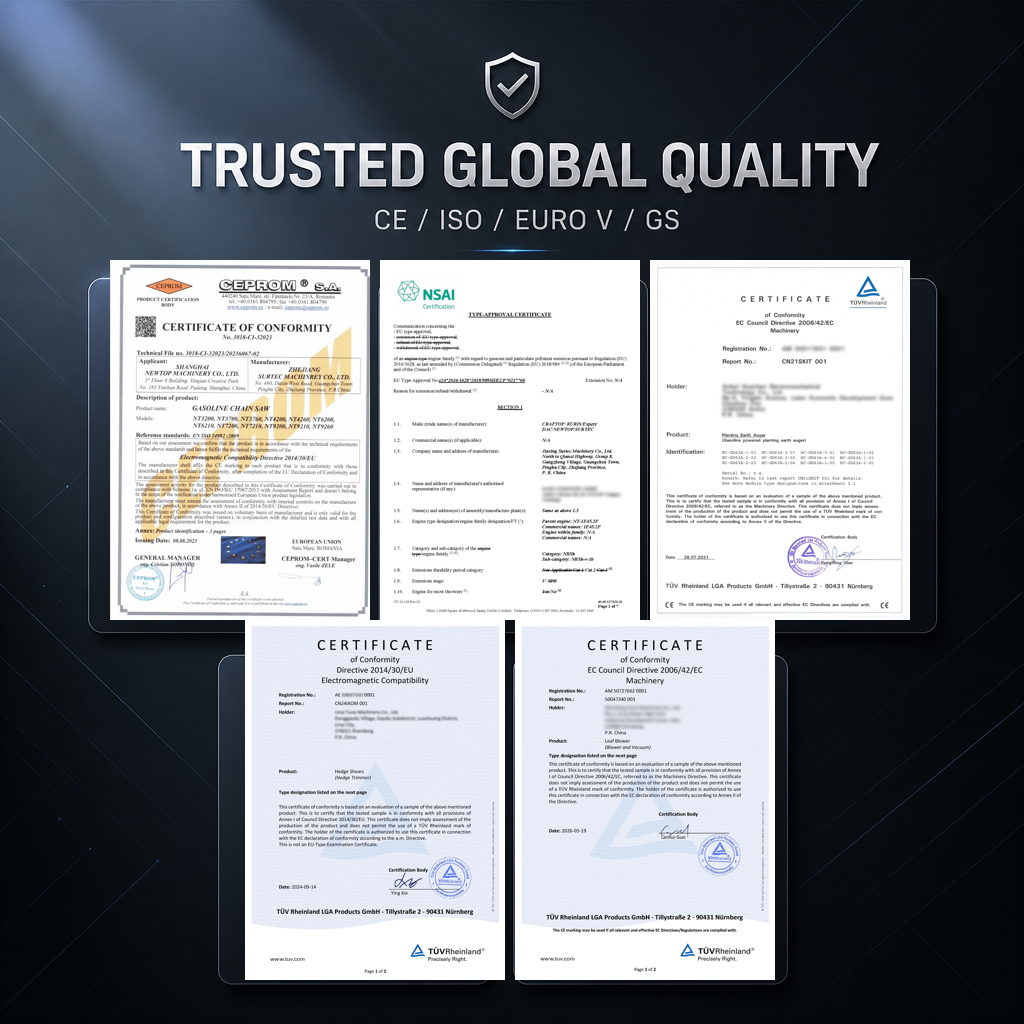
A transparent OPE manufacturer makes this step easy — publishing its portfolio, naming testing bodies, and supplying test report summaries without argument. You can see what that looks like on our certificates and patents page.
단계 4 — Test Samples From the Production Line, Not the Showroom
Showroom samples are chosen; production samples are representative. When you request samples before a bulk order, ask that they be pulled from the current production run of your model — same engine, same configuration, same packaging — and test them against a written protocol: cold start behavior, full-throttle stability, safety features such as chain brake and throttle lockout, vibration, and packaging drop tests for the export carton. A supplier confident in its production line agrees to production-pull samples without negotiation, because for a real manufacturer the sample and the container are the same product.
단계 5 — Check References and Repeat-Buyer Behavior
The final step reads the supplier’s history through other people’s orders. Ask for references in your own market or an adjacent one and actually call them — two conversations will tell you more about reorder behavior, after-sales response, and problem handling than any audit. Ask the supplier directly what share of its orders are repeat business; a factory living on new customers is telling you something. And when a factory volunteers its partner relationships openly — as we do in our article on how NEWTOP earns customer trust through quality and service — that transparency is itself a signal worth weighing.
Red Flags: When to Slow Down or Walk Away
| Red flag | Why it matters |
|---|---|
| Price far below every comparable quotation | Something is missing from the build or the paperwork — usually both |
| Refuses a video audit or third-party inspection | Legitimate factories host audits routinely; refusal is an answer |
| License scope, certificate owner, and bank account name differ | You do not know who you are contracting with — or who holds the certificates |
| Certificates never in the company’s own name | Borrowed compliance — the certificates cover someone else’s models |
| No testing equipment on the floor | Quality is whatever the parts suppliers shipped that week |
| Fast sample, vague production answers | The sample may come from a workshop that will not build your order |
| Payment only to a personal account | No corporate accountability and no recourse if the order fails |
| No answer on spare parts supply | After-sales is where machines earn their reputation — and reorders |
What a Verified Outdoor Power Equipment Manufacturer Looks Like
Run the five steps on a real factory and a consistent picture appears: one legal entity whose name matches the license, the certificates, and the bank account; production lines for its own model families with machining depth behind them; testing stations in active use; a public certificate portfolio; and export history in the markets it claims. That is what we built our verification around at 뉴탑 — manufacturing outdoor power equipment since 2003, with CE, GS, EPA, ETL, and ISO 9001 certification across our lines and a documented quality control process behind every shipment. 우리의 company profile and factory walkthroughs are open to any buyer running this process on us.
For a closer look at how the machines themselves come together, our guide to how chainsaws are manufactured walks through the production stages an audit should examine.
자주 묻는 질문
Is buying from a trading company always a mistake?
No — trading companies can consolidate SKUs and handle communication well. The risk is paying factory prices for trader margins without factory accountability. What matters is that the party you pay owns the quality outcome and says so in the contract.
How long does a factory audit take?
A focused one-day audit covers the essentials: lines running, testing stations, warehouse, and the document trail. Third-party firms typically need about a week of scheduling lead time; a controlled video audit can happen within days when travel is not an option.
What does a factory audit cost?
Third-party factory audits in China commonly run in the low hundreds of US dollars per person-day, depending on scope and travel. Against a container commitment, it is one of the cheapest risk controls you can buy.
Can I verify a manufacturer remotely?
예. Combine an unscheduled live video walkthrough of the production line, license and certificate number lookups, customs export records, and reference calls with buyers in your market. Remote verification catches most problems; on-site audits add depth for large programs.
What documents should a verified supplier provide with the first order?
At minimum: the signed Declaration of Conformity and test report summaries for your models, a business license copy, the pre-shipment inspection report, and packing documentation matching your order. Request them at the RFQ stage so they are commitments, not favors.
Verification is not distrust — it is how serious buyers and serious manufacturers find each other. A factory that passes these five steps will usually say so with documents, an open production floor, and references that answer the phone.
Running this process now? Explore the NEWTOP product range, request our certificates and factory audit package, or talk to our team about distribution for your market — we will send the documents before you ask twice.
A distributor in Chile and a buyer in Germany can look at the identical chainsaw and need two completely different sets of paperwork. That single mismatch explains most of the certification questions we receive: not “is this machine certified?” but “certified for whom?” This guide compares the four marks that dominate outdoor power equipment trade — CE, GS, EPA, and ETL — and maps each one to the markets and product types where it actually decides whether your order moves.
The short version: CE is the legal baseline for Europe, GS is the retail credibility layer on top of it, EPA is the emissions gate for gasoline engines into the United States, and ETL covers electrical safety for battery and corded equipment in North America. Everything else in this article is detail — but the detail is where importers either save a certification cycle or lose a season.
The Four Marks at a Glance
Before the market-by-market detail, here is what each mark actually is — because the four are routinely confused, and the confusion is expensive.
| 표시 | Region | What it covers | Legal status | Who issues it |
|---|---|---|---|---|
| CE | EU / EEA | Machinery safety, EMC, outdoor noise | Mandatory by law | Manufacturer self-declaration; notified body for some routes |
| GS | 독일 / EU retail | Product safety, independently tested | Voluntary, expected by retail channels | Testing houses such as TÜV |
| EPA | 미국 | Spark-ignition engine emissions | Mandatory by law | US EPA certificate of conformity |
| ETL | 북아메리카 | Electrical safety to UL/CSA standards | Voluntary, required by most channels | Intertek testing laboratories |
CE Marking: The Legal Baseline Across Europe
CE marking is the manufacturer’s declaration that a product meets the applicable EU directives, and for chainsaws, 예초기, 잔디 깎는 기계, and similar machines it is the law of the market, not a preference. 그만큼 European Commission’s CE marking page sets out the framework. For this product category, three directive families carry the weight: the Machinery Directive for mechanical safety, the Outdoor Noise Directive 2000/14/EC for guaranteed sound power levels on equipment used outdoors, and the EMC Directive for electromagnetic behavior — the last one especially relevant as battery platforms multiply.
The practical point for buyers comparing CE against the other three marks: CE is the only one on this list that is a market-access requirement across an entire economic bloc. If your destination is the EU and the machine is missing a genuine CE technical file, the conversation ends there — the other marks cannot substitute for it.

GS Mark: The Retail Layer in German-Speaking Markets
GS (Geprüfte Sicherheit, “tested safety”) is voluntary in law and close to mandatory in practice for garden machinery sold through German and Austrian retail. The mark signals that an independent testing house — TÜV being the best known — has tested the machine against the German Product Safety Act, and its GS mark overview explains the route. Three traits separate GS from CE in a buyer’s comparison: it is issued per model, it expires and requires ongoing factory audits, and it sits on top of CE rather than replacing it.
If your channel plan runs through DIY chains or builder’s merchants in the DACH region, ask for the GS certificate number at the RFQ stage. If your plan is to sell through independent dealers in Spain or Poland, GS moves from requirement to sales argument — worth having, not worth delaying a container for.
EPA Certification: The Gate for Gasoline Engines Into the United States
EPA is the odd one out in this comparison because it regulates the engine, not the machine. Any gasoline-powered equipment destined for US sale — chainsaws, 예초기, 발전기, water pumps — must use engines certified under the EPA’s nonroad spark-ignition rules, codified in 40 CFR Part 1054. Unlike CE, this is not self-declaration: the engine family carries a certificate of conformity, and the engine wears an emission compliance label that ties the physical unit to that certificate.
The comparison that matters here is lead time. A supplier whose engines already sit inside a certified family ships on production schedules. A supplier that must certify a new engine family for your order is signing up for laboratory testing and agency review measured in months. Two quotations for the “same” brush cutter can legitimately differ by six weeks for this reason alone.
ETL: Electrical Safety for Battery and Corded Lines in North America
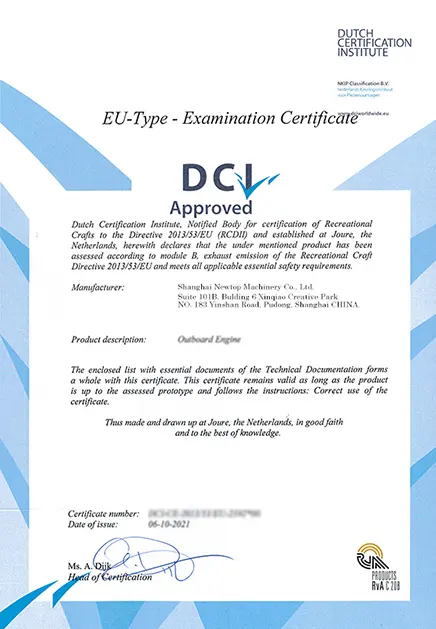
Battery sprayers, corded mowers, electric hedge trimmers, pressure washers — anything electrical sold in the United States or Canada is expected to demonstrate compliance with UL or CSA safety standards. The ETL Listed mark, issued by Intertek, is one of the two marks North American buyers accept for this, with equal standing to UL in law and practice. Retail chains and e-commerce platforms check for one or the other before listing an electrical product.
Two comparison notes buyers get wrong. 첫 번째, EPA and ETL answer different questions — EPA governs the gasoline engine, ETL governs the electrical system — so a battery line never needs EPA and a gasoline line never needs ETL. 두번째, the certification covers the complete configuration: machine, battery pack, and charger. A mark on the tool alone does not cover a third-party charger bundled into your kit.
Which Certification Should You Require? A Market Decision Matrix
Put the four marks against real destinations and product types, and the answer to “which one matters” becomes mechanical rather than a matter of opinion.
| Your market | Product line | Require at minimum | Strongly consider |
|---|---|---|---|
| EU / EEA | Gasoline or battery equipment | CE (Machinery + 소음 + EMC as applicable) | GS for DACH retail |
| 독일 / Austria retail | Garden machinery | CE + GS | — |
| 미국 | Gasoline equipment | EPA-certified engine family | CARB confirmation for California |
| US / Canada | Battery or corded equipment | ETL or UL | CE baseline for product credibility |
| 브라질 | Gasoline equipment | Confirm scope with customs broker; engine documentation | CE baseline; INMETRO where in scope |
| Middle East / 아프리카 / rest of LATAM | Gasoline equipment | Destination-specific confirmation | CE baseline — dealer and tender expectations |
One row deserves emphasis: for most Latin American, African, and Middle Eastern destinations there is no single binding mark for gasoline garden machinery, and CE documentation has become the de facto quality baseline that dealers and institutional buyers use to compare suppliers. We cover the country-level import requirements — Brazil, Mexico, 콜롬비아, Chile, 페루, and more — in a separate import regulations guide.
Four Confusions That Cost Importers Money
- CE is not a quality award. It is a legal declaration backed by a technical file. Comparing two suppliers on “both have CE” compares nothing — compare the certificate scope, the cited standard versions, and whether a test report sits behind the declaration.
- EPA belongs to the engine, not the machine. A certified engine inside a modified or different machine configuration does not automatically transfer compliance. Ask which engine family your configuration ships with.
- ETL and UL are interchangeable for channel purposes. North American buyers who demand one and refuse the other are imposing a preference, not a rule. Both demonstrate compliance with the same UL/CSA standards.
- GS never replaces CE. For the EU market, a GS-certified machine still needs the full CE route. GS adds independent testing on top; it does not subtract the baseline.
How NEWTOP Combines These Marks Across Product Lines
We manufacture gasoline and battery-powered outdoor equipment under the NEWTOP and CRAFTOP brands and hold CE, GS, EPA, ETL, and ISO 9001 certification across our chainsaw, 예초기, sprayer, water pump, and generator lines. In practice that means a European distributor orders against CE documentation with GS available for retail programs, a US buyer orders against EPA-certified engine families, and a battery program carries ETL for North American channels — each with the Declaration of Conformity and test report summaries available per model. The current portfolio is public on our certificates and patents page.
자주 묻는 질문
Is CE marking accepted in the United Kingdom?
For most product categories the UK continues to accept CE marking, while UKCA is the separate UK regime. The rules and deadlines have been extended several times, so confirm the current position for your specific category on GOV.UK before shipping.
Can one machine carry CE, GS, and EPA at the same time?
예. The marks cover different regimes — EU safety, German retail testing, US emissions — so a single model can legitimately carry several. What matters is that each certificate covers your exact model and destination configuration.
Does GS certification replace CE marking?
아니요. GS sits on top of CE for the EU market — a GS-certified machine still needs the full CE conformity route. GS adds independent third-party testing that many German and Austrian retail channels expect; treat it as a channel requirement, not an alternative.
Is EPA certification needed for battery-powered equipment?
아니요. EPA emission rules apply to spark-ignition engines, so battery and corded electric machines sit outside its scope. For those lines the North American question is electrical safety — ETL or UL certification instead.
Which certification do Latin American buyers ask for most?
CE, as a quality baseline, because most gasoline-powered lines in the region have no single unified mark of their own. The binding requirements are set per country, so confirm the destination rules for your specific market before ordering.
Certification comparison is not paperwork trivia — it is market selection. Match the mark to the destination and the product line before you request quotations, and the certificates become a filter that removes the wrong suppliers in the first email instead of a problem discovered at the port.
Building a line for a specific market? Browse the NEWTOP product range or talk to our team about which certification combinations fit your destination country — and if you are setting up distribution, 우리의 distributor program includes documentation support for your market entry.
A container of outdoor power equipment can be built to spec, packed correctly, and still fail before it earns a single sale. The reason is usually paperwork: the destination market required a certification the buyer never asked for, or the supplier handed over a certificate that turns out to cover a different model. This guide walks through the certifications that matter most when importing chainsaws, 예초기, 분무기, 물 펌프, 발전기, and lawn mowers from China, and shows you how to check that the documents in front of you are real.
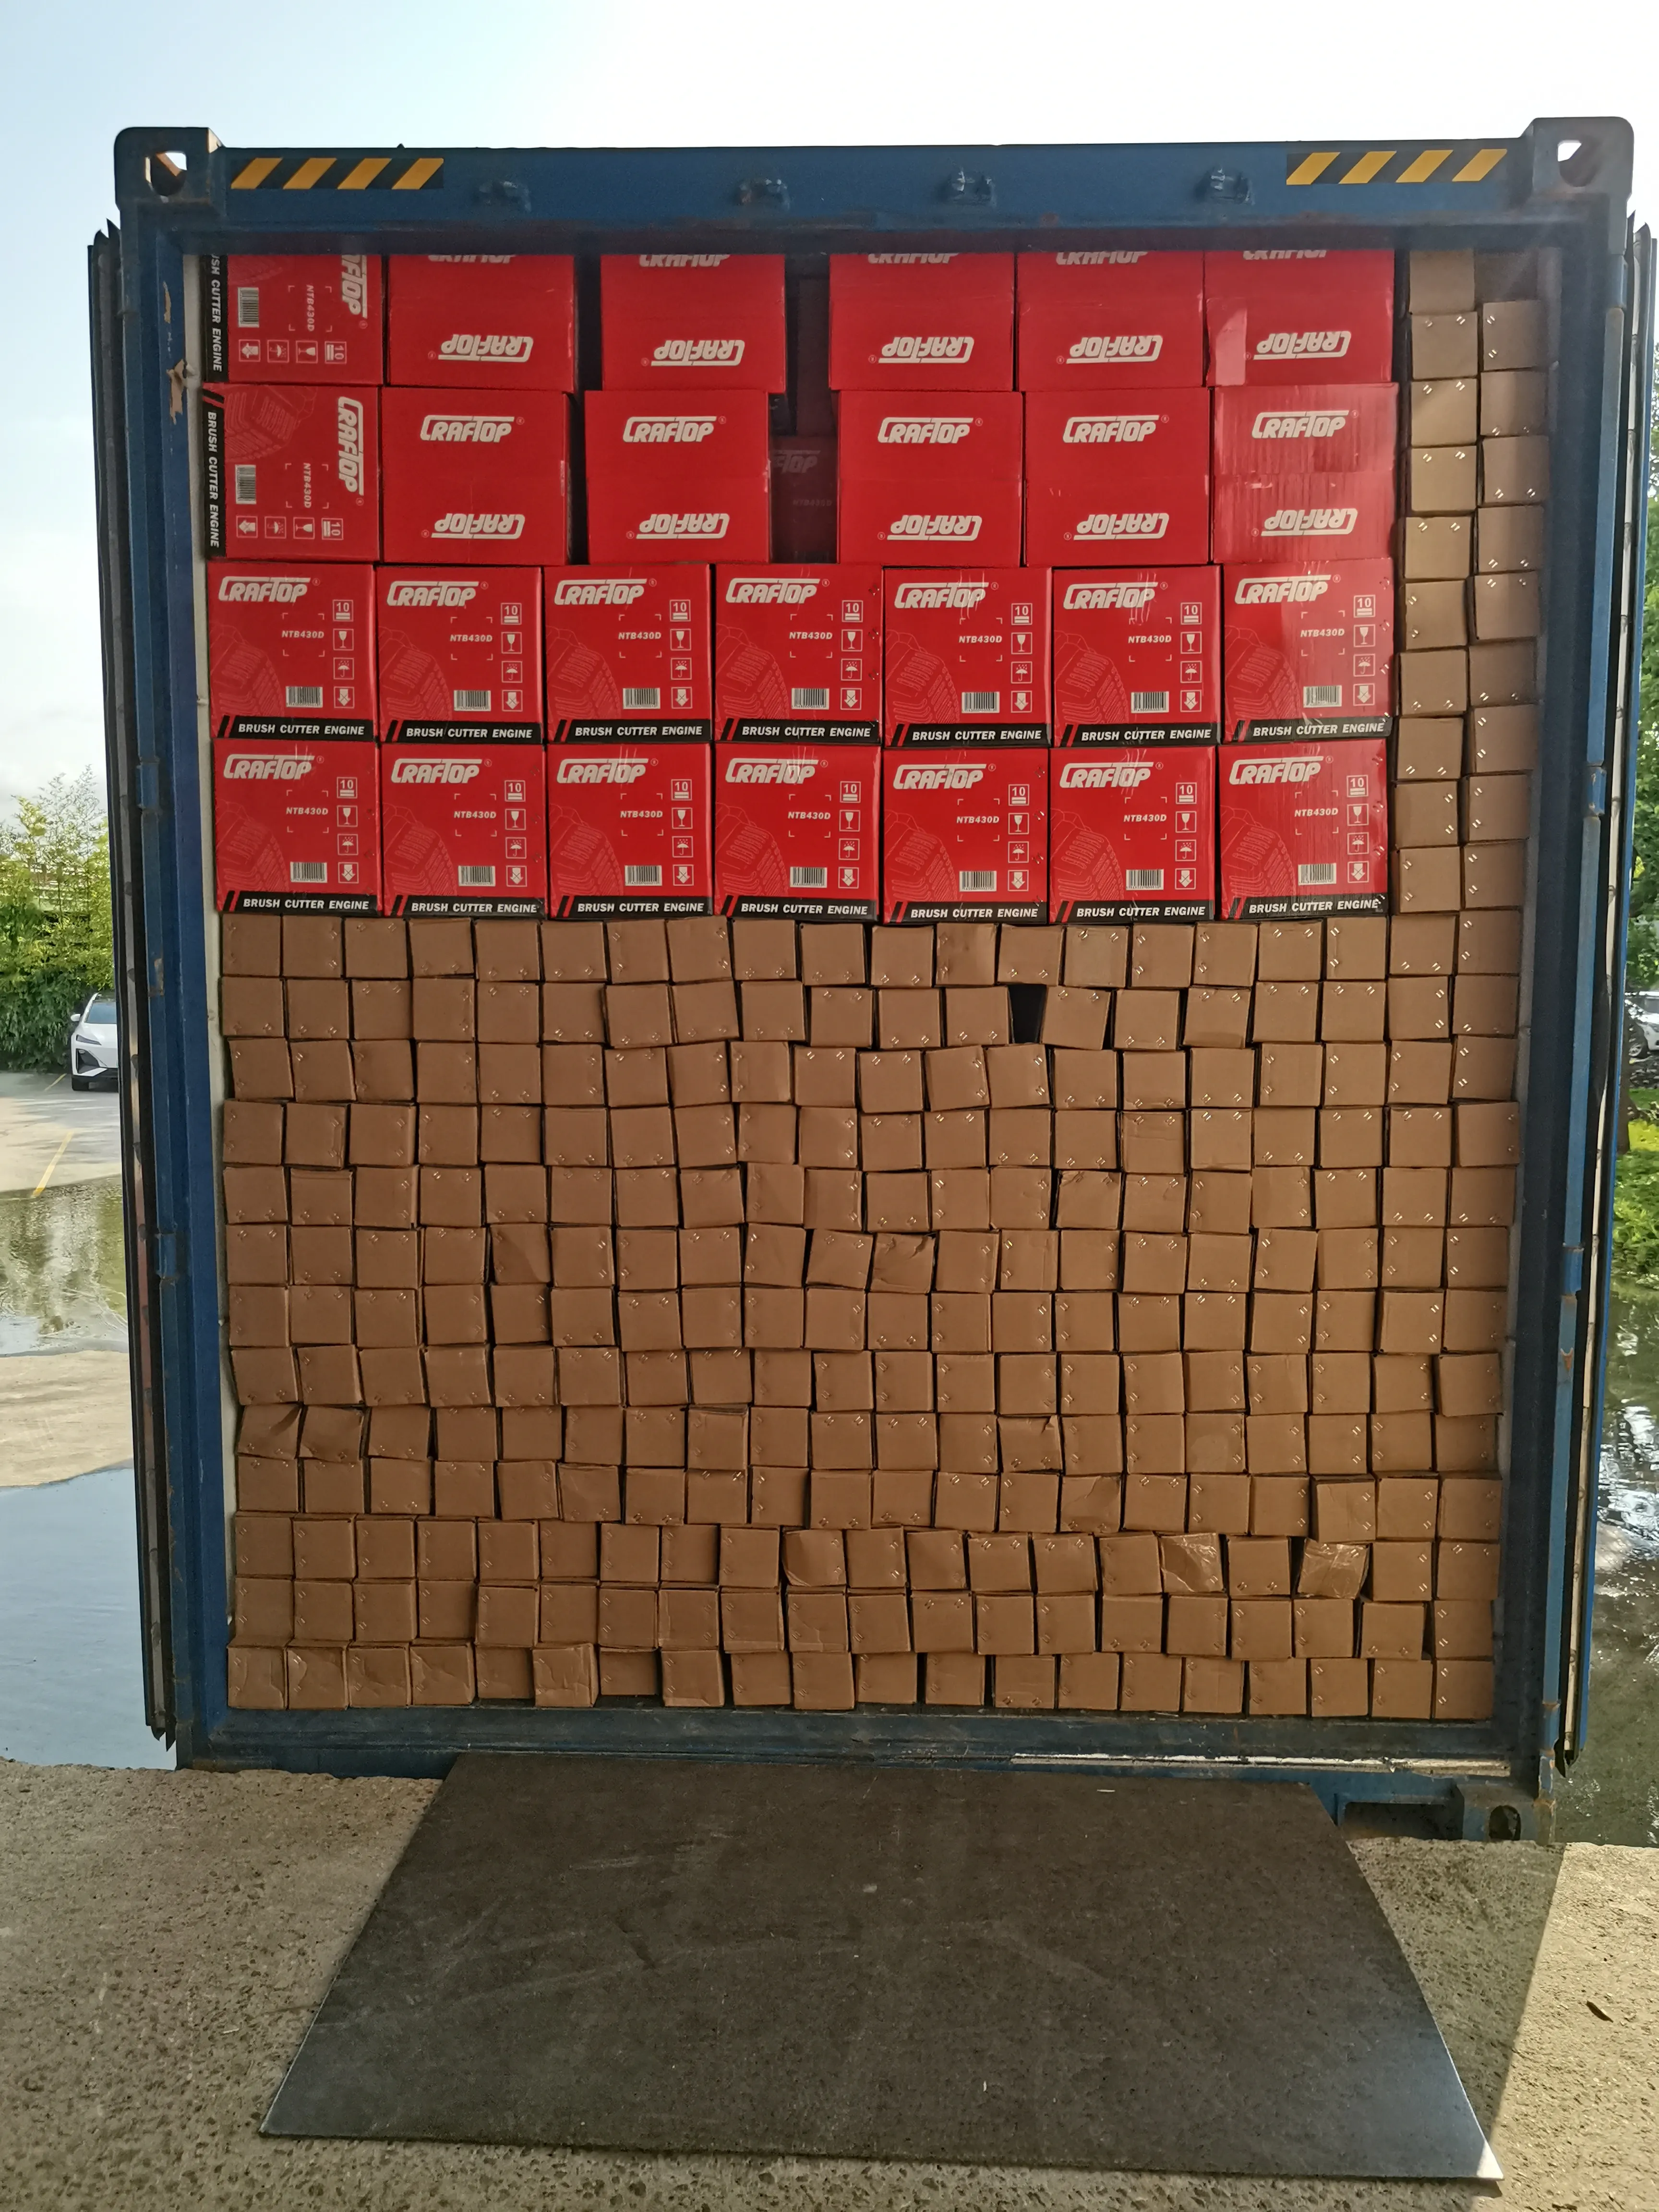
~에 뉴탑, we manufacture gasoline and battery-powered outdoor equipment under the NEWTOP and CRAFTOP brands and hold CE, GS, EPA, ETL, and ISO 9001 certification across our product lines. The table below reflects the questions distributors in Europe, the United States, 라틴 아메리카, and Africa ask us most often before their first order.
Why Certifications Decide Whether Your Order Moves or Gets Stuck
Certification failures are expensive in three specific ways, and none of them are obvious from a quotation sheet.
Customs and market access. Regulated products without the required conformity documents can be held at the border, re-exported, or destroyed. In the EU, a machine without a Declaration of Conformity cannot legally be placed on the market. In the United States, a gasoline engine that has not gone through EPA certification cannot be imported for sale, and the restriction applies at the port, not at the dealership.
Retail and channel requirements. Even where the law does not force a mark, your customers might. Garden machinery sold through German DIY chains, 예를 들어, is routinely expected to carry the GS mark even though GS is technically voluntary. If your brand wants shelf space, the channel decides.
Liability. If an imported machine injures a user, investigators ask for the technical file first. A valid certificate backed by test reports is the difference between a defensible product and a company-level crisis. This is why experienced importers treat certificates as part of the product, not as marketing material attached to it.
The Certification Map: Which Markets Require What
The table below summarizes the certifications buyers ask us about most, what each one actually covers, and whether it is a legal requirement or a channel expectation in your target market.
| 인증 | Region | What it covers | Status |
|---|---|---|---|
| CE | EU / EEA | Machinery safety, EMC, noise labeling | Mandatory by law |
| GS | 독일 / EU retail | Product safety, tested by an independent body | Voluntary, expected by retail chains |
| EPA | 미국 | Spark-ignition engine emissions | Mandatory by law |
| ETL | 북아메리카 | Electrical safety to UL/CSA standards | Voluntary, required by many channels |
| INMETRO | 브라질 | Product conformity assessment | Depends on product scope |
| NOM | Mexico | Product safety and labeling | Depends on product scope |
| ISO 9001 | 글로벌 | Factory quality management system | Voluntary, supplier-screening signal |
One warning before the detail: certification requirements attach to the product as it is configured, not to the product category in the abstract. A battery-powered sprayer and a gasoline sprayer with the same tank size sit under different rule sets. Confirm the scope for the exact model you are ordering, not for the brochure category.
CE Marking: The Baseline for European and Many Export Orders
CE marking is not a quality award. It is the manufacturer’s legal declaration that a product meets the applicable EU directives, and it is required before most outdoor power equipment can be sold in the European Economic Area. You can read the official scope and rules on the European Commission’s CE marking page.
For the machines in this category, three directive families matter most:
- Machinery Directive 2006/42/EC — covers mechanical and functional safety of the machine itself, from guard design to control systems.
- Outdoor noise directive 2000/14/EC — sets noise limits for equipment used outdoors and requires the guaranteed sound power level to be labeled on the machine. 전기톱, 예초기, and lawn mowers all fall inside its scope.
- EMC Directive — applies to the electromagnetic behavior of machines, especially relevant for battery and electric models with electronic controls.
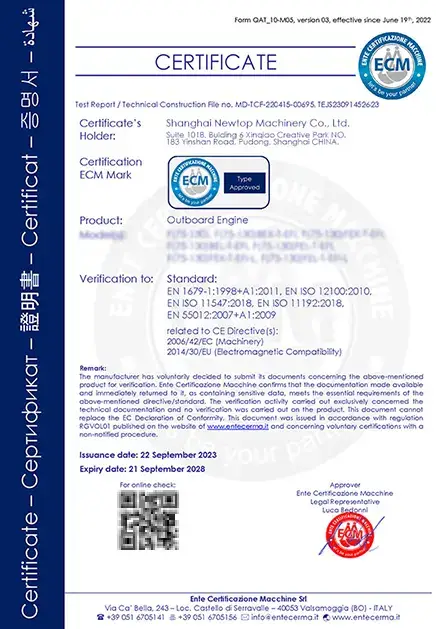
The mechanism surprises many first-time buyers: for most of this equipment, the manufacturer performs the conformity assessment, compiles the technical file, and issues the Declaration of Conformity itself. There is no Brussels sticker office. That is exactly why verification matters — a CE mark is only as honest as the technical file behind it, and section 9 of this guide shows you how to test that.
When you evaluate a supplier, ask two questions early. 첫 번째, which directive versions and standards does the current Declaration of Conformity cite? 두번째, does the certificate cover the exact engine and cutting-head configuration you are ordering? A certificate issued for a 2-stroke professional chainsaw does not quietly extend to a battery pole pruner built on a different platform.
GS Mark: What Retail Buyers in German-Speaking Markets Look For
The GS mark (Geprüfte Sicherheit, “tested safety”) is a voluntary German safety mark, but “voluntary” undersells it. 실제로, distributors selling garden machinery through retail chains and builder’s merchants in Germany and Austria treat GS as a de facto entry ticket, because the mark signals that an independent testing house — such as TÜV — has tested the machine against the German Product Safety Act. An explanation of the testing route is available from TÜV’s GS mark overview.
Three practical points for importers:
- GS certification is issued per product model, and it names the manufacturer and the testing body. A general “our factory has GS” claim means little until it points to a specific certificate number for a specific model.
- GS sits on top of CE rather than replacing it. A GS-certified machine still needs the CE conformity route for the EU market.
- The certificate has a validity window and is tied to ongoing factory audits. If your supplier’s GS lapsed, the machines produced after the lapse cannot legitimately carry the mark.
If your distribution plan includes German-speaking retail, ask for the GS certificate number at the RFQ stage, not after the order. Retrofitting a certification onto an already-produced container is not how any of this works.
EPA Certification: The United States Emissions Rule for Gasoline Engines
Any gasoline-powered outdoor equipment destined for the United States — chainsaws, 예초기, 발전기, water pumps with petrol engines — must comply with EPA emission regulations for nonroad spark-ignition engines. The governing rules are codified in 40 CFR Part 1054, and unlike CE, this is not a self-declaration system: the engine must be certified, and the certification belongs to the engine family.
What that means at the container level:
- The engine carries an emission compliance label that identifies the certified family and the manufacturer.
- Importing engines or machines with non-certified engines for sale in the US is a violation that customs can act on.
- California applies its own, stricter CARB requirements on top of the federal rule. If your distribution map includes California, say so explicitly in the RFQ.
The practical consequence for buyers is a lead-time one. A supplier with an existing EPA-certified engine family can ship quickly, because the hard regulatory work is already behind the engine. A supplier that must certify a new engine family for your order is looking at a process measured in months, because it involves laboratory testing and agency review. This is one of the quiet reasons two quotations for the “same” machine can differ by six weeks of lead time.
ETL and Electrical Safety Marks for Battery-Powered Product Lines
Battery and corded electric equipment — sprayers, mowers, 헤지 트리머, pressure washers — sold in North America is expected to demonstrate electrical safety compliance with UL or CSA standards. The ETL Listed mark, issued by Intertek, is one of the two most widely accepted ways to show this, alongside the UL mark itself. Retail buyers and e-commerce platforms routinely check for one or the other before listing an electrical product.
For importers, the checklist that matters:
- The ETL mark must appear on the product label together with the certification body’s control number.
- The certification covers the complete configuration sold: battery pack, charger, and machine. A mark on the tool alone does not cover a third-party charger bundled into your kit.
- Battery certifications have their own layer (cell and pack testing under standards such as UL 2580-family requirements for e-mobility contexts or IEC-based tests for portable products), so confirm which documents cover which component.
If you are building a battery line for the first time, involve the certification question in product selection. Choosing a platform that already holds ETL or UL certification for the target configuration will save you a certification cycle and a product redesign that no one budgeted for.
What Buyers Shipping to Latin America Should Check
Latin America does not have a single unified certification, and treating it as one region is the most common planning mistake. Brazil runs its own conformity assessment system under INMETRO (gov.br/inmetro), where the applicable requirements depend on the product’s classification and its Mercosur/Common NCM classification. Mexico applies mandatory NOM standards to electrical products, with scope determined by the product type and tariff fraction. 콜롬비아, Chile, and Peru each maintain their own technical regulation and energy/electrical regimes with product-dependent scope.
Three habits keep Latin American orders out of trouble:
- Start from the tariff classification, not from the product name. The NCM/HS code determines which regime, if any, applies to your machine.
- Use CE documentation as your engineering baseline. CE technical files make local conformity work faster, because the underlying safety testing already exists in a structured form.
- Check destination-country rules per market. We cover the country-by-country import requirements for Latin American and African markets — including Brazil, Mexico, 콜롬비아, Chile, 페루, and Venezuela — in a separate import regulations guide.
The practical pattern we see with Latin American distributors: most stock gasoline-powered lines where the binding constraints are engine documentation and labeling in the local language, while battery lines trigger the electrical-safety regimes. Knowing which side of that line your container sits on determines your document list.
ISO 9001: The Factory System Behind the Product Label
ISO 9001 is not a product certification — no machine carries an “ISO 9001 approved” sticker in any meaningful sense. It certifies that the factory operates a documented quality management system: incoming material inspection, process control, corrective-action loops, traceability. When you screen suppliers, it answers a different question than CE or EPA. CE tells you the machine met a standard on test day. ISO 9001 tells you the factory can reproduce that result across thousands of units and multiple production shifts.
For importers running reorders, this distinction is not academic. The most expensive quality problems are not the defective sample; they are the third shipment where the carburetor supplier changed without notice and your defect rate triples. A factory running a real ISO 9001 system manages that risk through supplier control and process records. A factory with a certificate on the wall and no system behind it does not.
You can review NEWTOP’s certification portfolio — CE, GS, EPA, ETL, and ISO 9001 across our chainsaw, 예초기, sprayer, and water pump lines — on our certificates and patents page.
How to Verify a Supplier’s Certificate Before You Transfer the Deposit
Certificate fraud in this industry is rarely sophisticated. It is usually one of three things: a genuine certificate for a different model presented as if it covered yours; an expired certificate; or a self-made PDF with a real testing body’s logo. All three collapse under the same six checks.
| 확인하다 | How to do it | Red flag |
|---|---|---|
| 1. Request the Declaration of Conformity | Ask for the signed DoC listing directives and harmonized standards for your model | Only logo images offered, no signed document |
| 2. Verify the certificate number | Look it up in the issuing body’s public database (TÜV, Intertek, SGS) | Number not found, or registered to a different company |
| 3. Match the model coverage | Confirm the certificate’s model/series list includes your exact SKU and engine configuration | Covers one showroom sample, not your order |
| 4. Check validity and standard versions | Confirm the expiry date and that cited standard editions are current | Expired, or withdrawn standard editions |
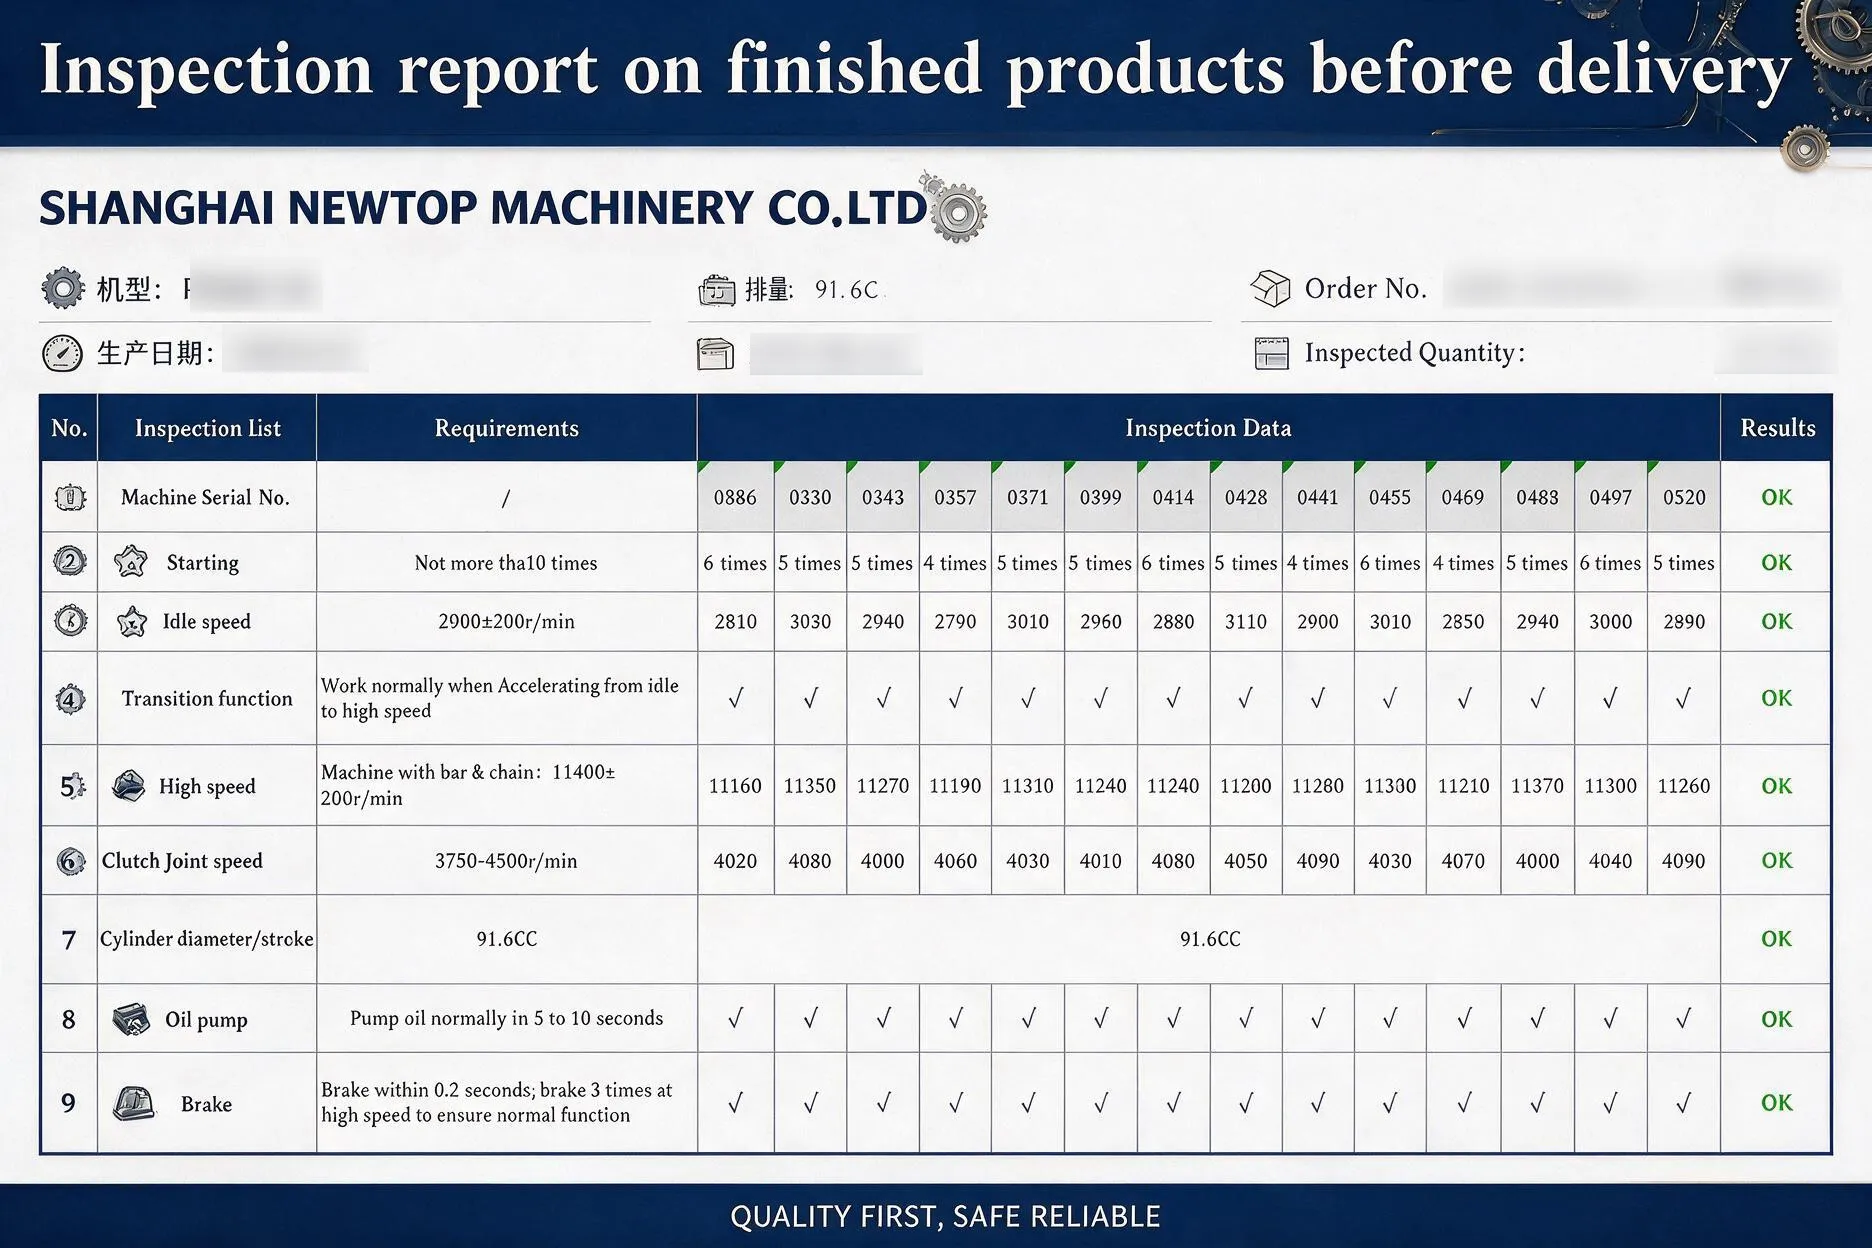
| 5. Ask for the test report summary | Request key results: noise, emissions, safety tests behind the certificate | Certificate exists, no report behind it |
| 6. For EPA: check the emission label | Confirm the engine’s emission family label matches the certified family in the documents | Label and certificate disagree |
Two of these checks deserve emphasis because they catch the majority of problems. Model matching is the big one: factories in this industry legitimately hold certificates for their best-selling configurations, and salespeople sometimes let the certificate’s halo extend to every machine in the catalog. Asking “show me the certificate where model NT-XXXX appears” takes thirty seconds and ends the ambiguity. The second is the test report. A genuine certificate is generated by a testing process that produced a report; a fabricated one usually has no report behind it because making one up is much harder than printing a page.
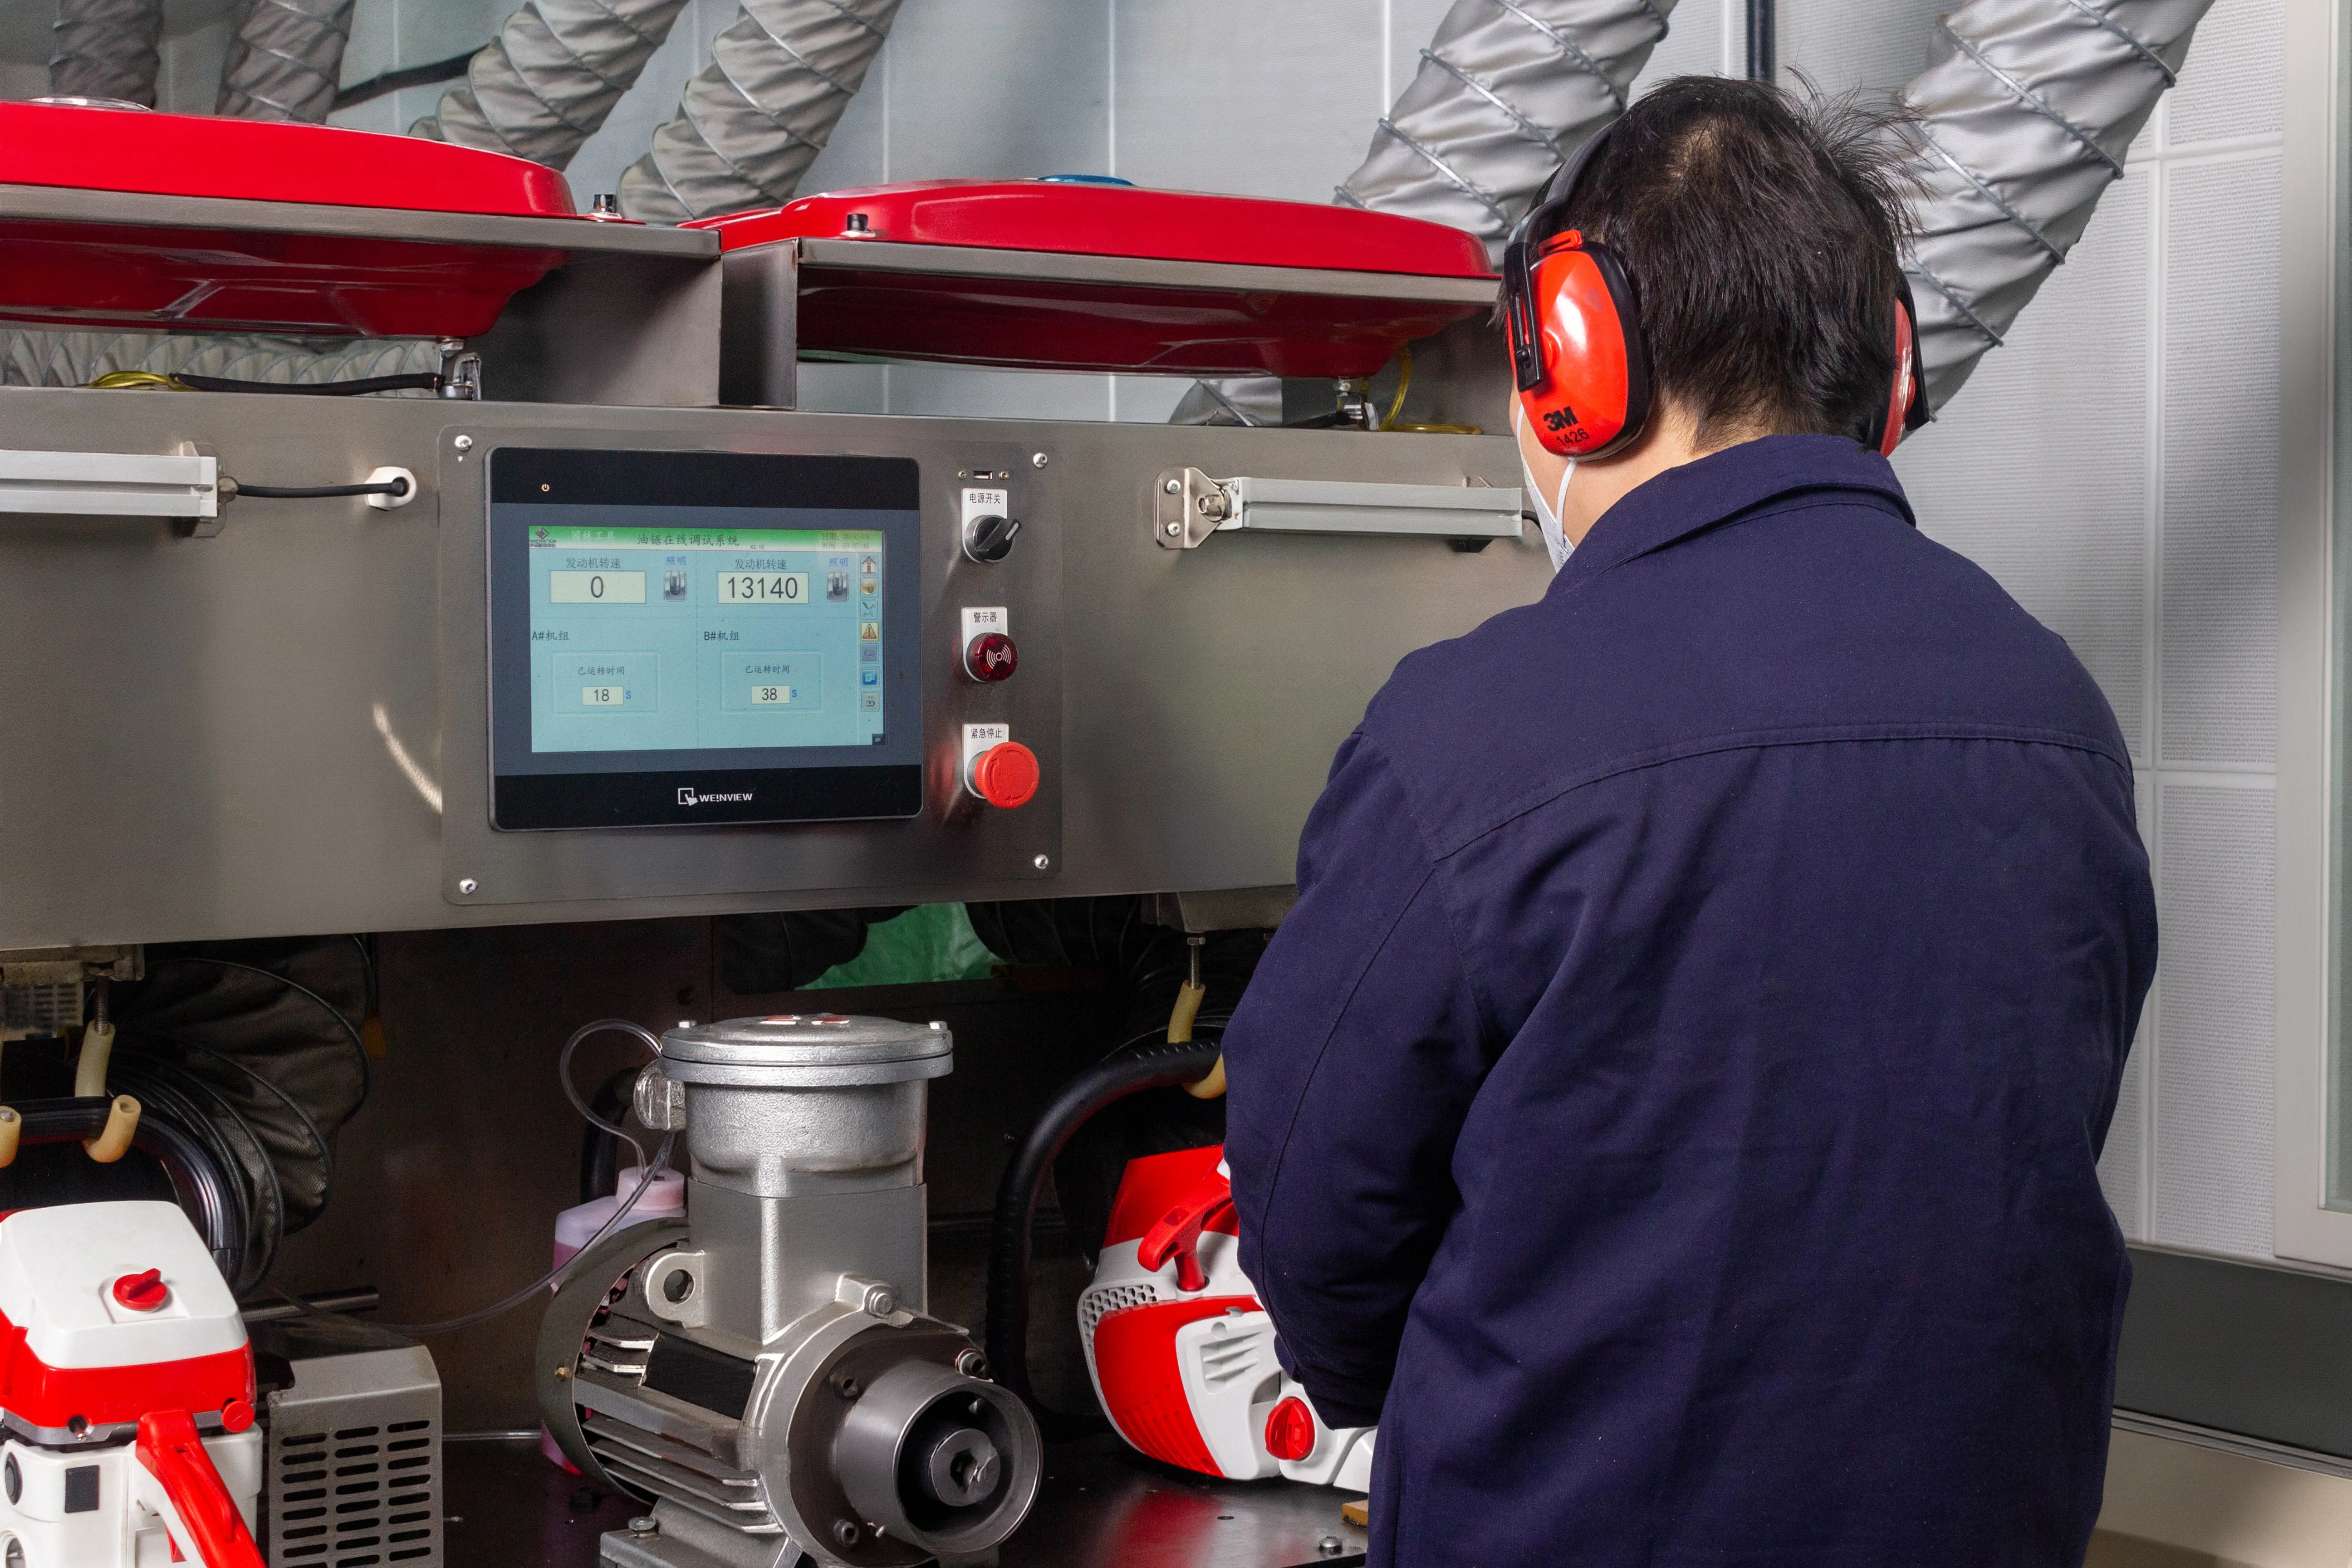
If the documents pass but something still feels off, add a factory audit or a third-party inspection before shipment. Our own production runs are checked through a documented quality control process, and we encourage buyers to book independent inspections regardless of supplier — a professional inspector charges a few hundred dollars, which is a rounding error against a stuck container.
What Certificates Do to Your Price, Lead Time, and MOQ
Certification status is embedded in your quotation whether the salesperson mentions it or not. Understanding the mechanics helps you read quotes and negotiate from strength.
Price. A machine built to a certified configuration carries engineering and testing costs that a bare build does not. That is part of why a certified professional chainsaw quotes higher than an uncertified lookalike — and why the uncertified version cannot legally enter the markets described above. When you compare quotes, line up the certification scope first; a price gap between differently certified products is not a discount opportunity, it is a different product.
Lead time. Orders built on existing certified platforms ship on production schedules. Orders that require new certification — a new engine family for EPA, a new model through GS testing — add the certification cycle to your timeline. Ask the supplier to state, in writing, whether your configuration is covered by existing certificates.
MOQ. Certification cost is largely fixed per model or family, so it spreads across the order. A distributor ordering a certified model from an existing line rides on volumes the factory already produces, which is one reason established models carry lower minimums than bespoke configurations. If your first order is small, choosing a certified in-line model is usually cheaper end to end than customizing an uncertified one.
자주 묻는 질문
Do I still need CE marking if my market is in Latin America?
CE is the EU regime, so it is not a legal requirement in Latin America. It still works in your favor: many distributors use CE as a quality baseline when comparing suppliers, and a CE technical file speeds up any local conformity work. Always check the destination country’s own rules for the binding requirements.
Who pays for certification, the buyer or the manufacturer?
For standard models, the manufacturer holds and maintains the certifications, and the cost sits inside the unit price. For customized or private-label versions, modifications can fall outside the certified configuration, and new certification is typically a buyer cost. Settle this in the OEM agreement before development starts.
Can I use the factory’s certificates for my own brand?
부분적으로. The test evidence belongs to the factory, while the Declaration of Conformity must name the economic operator placing the product on the market — your company, for a private-label product. Work with the factory to update the document set so brand, 모델, and responsible parties all match.
How do I check whether a CE certificate is genuine?
Run the six checks in the table above. The fastest two: verify the certificate number in the issuing body’s public database, and ask for the test report behind the certificate. Genuine certificates survive both; most fakes fail on the first.
Which certifications does NEWTOP hold?
NEWTOP holds CE, GS, EPA, ETL, and ISO 9001 certification across its product lines, with documents available for review per model. Request the Declaration of Conformity and test report summaries for any model you are sourcing, and run them against the six checks above.
Certification work rewards the buyers who treat it as part of product selection rather than a shipping formality. Confirm the scope, verify the documents, and put the certificate numbers into your purchase order where they become commitments instead of promises.
Planning your first container, or adding a certified line for a new market? Browse the NEWTOP product range or talk to our team about certificates and market requirements for your destination country — and if you are building a distribution business, 우리의 distributor program includes documentation support for your market entry. For a picture of how we work with partners over the long run, see how NEWTOP earns customer trust through quality and service.
Working with the right outdoor power equipment supplier is only one part of an international machinery order. The same brush cutter, 전기톱, 잔디 깎는 기계, generator or water pump can leave the factory with the same basic specification but face a different import process depending on whether it is headed for Nigeria, Tanzania, Brazil or Mexico.
The trouble usually starts when compliance is checked too late. A shipment may require conformity verification before export. An electric model may fall under rules that do not apply to its gasoline-powered equivalent. Labels, technical files, or importer information may also need to change before production is completed.
대리점용, the useful question is therefore not simply:
“Which certificate does this machine have?”
It is:
“What does this specific product need in the country where I plan to sell it?”
This guide focuses on practical import checks for major African and Latin American markets relevant to garden machinery and outdoor power equipment. It is intended to help importers know what to confirm with their supplier before an order moves into production.
Compliance note: Requirements can change and often depend on the exact HS code, product type, engine or electrical configuration, 용도와 용도. Final import requirements should always be confirmed with the local importer, customs broker, conformity-assessment body, or competent authority.
Start With the Product, Not With a Certificate
There is rarely one certificate that answers every import question.
A CE document may support a technical file but does not automatically replace the local conformity route in another country. 남아프리카, 예를 들어, expressly states that CE certificates alone are not accepted for products requiring NRCS approval; accredited safety test reports are required instead.
Before asking a supplier for documents, separate the main compliance questions:
| Compliance Area | What Needs to Be Confirmed |
|---|---|
| Customs Classification | Correct HS, NCM, tariff fraction, or national tariff code |
| Product Conformity | Whether the product falls under compulsory standards or certification |
| 엔진 / Emission Rules | Requirements applying to gasoline or diesel engines |
| Electrical Requirements | 안전, EMC, voltage, frequency, plugs, 충전기, or electrical components |
| Labeling | Language, importer details, 안전정보, ratings, and local markings |
| Pre-Shipment Verification | Whether conformity needs to be checked before export |
| Import Documents | Invoice, packing list, certificate of origin, bill of lading, 테스트 보고서, and permits |
The correct order is usually:
identify the product → confirm the tariff classification → check the applicable regulation → prepare the required product and shipment documents.
Starting with “we already have CE” and trying to work backwards is far less reliable.
Importing Garden Machinery into Africa
Africa is not one regulatory market. Nigeria, 케냐, Tanzania, Zambia, Ghana and South Africa all approach imported equipment differently.
For Chinese exporters in particular, Kenya and Tanzania also deserve early attention because conformity work may take place before the goods leave China.
Nigeria: SONCAP Needs to Be Checked Early
Nigeria’s SONCAP system applies to SON-regulated imported products and operates as an offshore, pre-shipment conformity-assessment programme.
For regulated goods, the process can involve a Product Certificate, testing and verification in the exporting country, a Certificate of Conformity, and ultimately the SONCAP Certificate used for customs clearance. SON states that Product Certificates are used in the Form M process, while the SONCAP Certificate is required for customs clearance of regulated goods.
That makes Nigeria a poor market for leaving compliance until the container is ready.
Before confirming a commercial order, the importer should establish:
- whether the actual product is within SONCAP scope;
- which applicable standard and certification route will be used;
- what documents the exporter needs to prepare;
- whether inspection or testing will be required before shipment.
에이 살수 장치 importing finished chainsaws, 예초기, 발전기, or other machinery for resale should also avoid assuming that an exemption intended for industrial machinery imported for a manufacturer’s own use applies to normal commercial stock.
The exact product and intended import route matter.
Ghana: Mandatory Standards and EasyPASS Are Not the Same Thing
Ghana is worth treating carefully because EasyPASS attracted considerable attention in 2026.
In July 2026, the Ghana Standards Authority clarified that EasyPASS did not introduce a new compulsory requirement for every importer. It is an established conformity-assessment programme. 동시에, GSA emphasized that products placed on the Ghanaian market must still comply with applicable mandatory Ghana Standards, regardless of whether the business participates in EasyPASS.
So the first question should not be “Do I need EasyPASS?”
It should be:
Is this particular machine covered by a mandatory Ghana Standard, and what conformity route applies to it?
For customs clearance, Ghana Revenue Authority currently lists documents such as the Bill of Lading or waybill, invoice, packing list, Import Declaration Form, importer identification, and any permit required by the relevant regulator.
For the exporter, consistency matters. The model description on the invoice, packing list, technical documents, labels and physical machine should tell the same story.
케냐: PVoC Can Put the Inspection Before the Shipment
Kenya operates a Pre-Export Verification of Conformity programme through KEBS.
The current KEBS guidance states that PVoC is carried out in the exporting country to verify compliance with applicable Kenyan technical regulations, mandatory standards, or approved specifications. China is included among the exporting zones served by KEBS-appointed PVoC contractors.
For an outdoor equipment order, that can move part of the compliance work forward in the purchasing timeline.
Instead of waiting for cargo to arrive in Kenya, the importer and supplier may need to coordinate product information, supporting test reports, physical inspection, and certification while the goods are still in the country of export.
A practical sequence is:
Product scope → applicable Kenyan standard → PVoC request → inspection/testing if required → CoC → shipment
Not every import uses the same route, and KEBS publishes exemptions for certain goods and users. A commercial distributor should therefore confirm the actual treatment rather than assume an exemption applies.
Tanzania: For Regulated Goods, the CoC Is Part of the Shipping Plan
Tanzania also operates a PVoC system, and the current TBS programme covers regulated products before export.
TBS’s 2025 PVoC guideline states that affected consignments are inspected and/or tested before shipment and require a Certificate of Conformity. Its current import-control page also maintains lists of regulated HS codes and PVoC procedures.
This is particularly relevant to NEWTOP because TBS issued a June 2026 notice specifically reminding importers of regulated goods originating from China Mainland and several nearby territories that PVoC inspection must take place in the country of export before shipment.
For a Tanzanian buyer, the supplier therefore needs more than a generic PDF test report. The important issue is whether the product information and available conformity evidence are suitable for the actual TBS route.
TBS’s summarized procedure indicates that documentary review can include technical product details, third-party conformity evidence, accredited laboratory reports, and control testing where necessary.
Zambia: Check Whether the Product Is Actually Under a Compulsory Standard
Zambia takes a more product-specific approach.
The Zambia Compulsory Standards Agency currently administers import quality monitoring for goods covered by compulsory standards. Its published information states that the system applies specifically to regulated products rather than every imported item.
This distinction is useful for garden machinery.
A gasoline machine, an electrical tool, a battery-related product, and an accessory should not automatically be treated as one compliance category.
Before asking a supplier to obtain a particular certificate, the importer should first compare the product against the current ZCSA compulsory-standard scope.
ZCSA also provides several import-clearance arrangements, including batch clearance, pre-import schemes, and annual import quality certification for qualifying importers.
In other words, the compliance conversation becomes more efficient when the buyer starts with the exact product rather than a generic request for “Zambia certification.”
남아프리카: Battery-Powered Garden Equipment Deserves a Separate Check
South Africa is one of the markets where gasoline-powered and battery-powered garden equipment should not automatically be treated under the same compliance route.
The NRCS regulates certain electrical and electronic products under compulsory specifications. Its current list includes VC 9105 for electric motor-operated hand-held tools, transportable tools, and lawn and garden machinery. Battery-powered garden equipment may therefore require a separate regulatory check even though the machine itself is not connected directly to mains power.
Where a product falls within the applicable compulsory specification, the relevant model or product family may require regulatory approval before entering the South African market. The applicant must be a South African legal entity, and accredited test reports can form part of the approval evidence.
The charger should also be reviewed separately, as its rated voltage, plug configuration, electrical safety, and other requirements may fall under additional South African electrical regulations.
NRCS is also clear on one point:
A CE certificate on its own is not accepted as the regulatory approval basis.
This does not mean gasoline-powered chainsaws, 분무기, or brush cutters automatically follow the same approval route.
For distributors carrying both gasoline and lithium battery-powered outdoor equipment, each product type should be checked against the applicable NRCS scope rather than using one compliance file across the entire range.
Importing Garden Machinery into Latin America
Latin America often looks different from the African PVoC markets.
Rather than one broad pre-export programme, compliance frequently begins with the tariff classification and then moves into product-specific technical regulations, electrical requirements, 라벨링, or import authorizations.
That makes the exact product description particularly important.
브라질: Start With the NCM, Not With “Do You Have Inmetro?”
Brazilian importers should begin with the NCM classification.
Inmetro’s latest guidance, updated in August 2026, tells importers to use the NCM code in Portal Único Siscomex to check the applicable administrative treatment and determine whether Inmetro approval is required.
This matters because an NCM falling within a controlled area does not automatically mean every product classified there follows the same certification requirement. Inmetro also provides exclusions and exemption routes where the specific product falls outside regulatory scope.
Start with: Correct NCM classification
Check next: Administrative treatment in Portal Único Siscomex
If applicable: Confirm whether Inmetro certification, registration, or import approval is required
Prepare before ordering: Exact model, technical description, 전원, voltage/frequency where applicable, manufacturer details, and supporting test documentation
For the supplier, this means the final model information cannot be vague.
Inmetro’s import guidance specifically calls for clear product descriptions containing information such as brand, model or part number, technical characteristics, 힘, voltage, 작동 범위, and application where relevant.
A gasoline lawn mower, an electric pressure washer, and a battery charger may therefore follow different compliance routes even though one distributor buys all three from the same factory.
Mexico: Match the Tariff Fraction to the Applicable NOM
Mexico also works better when the importer begins with classification rather than with a certificate name.
SNICE maintains an Annex of tariff fractions subject to compliance with Mexican Official Standards at import. The applicable NOM therefore needs to be checked against the actual tariff fraction and product scope.
For an importer, the workflow is more useful when expressed this way:
Tariff fraction → Applicable NOM → Conformity / labeling requirements → Final Spanish product information and packaging
Electrical equipment needs particular care because electrical-safety requirements may involve different standards from gasoline-powered equipment.
The importer should therefore finalize the correct model, electrical configuration, ratings, and labeling requirements before artwork and packaging are approved.
It is much easier to print the right Spanish label at the factory than to correct thousands of boxes after customs or market-surveillance questions arise.
콜롬비아: Check the Technical Regulation Before Commercialization
Colombia applies technical regulations by product rather than by the broad description “garden machinery.”
The Superintendencia de Industria y Comercio states that products subject to technical regulations must comply with the applicable regulation before commercialization and may require the appropriate conformity certificate. Manufacturers and importers of goods covered by SIC-supervised technical regulations are also subject to registration requirements.
Electrical products require another layer of attention.
Colombia updated its RETIE framework through Resolution 40284 of June 23, 2026. The current regulation contains separate sections dealing with products within scope and conformity assessment.
That does not mean every electric lawn mower or charger automatically falls under RETIE in the same way.
The importer needs to check the exact product against the current scope.
For mixed petrol and electric ranges, one regulatory answer should therefore never be copied across every SKU without verification.
Chile: Check SEC Scope for Electrical and Fuel-Related Products
Chile operates compulsory certification systems through the Superintendencia de Electricidad y Combustibles for specified electrical and fuel products.
SEC states that products falling within the mandatory system must be certified before commercialization and carry the applicable certification marking. It also provides different conformity routes, including mechanisms involving recognized foreign certification in eligible cases.
For a garden-machinery importer, the first job is to confirm whether the exact product appears within SEC’s regulated scope.
If it does, certification, testing, labels, and supporting product information should be planned before shipment.
If it does not, the importer should not request a random “SEC certificate” simply because another electrical product needed one.
The scope of the regulation remains the deciding factor.
페루: Use the Tariff Subheading to Find the Restriction
Peru makes this process fairly easy to understand conceptually.
SUNAT advises importers to use the national tariff subheading to identify whether goods are subject to restrictions and which government authority issues the relevant control document. Restricted goods require the appropriate authorization in addition to normal customs documents.
For many regulated procedures, Peru’s VUCE acts as the electronic trade window.
So instead of starting with assumptions based on another Latin American country, the buyer can work through:
Peruvian tariff subheading → restriction check → competent authority → required document
This is particularly useful when a distributor carries several equipment categories.
A gasoline engine product, electric machine, accessory, or battery-related product may not all produce the same result.
베네수엘라: Verify the Current Tariff Treatment Before Production Is Finished
Venezuela deserves more caution because its customs tariff has undergone repeated amendments, including further changes during 2026. Current tariff treatment should therefore be checked against the exact product code at the time of the import.
Under the Venezuelan customs framework, Legal Regime 20 is linked to goods affected by mandatory COVENIN standards or technical regulations, with SENCAMER involved in determining applicability. 하지만, this should not be interpreted as meaning every chainsaw, mower, 예초기, 발전기, or pump automatically follows that procedure.
Do not assume that every garden machine follows the same SENCAMER procedure. The local importer or customs representative should verify the current tariff code, applicable legal regime, and any COVENIN or technical-regulation requirement before labels, 포장, and shipment are finalized.
This is especially important where customized labels or importer information are involved.
The local check should happen before the supplier finishes artwork and production—not after the goods are already on the water.
Gasoline and Battery-Powered Equipment Need Different Compliance Checks
Product type can change the regulatory discussion even within the same country.
For conventional gasoline-powered equipment, the buyer may need to consider engine specifications, emissions documentation, 안전정보, noise requirements, and fuel-system characteristics where relevant.
NEWTOP also offers lithium battery-powered outdoor equipment. These products should be reviewed separately because lithium batteries can introduce additional safety, 운송, testing, documentation, and destination-market requirements. The charger may also bring its own electrical requirements, including rated voltage, frequency, plug configuration, electrical safety, and EMC, depending on the market.
For that reason, a compliance file confirmed for a gasoline brush cutter should never be assumed to cover a lithium battery-powered model simply because the two products serve the same application.
What the Outdoor Power Equipment Supplier Can Prepare
The local importer remains responsible for confirming the final regulatory route, but the supplier plays an important role long before the customs declaration is filed.
When a buyer provides clear destination-market requirements, NEWTOP can review the product configuration and prepare supporting information before the order is finalized.
Typical export documents available can include:
- Commercial Invoice
- Packing List
- Certificate of Origin
- Bill of Lading
- Product manuals
- Test reports
- Other agreed product or shipment documentation
Depending on the product and model, NEWTOP also has documentation or certifications 포함 CE, EMC, EPA, RoHS and EURO V. Marine products can involve additional certification such as CCS.
These should not be presented as a single certificate package covering every NEWTOP product.
The right approach is to match the available document to the actual model, destination, and import requirement.
Labels and Packaging Can Be Prepared for the Market
A supplier can also prevent problems by getting market-specific product information right during production.
Voltage and frequency must always reflect the machine’s actual technical configuration. They should not be altered simply because a customer requests different numbers on the label.
Other elements can be customized according to confirmed importer requirements, 포함:
- language;
- importer information;
- warning labels;
- product and carton labels;
- 로고;
- packaging artwork;
- barcodes and other commercial information.
For NEWTOP distributors and appointed agents, these market-specific requirements can be discussed before production so that the finished goods arrive with the agreed branding and information already in place.
That is considerably more efficient than relabeling inventory after it reaches the destination.
A Pre-Shipment Compliance Review Saves More Than a Port-Side Fix
Before production is released or the container is booked, the importer and supplier should make sure they are working from the same final compliance information.
The useful questions are straightforward:
- What is the final HS, NCM, or national tariff code?
- Is the product covered by a compulsory technical regulation?
- Does it require PVoC, certification, registration, or another approval?
- Is the final engine or electrical configuration the same one used in the technical documents?
- Are voltage and frequency correct?
- Has the required label language been confirmed?
- Does the market require importer information on the product or package?
- Which test reports or certificates are available for the actual model?
- Do the invoice and packing-list descriptions match the goods?
- Is a Certificate of Origin required?
- Does a lithium product need a separate compliance and transport review?
For mixed containers, this check becomes even more important. One shipment may include gasoline machinery, electric tools, 예비 부품, and battery products, yet each group can follow a different regulatory path.
Compliance Is Easier to Fix Before Production Than After Arrival
There is no single “Africa certificate” or “Latin America certificate” for garden machinery.
Nigeria may require SONCAP for regulated commercial goods. Kenya and Tanzania can move conformity verification into the exporting country. Zambia works from its compulsory-standard scope. South Africa has specific requirements for regulated electrical lawn and garden machinery.
Across Latin America, 브라질, Mexico, 페루, and other markets often make the tariff classification the starting point for determining what comes next.
That is where cooperation with an experienced outdoor power equipment supplier matters.
NEWTOP can support importers with product specifications, available certification and test documentation, export documents, and customized labels or packaging according to confirmed market requirements. Complete machines and spare parts can also be coordinated within the same sourcing process.
But the safest sequence should stay the same:
Identify the exact product. Confirm the destination requirement. Finalize the specification and labeling. Prepare the documents. Then ship.
Most compliance problems cost far less to solve while the machine is still on a production sheet than when the container is already waiting at the destination port.
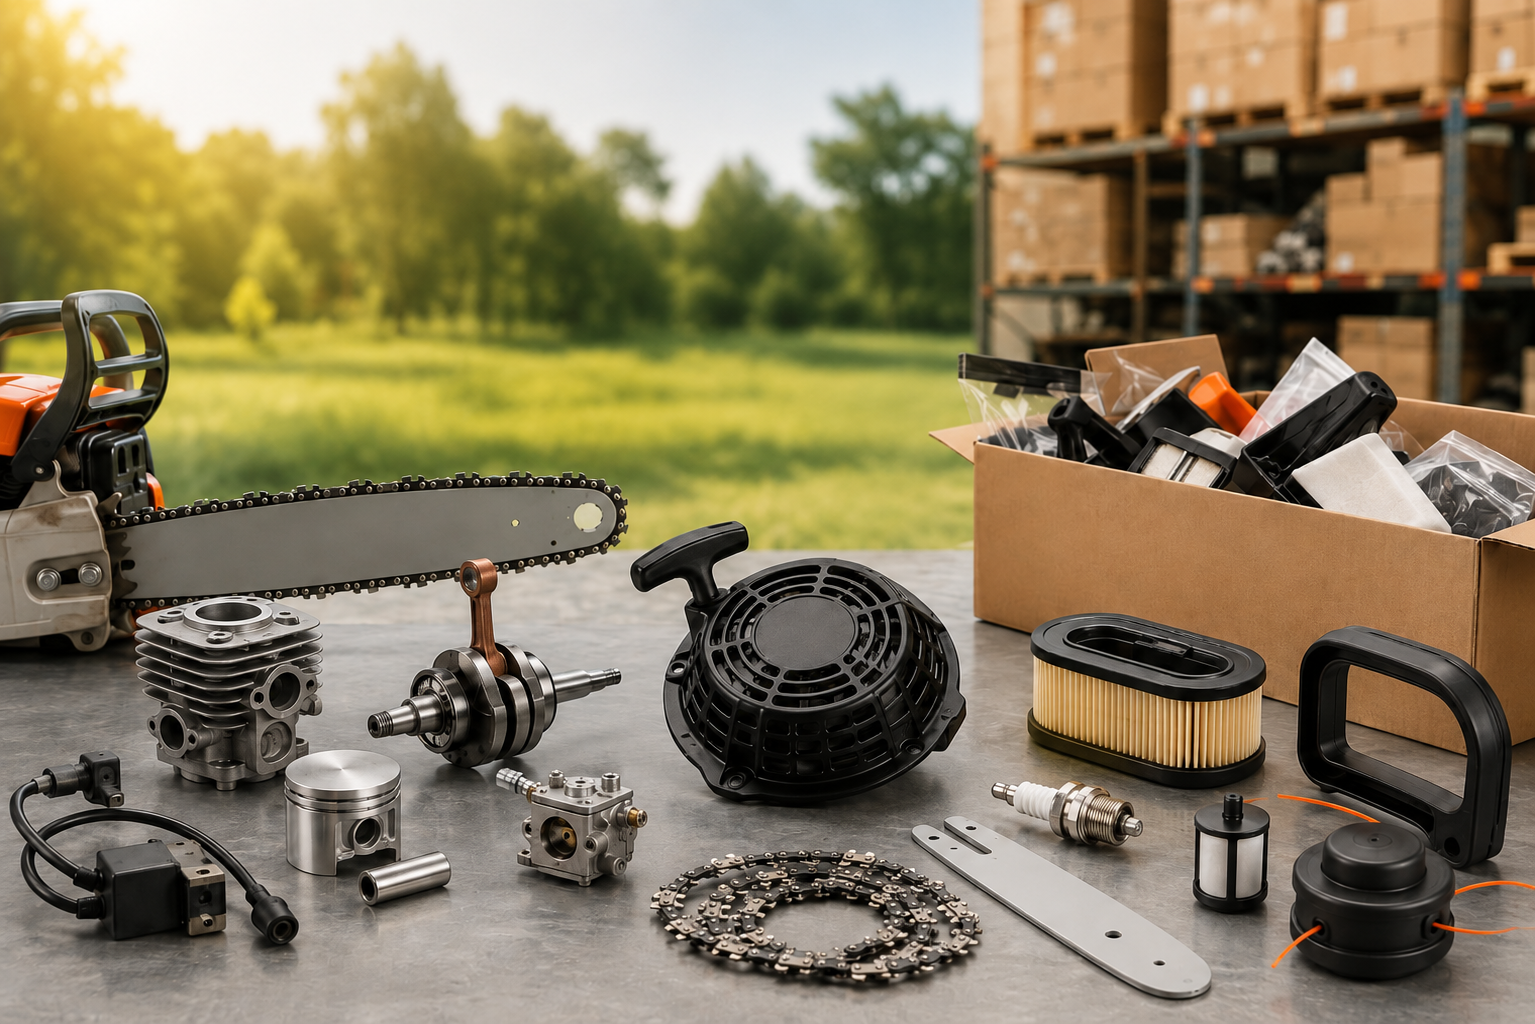
Sourcing outdoor power equipment parts and accessories becomes complicated long before the order becomes large. A distributor may handle only a few machine families, yet the service parts behind them can run into dozens or hundreds of SKUs. Some items arrive with clear part numbers. Others come as workshop photos, old samples, or descriptions such as “starter for this model.”
The challenge is not simply finding a factory that sells carburetors, recoil starters, ignition coils, cylinders, 피스톤, 크랭크샤프트, or gearboxes. The harder part is keeping every component tied to the correct machine, controlling mixed-SKU orders, and making sure the same part can be identified again when stock needs replenishing.
For dealers and distributors, a good parts supplier should make that process easier—not add another layer of uncertainty.
A Spare-Parts Order Is Not Just a Longer Machine Order
Complete machines are relatively straightforward to specify. A buyer confirms the model, quantity, configuration, 포장, and destination.
Parts orders behave differently.
One inquiry may contain 40 또는 50 separate lines. Another may combine components from several machine families, with different quantities for every item. Some parts move quickly in the local market, while others are only needed occasionally for workshop repairs.
This creates a different purchasing workload. A distributor has to manage compatibility, SKU identification, packaging references, quantities, and future reorder information at the same time.
A cheap quotation is of limited value if several components turn out to be wrong once the shipment reaches the workshop.
Start with the Machine, Not Just the Part Name
“Carburetor,” “ignition coil,” or “recoil starter” is rarely enough information for reliable matching.
A useful inquiry should start with the machine itself. Whenever possible, provide:
- Machine or engine model
- Existing part number, if available
- Clear photos of the original component
- Required quantity
- Key dimensions when the match is uncertain
- Visible markings, 커넥터, splines, threads, or mounting points
Photos become particularly useful when the original packaging or documentation is no longer available. For older machines, a clear image of the part and its mounting area can often provide more useful information than a general description.
A real sourcing example
A Tanzanian agricultural equipment retailer once approached NEWTOP with a requirement for dozens of different PJH sprayer parts. The quantity of each item was relatively small—fewer than 1,000 pieces per SKU—and several components were not items commonly produced in large volumes.
The request was handled by matching the customer’s machine references and product images rather than treating each line as an unrelated part. 이틀 이내, the required items had been identified and organized for quotation.
The difficult part was not one unusual component. It was keeping a long list of small requirements correctly matched to the machines they belonged to.
This kind of inquiry is much closer to a real distributor parts order than a purchase of 5,000 identical pieces.
Compatibility Comes Before Price
Two components can look almost identical and still differ where it matters.
A recoil starter may use a different mounting-hole pattern. An ignition coil may have a different connector or fixing position. Crankshafts can vary in shaft dimensions or thread details. Cylinders, pistons and gearboxes may have version differences that are difficult to identify from a catalog image alone.
Depending on the part, confirmation may involve checking mounting positions, dimensions, shaft diameters, threads, splines, 커넥터, sealing surfaces or other model-specific details.
This also applies to parts described as direct replacements. Fitment should be confirmed against the relevant machine model and available reference information before a bulk order is finalized.
뉴탑에서, parts can be matched according to the customer’s machine model, photos, and confirmed requirements. Buyers can then choose between a complete matching parts set and individual components, subject to the applicable MOQ.
Complete Parts Set or Individual Parts?
The better option depends on how the dealer sells and services equipment.
| Buying Format | Better Suited To | Main Benefit |
|---|---|---|
| Complete Parts Set | Dealers building service coverage around one machine platform | Broader parts coverage in one purchase |
| Individual Parts | Dealers with existing repair or sales data | Replenish only the SKUs currently needed |
A complete set can be useful when a distributor is entering a new machine category or wants a broader repair range available from the start.
Individual components make more sense once the local market has shown which parts turn over fastest. A dealer may then replenish carburetors, recoil starters, ignition coils, cylinders, 피스톤, 크랭크샤프트, gearboxes, or other frequently requested items separately.
실제로, many distributors use both. Core machine families receive broader parts coverage, while proven fast-moving SKUs are reordered individually.
Managing Outdoor Power Equipment Parts and Accessories Across Multiple SKUs
A typical aftermarket order does not always look impressive on paper.
It may include 30 pieces of one component, 60 of another, several dozen of a third item, and another 20 또는 30 SKUs in smaller quantities. Once multiple machine categories are involved, the number of lines grows quickly.
This is where one-stop sourcing becomes more useful than simply having a long product catalog.
NEWTOP can support mixed-SKU purchasing across dozens or even hundreds of spare-part items, provided the MOQ for the relevant products is met. Small-batch, multi-SKU requirements can be handled within the same sourcing project.
Depending on the inquiry, the order can include:
- Parts identified from machine models
- Components matched from customer photos
- Complete matching parts sets
- Individual replacement parts
- Complete machines with corresponding spare parts
- OEM packaging
- Customer-specific part numbers
- Barcode labels
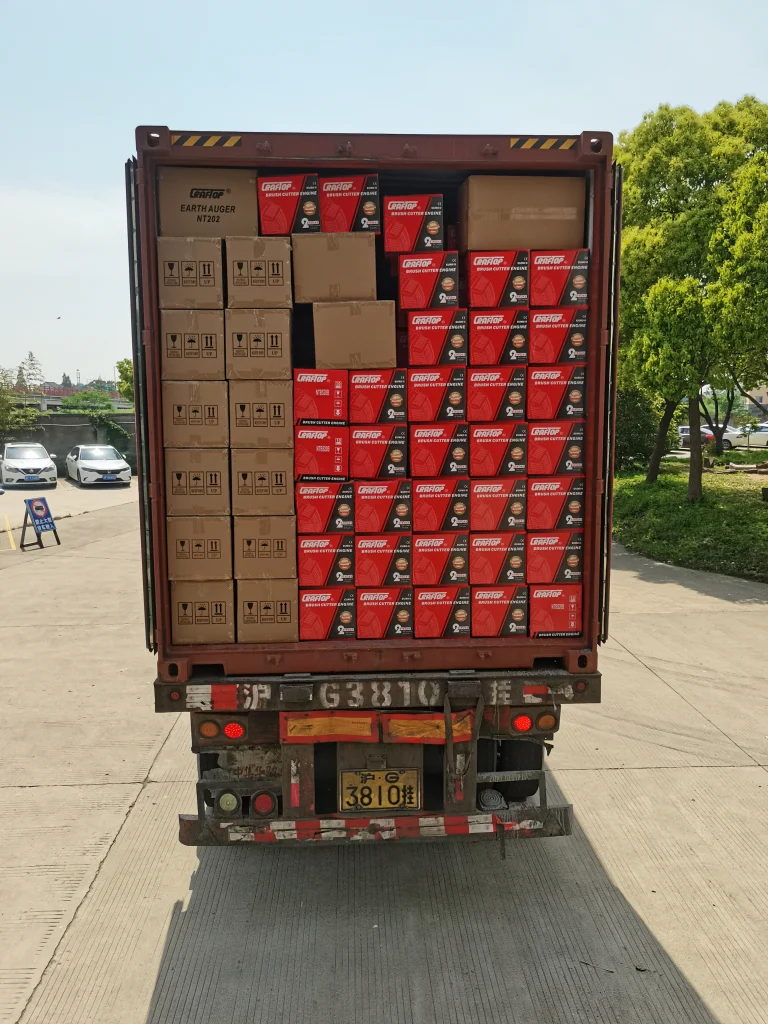
For a distributor already buying machines, adding related service parts to the same purchasing plan can also reduce coordination work. Machines and spare parts do not need to move through completely separate supply chains.
The same applies to packaging and inventory references. If the buyer already uses internal part numbers or barcodes, those identifiers can be incorporated into OEM packaging after the details are confirmed.
This becomes increasingly important as the catalog expands.
Saving a few cents on one component may not mean much if the purchasing team has to coordinate ten different suppliers, reconcile several numbering systems, or re-identify parts every time the workshop needs stock.
For businesses buying outdoor power equipment parts and accessories regularly, efficiency has to be measured across the full order, not only at SKU level.
How Parts Quality Is Checked Before Shipment
Parts inspection should not stop at appearance.
Different components have different failure risks. Dimensional accuracy may be critical for one item, while hardness, rotational balance, sealing performance, or material composition may matter more for another.
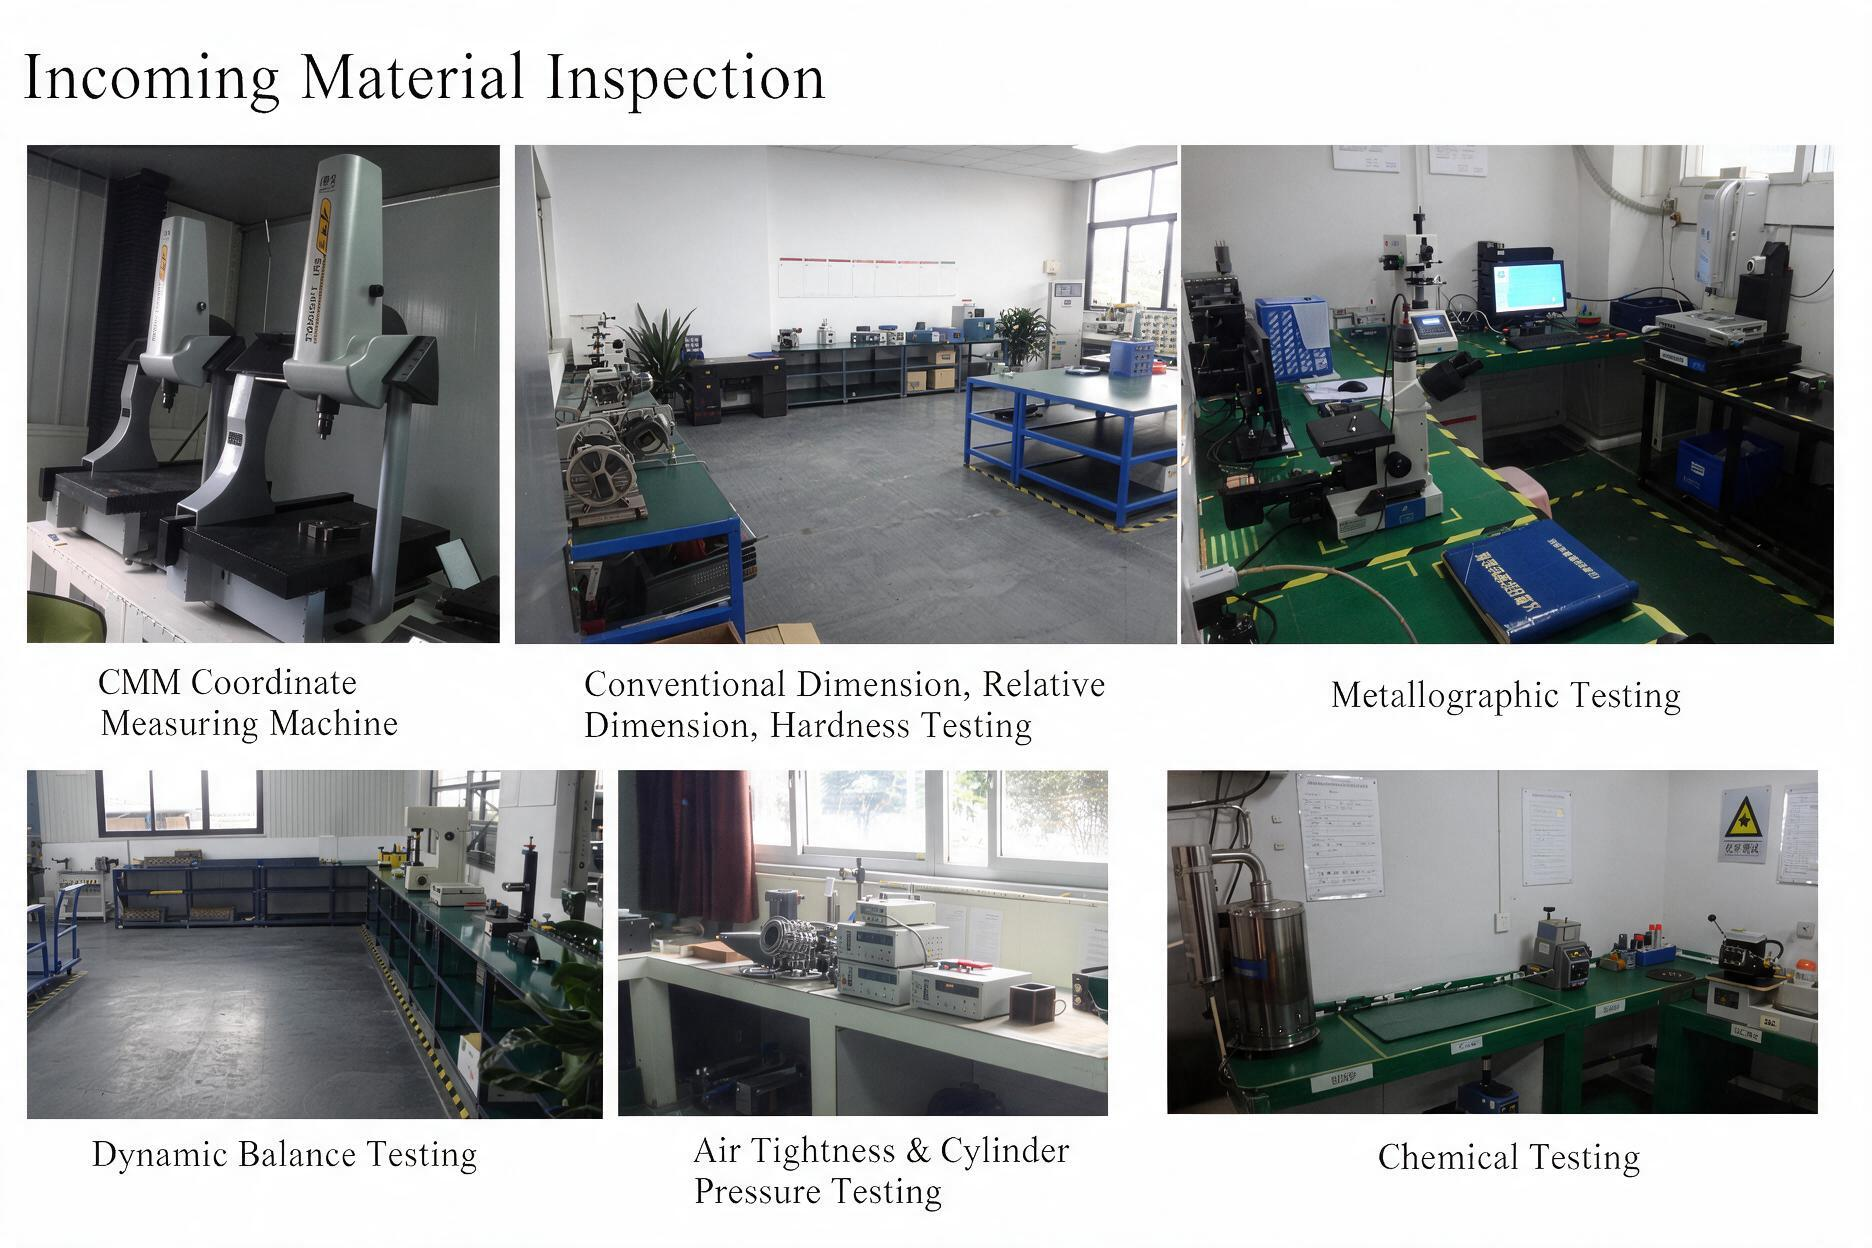
NEWTOP uses professional inspection equipment for incoming components, with the inspection method selected according to the part and the relevant quality requirement.
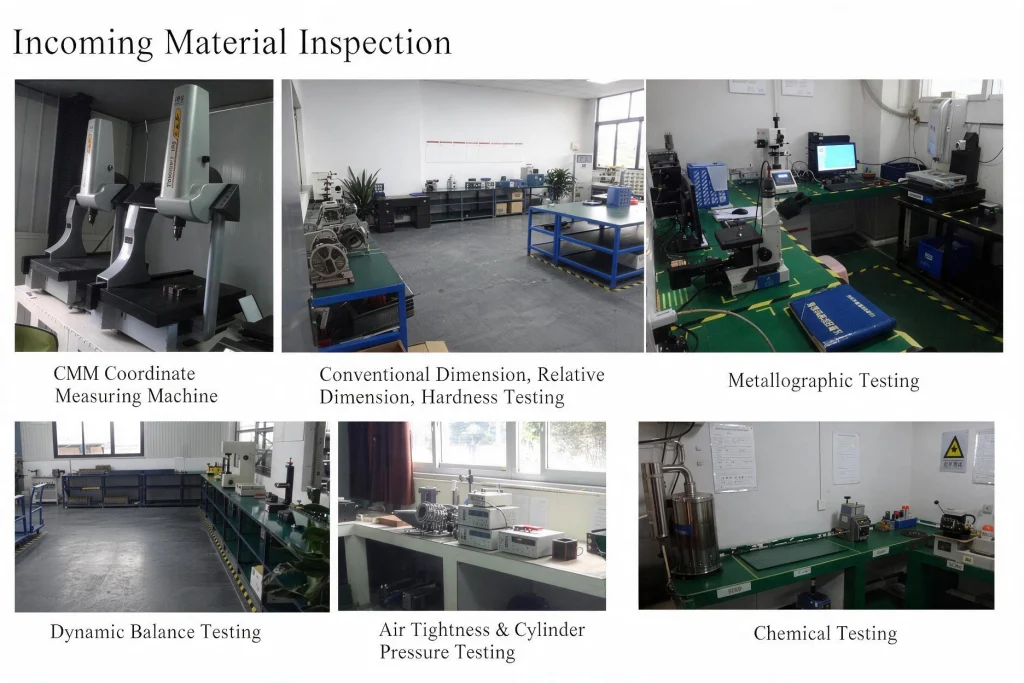
The available inspection methods include:
| Inspection Area | Typical Check |
|---|---|
| Dimensions | Conventional dimensions, relative dimensions, and CMM measurement |
| 재료 | Hardness, metallographic, and chemical testing |
| Rotating Components | Dynamic balance testing |
| Cylinder-Related Parts | Air-tightness and cylinder-pressure testing |
A coordinate measuring machine, or CMM, can be used where more precise dimensional or positional relationships need to be checked.
Dynamic balance testing is relevant to rotating components where imbalance may contribute to vibration or unstable operation.
For cylinder-related components, air-tightness and cylinder-pressure testing can be applied where sealing performance needs to be verified. Metallographic and chemical testing are available when material structure or composition requires further examination.
Not every component goes through every test. The inspection should match the part and its quality risk.
That distinction is useful when comparing suppliers. Asking how a specific part is checked usually tells a buyer more than asking whether “quality inspection” is available.
Make the First Order Easier to Reorder
The first quotation gets most of the attention, but the real test of a parts supply system often comes months later.
A workshop asks for the same starter again. The warehouse has a product code that the supplier does not recognize. The previous quotation only says “starter assembly.” Someone then has to find an old photo and begin the matching process again.
This is avoidable.
Keep the Reference, Not Just the Part Name
Once a part has been confirmed, it helps to keep a simple record of:
- Supplier part number
- Customer part number
- Machine model
- Confirmed fitment
- Product photo
- Barcode
- Packaging reference
- Previous order quantity
If the distributor already uses an ERP, catalog, or warehouse coding system, its own references can also appear on OEM labels and packaging.
The benefit is simple: purchasing, warehouse, sales, and service teams can refer to the same item in the same way.
It becomes even more useful when machines and spare parts are sourced through the same platform. Equipment already sold in the market can be linked to the service parts needed later, and future machine shipments can include the replacement items that workshops are actually consuming.
A well-organized second order should sound less like:
“Can you identify this part?”
and more like:
“Please replenish these confirmed SKUs.”
That is a much healthier aftermarket supply process.
What to Send When Requesting a Parts Quote
A good spare-parts RFQ does not need to be complicated. It simply needs enough information for the supplier to identify each item correctly.
A Practical RFQ Checklist
Prepare:
- Machine or engine model
- Part name and part number, if available
- Clear photos of the original part
- Quantity required for each SKU
- Dimensions or physical sample if fitment is uncertain
- Complete-set or individual-part requirement
- OEM packaging, barcode, or customer part-number requirements
- Destination country and shipping requirements
For an inquiry containing many SKUs, a spreadsheet with one item per row is usually much easier to manage than dozens of separate messages and photos.
If a component cannot be identified confidently, it is better to leave it pending for confirmation than to force a match simply to complete the quotation.
Good parts sourcing should also become simpler with every reorder. Once the machine model, fitment, part number, 포장, and buyer reference have been recorded, the same component should not need to be identified from the beginning every time inventory runs low.
For dealers and distributors, a reliable outdoor power equipment parts and accessories supplier is therefore not simply a company with a large catalog. The stronger partner is one that can handle mixed SKUs, confirm compatibility, support appropriate quality inspection, and keep future replenishment organized.
NEWTOP combines complete machines and replacement parts within one sourcing platform. Buyers can source complete matching parts sets, individual components, or machines and service parts together according to their market requirements and MOQ.
The first parts order may still require careful matching. The important part is making sure the second, third, and fourth orders become easier.
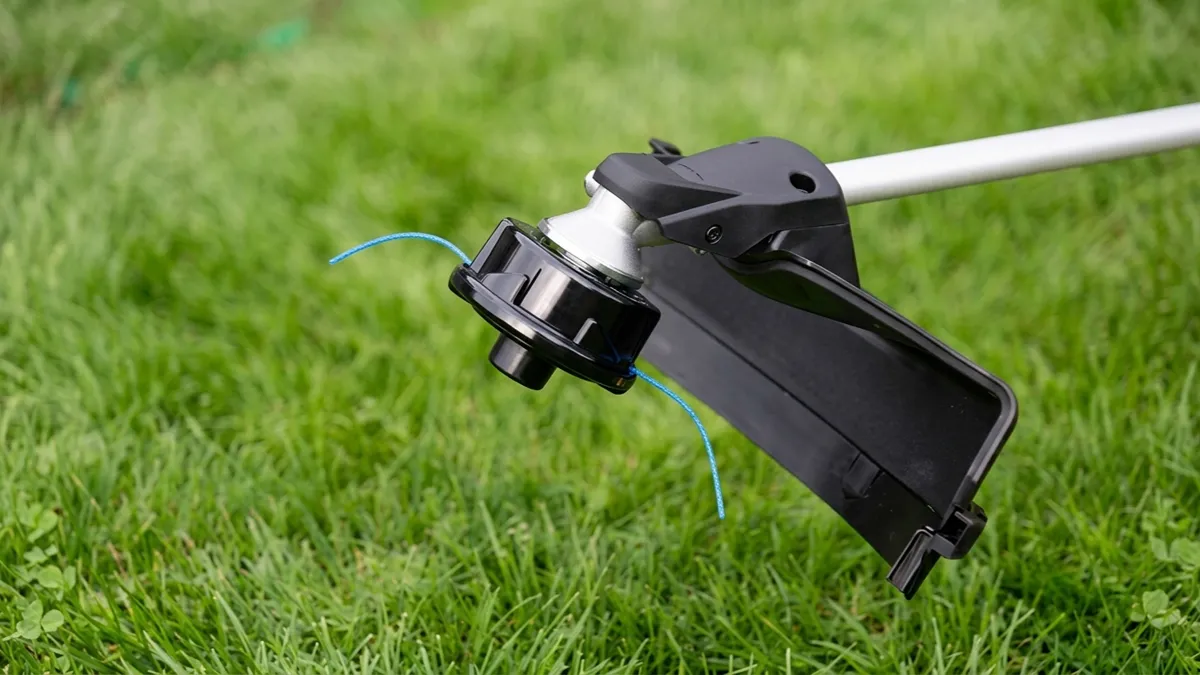
올바른 스트링 트리머 헤드를 선택하면 절단 성능에 영향을 미칠 수 있습니다., 라인 소비, 기계 부하, 및 운영자 효율성. 가벼운 잔디 다듬기용으로 설계된 헤드는 빽빽한 잡초나 덤불에는 적합하지 않을 수 있습니다., 간단한 잔디 가장자리 처리에는 튼튼한 블레이드 시스템이 필요하지 않을 수 있습니다..
광범위하게 말하면, 스트링 트리머 헤드는 여러 가지 방법으로 분류될 수 있습니다., 공급 메커니즘 포함, 라인 로딩 방식, 절단 매체, 라인 콘센트 구성, 그리고 블레이드 디자인. 이러한 차이점을 이해하면 사용자가 기계와 작업에 맞는 절단 시스템을 선택하는 데 도움이 됩니다..
이 가이드에서는 트리머 헤드의 주요 유형을 설명합니다., 그들이 어떻게 작동하는지, 어떤 애플리케이션에 적합한지, 교체하기 전에 호환성을 확인하는 방법.
스트링 트리머 헤드란??
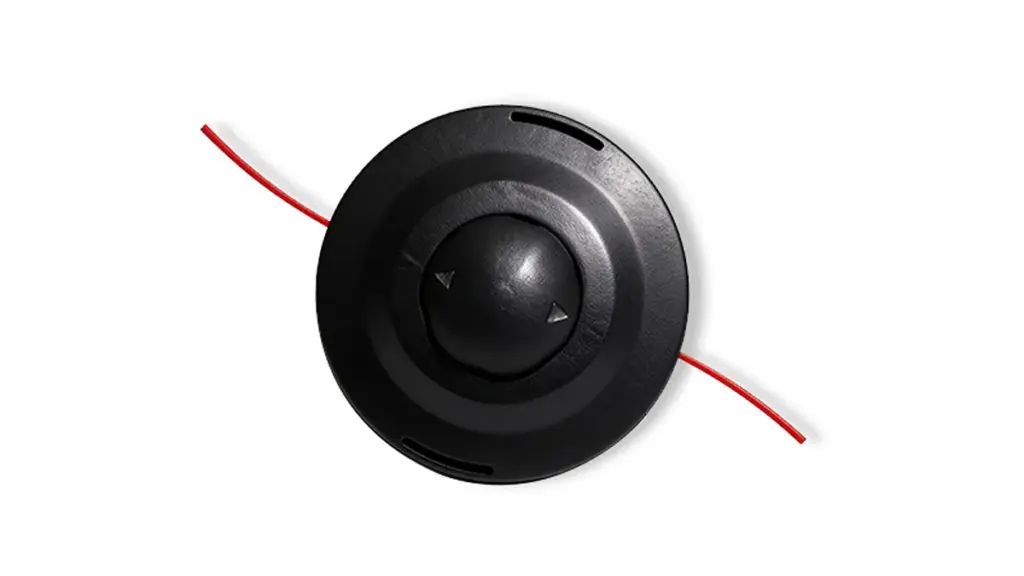
에이 스트링 트리머 헤드 스트링 트리머 또는 브러시 커터 샤프트의 하단에 설치된 절단 어셈블리입니다.. 절단선을 잡고 헤드가 회전함에 따라 절단선이 풀리는 방식을 조절합니다.. 엔진이나 모터가 샤프트를 구동할 때, 트리머 헤드가 고속으로 회전합니다., 나일론 줄이 바깥쪽으로 늘어나 잔디가 잘립니다., 잡초, 그리고 다른 가벼운 식물.
스트링 트리머 헤드의 주요 구성 요소
일반적인 스트링 트리머 헤드는 여러 주요 구성 요소로 구성됩니다.. 정확한 구조는 헤드 유형에 따라 다릅니다., 하지만 주요 부분에는 일반적으로 다음이 포함됩니다.:
- 주택: 외부 본체는 내부 구성 요소를 보호하고 절단 시스템을 함께 고정합니다..
- 스풀: 감긴 나일론 라인을 보관하기 위해 스풀형 헤드에 사용.
- 트리머 라인: 풀, 잡초에 접촉하여 절단하는 나일론 절단재.
- 피드 메커니즘: 추가 라인이 해제되는 방식을 제어합니다.. 범프 피드 헤드는 범프 메커니즘을 사용합니다., 자동 공급 설계는 내부 방출 시스템을 사용하는 반면.
- 범프 손잡이: 많은 범프 피드 헤드에서 발견됨. 이를 통해 작업자는 머리를 땅에 대고 두드려 더 많은 라인을 풀 수 있습니다..
- 커버 또는 캡: 스풀과 내부 부품을 제자리에 고정하고 라인 교체를 위한 접근을 허용합니다..
- 장착 너트 또는 어댑터: 트리머 헤드를 장비의 구동축에 연결합니다.. 나사산과 장착 시스템은 트리머와 일치해야 합니다..
- 작은 구멍 또는 라인 개구부: 작동시 나일론 라인을 헤드 안쪽에서 바깥쪽으로 유도.
스트링 트리머 헤드는 어떻게 분류됩니까??
스트링 트리머 헤드는 하나의 헤드가 동시에 두 개 이상의 카테고리에 속할 수 있으므로 여러 각도에서 분류될 수 있습니다..
가장 일반적인 분류 방법은 다음과 같습니다.:
- 공급 메커니즘으로: 범프피드, 자동 공급, 그리고 고정선.
- 라인 로딩 방식으로: 수동풍, 쉬운 로드/속도 공급, 미리 감겨진 스풀.
- 매체를 절단하여: 나일론 라인, 금속 블레이드, 철사, 아니면 와이어 브러시.
- 라인 콘센트 구성별: 한 줄, 이중선, 그리고 여러 줄.
- 블레이드 디자인으로: 2-이빨, 3-이빨, 4-이빨, 원형톱, 컷아웃 블레이드 디자인.
다양한 유형의 스트링 트리머 헤드 비교
| 트리머 헤드 유형 | 피드 메커니즘 | 라인 스풀링 / 로드 중 | 적합 라인 직경 | 주요 장점 | 주요 단점 | 최고의 사용 사례 |
|---|---|---|---|---|---|---|
| 범프 피드 헤드 산업 표준 |
땅에 부딪히는 소리; 봄 & 원심력을 통한 래칫 릴리스 라인 | 보통의 (하우징 분해 필요 & 수동 와인딩) |
0.065″ – 0.105″ (1.6mm – 2.7mm) |
• 정확한 라인 소비 제어 • 엔진을 멈추지 않고 즉시 라인 공급 • 전반적으로 높은 운영 효율성 |
• 하단 캡은 지면의 충격으로 인해 마모됩니다. • 과도한 힘은 라인을 과도하게 공급할 수 있습니다. |
정기적인 잔디 관리, 상업용 조경, 가장자리 트리밍 |
| 간편한 로드 / 속도 공급 최고 추천 |
범프 피드 메커니즘 (고급 버전) | 매우 쉬움 (분해 없음; 스풀을 통해 피드 라인 및 트위스트) |
0.080″ – 0.105″ (2.0mm – 2.7mm) |
• 줄 엉킴 제거 & 지루한 분해 • 빠른 새로고침 (아래에 30 초) • 범프피드 속도와 손쉬운 라인 로딩 결합 |
• 단단한 파편이 내부에 들어가면 내부 래칫이 걸릴 수 있습니다. • 단가가 약간 높음 |
프로 조경사, 빠른 라인 교체를 원하는 주택 소유자 |
| 자동 공급 (자동 공급) 초보자 친화적 |
스로틀에서 고정 길이를 자동 해제합니다. / 스위치 트리거 릴리스 | 쉬운 (종종 미리 감겨진 교체 스풀을 사용합니다.) |
0.065″ – 0.080″ (1.6mm – 2.0mm) |
• 100% 핸즈프리 라인 급지 • 지면 범핑이 필요하지 않습니다. • 초보자에게도 매우 쉽습니다. |
• 더 높은 회선 소비 • 라인 출력을 수동으로 제어할 수 없습니다. • 라인 걸림 문제 해결은 지루할 수 있습니다. |
작은 주거용 잔디밭, 가벼운 트리밍, DIY 주택 소유자 |
| 고정 라인 헤드 헤비 듀티 |
없음 (미리 절단된 개별 라인 스트립을 사용합니다.) | 매우 쉬움 (푸시인 / 미리 절단된 라인을 직접 잠급니다.) |
0.105″ – 0.155″ (2.7mm – 4.0mm) |
• 라인 용접이나 내부 엉킴 위험 없음 • 초박형 지원 & 톱니 모양의 튼튼한 라인 • 거친 파편에 대한 최대 내구성 |
• 마모된 라인을 수동으로 교체하려면 기계를 정지해야 합니다. • 연속적으로 공급할 수 없습니다. |
두꺼운 잡초, 무성한 지역, 브러시 가장자리 지우기 |
| 블레이드 트리머 헤드 하드 커팅 |
라인리스 (플라스틱 또는 금속 블레이드를 사용합니다.) | 해당 없음 (나사/클립을 통해 마모된 개별 블레이드 교체) |
해당 없음 (나일론 라인을 완전히 대체합니다.) |
• 매우 높은 절삭력 • 무거운 잡초를 잘라냅니다. & 작은 나무는 쉽게 싹을 틔운다 • 줄이 닳거나 끊어지지 않음 |
• 발사체 파편의 위험이 더 높음 / 부상 • 돌이나 콘크리트에 대한 블레이드의 칩/부서짐 |
무거운 브러시 청소, 두꺼운 잡초, 빽빽한 초목 |
| 스틸 와이어 브러시 헤드 특수 목적 |
라인리스 (고장력 꼬인 강철 와이어 강모) | 해당 없음 (전체 와이어 휠 어셈블리 교체) |
해당 없음 (무거운 강철 와이어 묶음) |
• 단단한 표면에 대한 내마모성이 뛰어납니다. • 이끼를 긁어낸다, 잡초, 녹이 슬지 않도록 효과적으로 |
• 중량이 무거우면 모터/기어박스에 추가 부하가 가해집니다. • 투척 위험이 높음 (보호 장비가 필요합니다) |
포장 균열, 보도 이끼, 진입로 조인트 잡초 제거 |
메모: 아래 표시된 권장 라인 직경 범위는 업계 참고값일 뿐입니다.. 실제 라인 호환성은 트리머 헤드 디자인에 따라 다를 수 있습니다., 기계의 힘, 그리고 제조사 사양. 트리머 라인을 선택하기 전에 항상 사용 설명서나 제품 사양을 확인하세요..
공급 메커니즘에 따른 스트링 트리머 헤드 유형
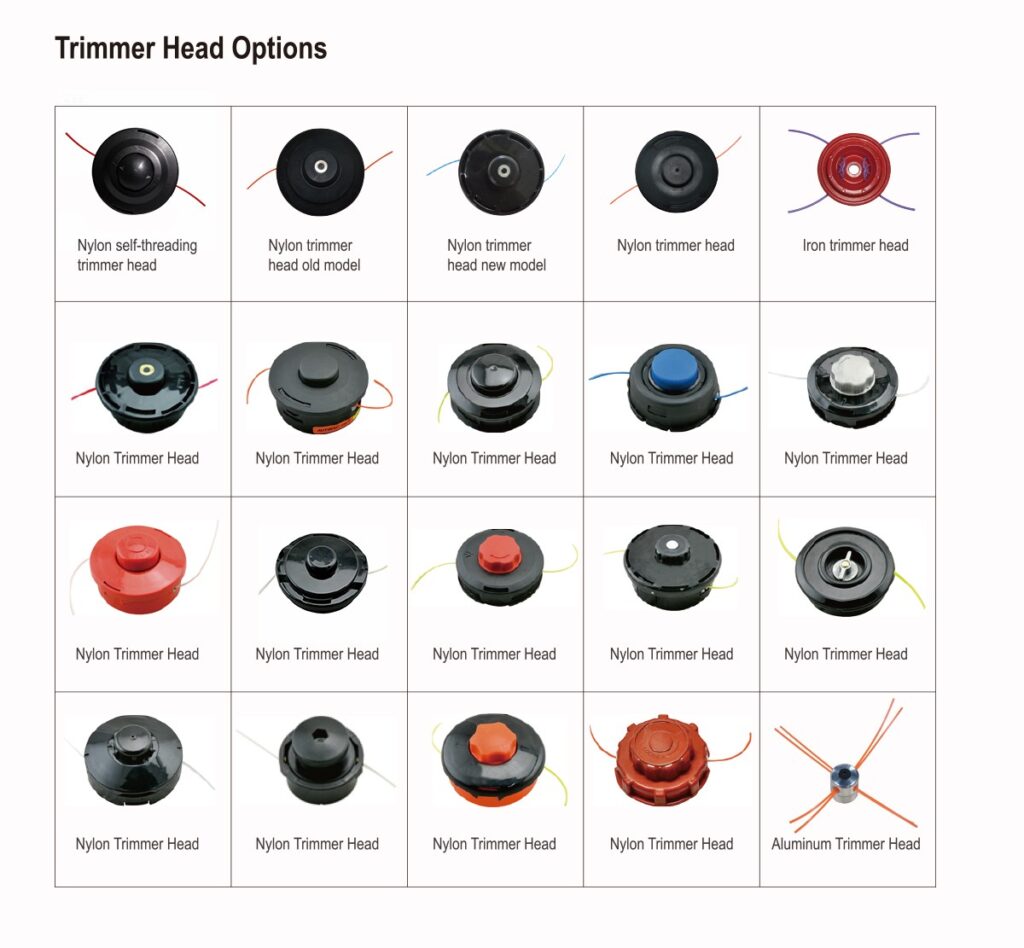
공급 메커니즘은 작업 중 절단선이 해제되는 방식을 결정합니다.. 사용자 편의성에 직접적인 영향을 미칩니다, 라인 소비, 및 유지 보수 요구 사항. 다양한 작업 조건에 맞게 다양한 공급 시스템이 설계되었습니다., 가끔 잔디를 다듬는 것부터 빈번한 전문 조경 작업까지. 가장 일반적인 급식 방법에는 범프 급식(Bump Feed)이 포함됩니다., 자동 공급, 및 고정 회선 시스템, 각각은 제어 간의 서로 다른 균형을 제공합니다., 능률, 그리고 단순함.
범프 피드 트리머 헤드
에이 범프 피드 트리머 헤드 작업자가 회전하는 헤드를 지면에 두드리면 추가 나일론 라인이 풀리는 스풀 시스템을 사용합니다.. 충격으로 인해 기계적 공급 메커니즘이 활성화됩니다., 원심력이 출구 구멍을 통해 더 많은 라인을 끌어당길 수 있도록 합니다.. 이 디자인은 사용자가 라인 확장 시기를 결정할 수 있기 때문에 제어가 잘 됩니다.. 장점은 간단한 조작을 포함합니다, 폭넓은 호환성, 그리고 쉬운 유지 보수. 하지만, 빈번한 접지 접촉 후 범프 손잡이와 내부 구성 요소가 마모될 수 있습니다., 특히 상업용 애플리케이션에서. 범프 피드 헤드는 일반 잔디 절단에 널리 사용됩니다., 잔디밭 가장자리, 그리고 잡초 다듬기.
NEWTOP 살펴보기 예초기용 트리머 헤드 솔루션 귀하의 응용 분야에 적합한 교체 옵션을 찾으려면.
자동 피드 트리머 헤드
안 자동 공급 트리머 헤드 내부 메커니즘을 사용하여 작업자가 머리를 부딪칠 필요 없이 작업 중에 자동으로 절단선을 해제합니다.. 디자인에 따라, 시스템이 원심력을 사용할 수 있습니다., 스프링 메커니즘, 또는 정확한 라인 길이를 유지하기 위한 사전 설정된 공급 구조. 가장 큰 장점은 편의성 향상, 특히 빈번한 수동 조정이 비효율적인 넓은 영역을 다룰 때. 하지만, 자동 공급 시스템이 과도한 길이를 방출하면 더 많은 라인을 소비할 수 있습니다., 내부 메커니즘은 일반적으로 범프 피드 설계에 비해 더 정밀한 제조가 필요합니다..
고정 라인 트리머 헤드
에이 고정 라인 트리머 헤드 헤드에 직접 삽입되는 사전 절단된 개별 나일론 라인 조각을 사용하기 때문에 스풀 기반 시스템과 다르게 작동합니다.. 작동 중, 고정라인이 머리와 함께 회전하며 고속 충격으로 식생을 절단. 이 구조는 스풀 감기 문제를 제거하고 빠른 라인 교체를 가능하게 합니다., 간단한 유지보수를 선호하는 사용자에게 적합합니다.. 고정 라인 헤드는 더 질긴 잔디와 잡초를 위해 더 두꺼운 라인과 함께 사용되는 경우가 많습니다.. 주요 한계는 절단 중에 라인을 자동으로 연장하는 대신 작업자가 마모된 라인 부분을 수동으로 교체해야 한다는 것입니다..
내구성이 뛰어난 전력 장비로 비즈니스 확장

라인 로딩 방식에 따른 스트링 트리머 헤드의 종류
라인 로딩 방법은 트리머 헤드에 새로운 절단선을 설치하는 방법을 설명합니다.. 모든 라인 기반 헤드는 동일한 기본 절단 기능을 수행하지만, 로딩 디자인은 교체 속도와 사용자 경험에 큰 영향을 미칠 수 있습니다.. 전통적인 수동 와인딩 시스템은 단순한 구조와 신뢰성에 중점을 둡니다., 가동 중지 시간을 줄이고 유지 관리를 더 쉽게 하기 위해 현대식 쉽게 로드하고 미리 감은 스풀 디자인을 개발했습니다..
수동 윈드 트리머 헤드
에이 수동 윈드 트리머 헤드 설치 전에 작업자가 내부 스풀 주위에 나일론 라인을 수동으로 감아야 합니다.. 작업 중 원활한 공급을 보장하려면 라인을 균일하고 올바른 방향으로 감아야 합니다.. 이 디자인은 단순한 구조로 인해 가장 전통적이고 널리 사용되는 시스템 중 하나입니다., 낮은 제조 비용, 그리고 믿을 수 있는 성능. 하지만, 라인 교체는 최신 간편 로드 시스템에 비해 더 많은 시간이 소요됩니다., 잘못 감으면 라인 걸림이나 고르지 못한 공급이 발생할 수 있습니다.. 수동 윈드 헤드는 내구성과 비용 효율성이 중요한 주거용 및 전문가급 트리머에 일반적으로 사용됩니다..
간편한 로드 / 스피드 피드 트리머 헤드
안 쉬운 로드 또는 속도 공급 트리머 헤드 스풀을 분해하거나 전체 라인을 수동으로 감는 필요성을 줄여 라인 교체 프로세스를 단순화하도록 설계되었습니다.. 많은 디자인에, 작업자가 헤드를 통해 직접 라인을 삽입하고 스풀을 회전시켜 균일하게 로딩합니다.. 이 시스템은 유지 관리 효율성을 향상시키고 가동 중지 시간을 줄입니다., 전문 조경사와 상업 사용자들 사이에서 인기를 얻습니다.. 가장 큰 장점은 더 빠른 라인 설치입니다., 단점은 구조가 일반적으로 더 복잡하고 전통적인 수동 윈드 헤드에 비해 더 높은 제조 정밀도가 필요할 수 있다는 것입니다..
미리 감긴 스풀 트리머 헤드
에이 미리 감겨진 스풀 트리머 헤드 제조업체에서 이미 설치한 나일론 라인이 있는 교체 스풀을 사용합니다.. 라인이 소진되면, 사용자는 새 라인을 수동으로 감는 대신 기존 스풀을 제거하고 새 스풀을 설치하기만 하면 됩니다.. 이는 가장 빠르고 쉬운 교체 프로세스를 제공합니다., 특히 편의성을 우선시하는 가끔 사용자를 위한. 하지만, 사전 감겨진 스풀은 일반적으로 교체 비용이 더 높으며 사용자가 호환되는 스풀 크기를 구매해야 합니다.. 이 유형은 사용 편의성이 주요 구매 요소인 소비자 등급 전기 및 배터리 구동 트리머에서 흔히 볼 수 있습니다..
매체 절단에 따른 스트링 트리머 헤드 유형
절단 매체는 식물과 접촉하여 제거하는 실제 재료입니다.. 다양한 재료는 다양한 수준의 절단 강도를 제공합니다., 유연성, 내구성, 그리고 안전. 나일론 라인은 일반 잔디 다듬기에 흔히 사용됩니다., 금속 블레이드와 와이어 기반 시스템은 더 거친 초목이나 특수 용도로 설계되었습니다..
나일론 라인 트리머 헤드
나일론 라인 트리머 헤드 잔디 다듬기에 사용되는 가장 일반적인 절단 시스템입니다. 예초기. 고속으로 회전하는 유연한 나일론 라인을 사용하여 충격력으로 잔디와 잡초를 잘라냅니다.. 다양한 라인 직경, 모양, 재료가 내구성에 영향을 줄 수 있습니다., 절단 효율, 그리고 파손에 대한 저항성. 나일론 헤드는 유연한 라인이 단단한 표면에 닿을 때 손상을 일으킬 가능성이 적기 때문에 탁월한 안전성을 제공합니다.. 하지만, 두꺼운 브러시에는 덜 효과적입니다., 우디 줄기, 또는 빽빽한 식물. 잔디 관리에 이상적입니다., 가장자리 다듬기, 일반 조경 응용 분야.
블레이드 트리머 헤드
에이 블레이드 트리머 헤드 유연한 나일론 라인 대신 견고한 금속 블레이드를 사용하여 더욱 강력한 커팅 성능을 제공합니다.. 회전하는 칼날이 직접 접촉하여 식물을 잘라냅니다., 두꺼운 잔디에 적합하도록 만들어졌습니다., 무거운 잡초, 나일론 라인을 빨리 마모시킬 수 있는 작은 브러시. 블레이드 시스템은 까다로운 작업에서 더 높은 절삭력과 더 긴 서비스 수명을 제공합니다., 하지만 더 강한 기계가 필요해요, 제대로 된 안전요원, 그리고 올바른 설치. 금속 블레이드는 더 높은 충격력을 생성하기 때문에, 경량 주거용 스트링 트리머보다는 주로 전문 예초기와 함께 사용됩니다..
와이어 및 와이어 브러시 트리머 헤드
와이어 및 와이어 브러시 트리머 헤드 거친 식물을 제거하려면 금속 와이어 요소 또는 브러시 스타일 절단 재료를 사용하십시오., 이끼, 잡초, 표면 성장. 날카로운 모서리로 자르는 것보다, 회전하는 와이어는 연마성 청소 및 절단 작업을 생성합니다.. 이 헤드는 포장 돌 사이의 잡초 제거 또는 단단한 표면 청소와 같은 특수 작업에 유용할 수 있습니다..
라인 아웃렛 구성에 따른 스트링 트리머 헤드 유형

라인 출구 구성은 트리머 헤드에서 연장되는 절단선 끝의 수와 배열을 나타냅니다.. 이 디자인은 절단 적용 범위에 영향을 미칩니다., 능률, 트리머 모터 또는 엔진에 가해지는 부하. 단일 라인 시스템은 일반적으로 더 가벼운 애플리케이션을 위해 설계됩니다., 이중 라인 및 다중 라인 헤드는 더 넓은 영역과 무거운 잔디 조건에 대해 향상된 절단 성능을 제공합니다..
단일 라인 트리머 헤드
에이 단선 트리머 헤드 작동시 머리부터 뻗은 나일론 라인 1개 사용. 움직이는 부품이 적고 회전 저항이 낮기 때문에, 주거용 잔디 관리용으로 설계된 경량 트리머에 자주 사용됩니다.. 단일 라인 시스템은 안정적인 작동을 제공합니다., 라인 소비 감소, 다중 라인 설계에 비해 유지 관리가 더 쉽습니다.. 하지만, 일반적으로 빽빽한 초목을 다룰 때 절단 범위가 적고 절단 효율이 낮습니다.. 가벼운 트리밍에 적합합니다., 잔디밭 가장자리, 최대절삭속도보다 정밀도가 더 중요한 분야.
이중 라인 및 다중 라인 트리머 헤드
에이 이중 라인 또는 다중 라인 트리머 헤드 머리에서 연장되는 두 개 이상의 절단선 끝을 사용합니다., 회전 중 절단 지점 수 증가. 이 디자인은 절단 효율성을 향상시키고 기계가 회전할 때마다 더 많은 초목을 제거할 수 있게 해줍니다.. 다중 라인 헤드는 일반적으로 더 무거운 잔디 및 전문 조경 분야에 사용됩니다.. 하지만, 추가 라인은 공기 저항을 증가시키고 엔진이나 모터에 더 많은 부하를 가합니다.. 그러므로, 이러한 헤드는 성능을 유지하고 과도한 마모를 방지하기 위해 충분한 기계 출력과 적절한 라인 직경 선택이 필요합니다..
블레이드 디자인에 따른 금속 블레이드 트리머 헤드의 유형
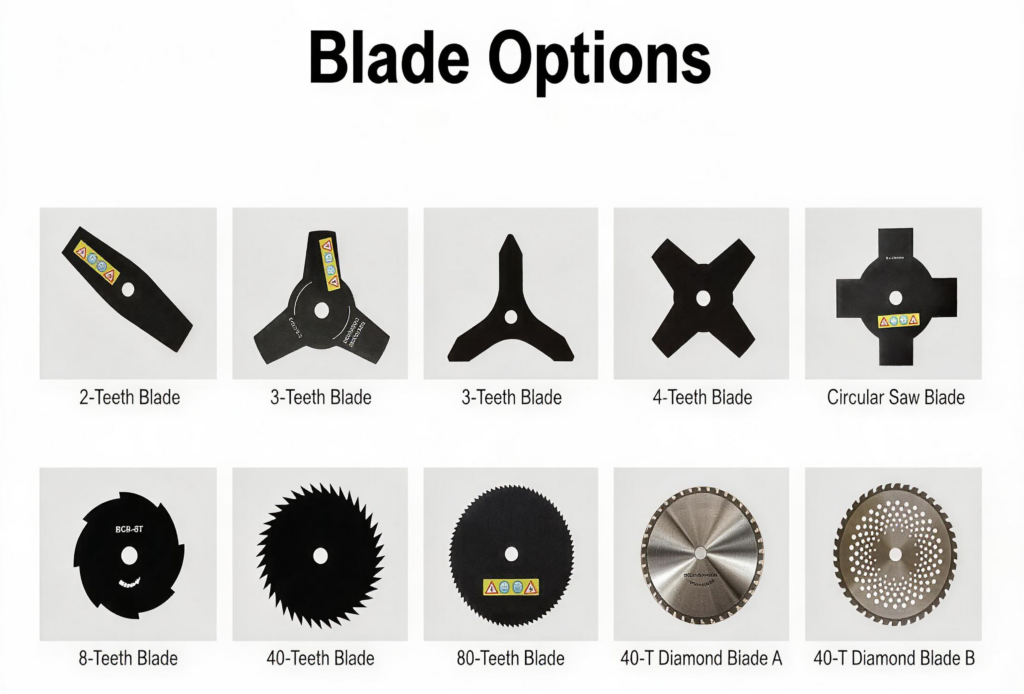
금속 블레이드 헤드는 나일론 라인으로는 충분한 절단력을 제공할 수 없는 예초기 및 중장비 트리밍 장비에 주로 사용됩니다.. 블레이드 모양, 치아 번호, 전반적인 구조는 블레이드가 다양한 유형의 식물을 얼마나 효율적으로 절단하는지 결정합니다..
2-치아 직선 블레이드
에이 2-치아 직선 블레이드 블레이드 디스크에 서로 반대편에 위치한 두 개의 커팅 엣지가 특징. 심플한 디자인으로 균형이 잘 잡혀있습니다., 낮은 회전 중량, 가벼운 식물을 위한 효율적인 절단 성능. 치아가 적기 때문에, 다치날에 비해 적은 동력으로 높은 회전속도를 유지할 수 있습니다.. 이 블레이드는 일반적으로 잔디 절단 및 부드러운 잡초에 사용됩니다.. 하지만, 제한된 수의 절단 모서리로 인해 더 단단한 재료를 처리하는 능력이 떨어지기 때문에 빽빽한 수풀이나 목본 식물용으로 설계되지 않았습니다..
3-치아 블레이드
에이 3-이빨날 절단 강도 사이의 균형을 제공하기 때문에 가장 일반적으로 사용되는 예초기 날 중 하나입니다., 제어, 그리고 다양성. 3개의 절삭날은 효율적인 회전을 유지하면서 충격력을 더욱 균일하게 분산시킵니다.. 이 디자인은 중간 밀도 잔디에 적합합니다., 잡초, 일반 식생 관리. 2톱니 블레이드와 비교, 3-톱니 디자인은 향상된 절단 범위를 제공합니다., 많은 예초기에 사용할 수 있을 만큼 가볍지만.
4-치아 블레이드
에이 4-이빨날 2날 및 3날 디자인에 비해 추가 절삭날 제공, 두꺼운 초목을 작업할 때 절단 일관성 개선. 치아 수가 증가하면 회전 중에 식물과 더 자주 접촉할 수 있습니다., 절단 효율을 향상시킬 수 있는. 하지만, 추가 재료로 인해 블레이드 무게가 증가하고 적절한 기계 출력이 필요합니다.. 4개의 톱니 블레이드는 사용자가 표준 나일론 라인 시스템보다 더 강력한 성능을 필요로 하지만 원형 톱날이 필요하지 않은 더 무거운 풀과 질긴 잡초에 자주 사용됩니다..
원형 톱날
에이 원형 톱날 바깥쪽 가장자리 주위에 여러 개의 날카로운 이빨을 사용합니다., 일반 톱과 비슷하다. 잔디깎이 칼날과 달리, 훨씬 더 거친 식물을 처리하도록 설계되었습니다., 두꺼운 브러쉬 포함, 작은 나무 줄기, 그리고 어린 묘목. 많은 날수로 공격적인 절삭 성능 제공, 하지만 더 높은 엔진 출력도 필요합니다, 올바른 블레이드 장착, 전문적인 운영 관행. 원형 톱날은 일반적으로 견고한 예초기와 함께 사용되며 이러한 유형의 절단 장치를 지원하도록 특별히 설계된 기계에만 설치해야 합니다..
컷아웃 및 속이 빈 블레이드 디자인
컷아웃 및 속이 빈 블레이드 디자인 절단 강도를 유지하면서 무게를 줄이기 위해 블레이드 본체의 개구부나 재료 면적을 줄입니다.. 이러한 디자인은 회전 질량을 줄이는 데 도움이 됩니다., 기계 균형 개선, 장시간 사용 시 작업자의 피로도 감소. 컷아웃 구조는 회전 시 저항을 줄여 핸들링을 향상시킬 수도 있습니다.. 특정 식생 조건에 맞게 다양한 개방 패턴이 개발되었습니다., 잔디 관리부터 무거운 예초까지. 모든 금속 블레이드와 마찬가지로, 성능은 예초기의 힘과 칼날 디자인의 일치에 따라 달라집니다., 가드 시스템, 그리고 의도된 작업 환경.
귀하의 마당에 적합한 트리머 헤드를 선택하는 방법
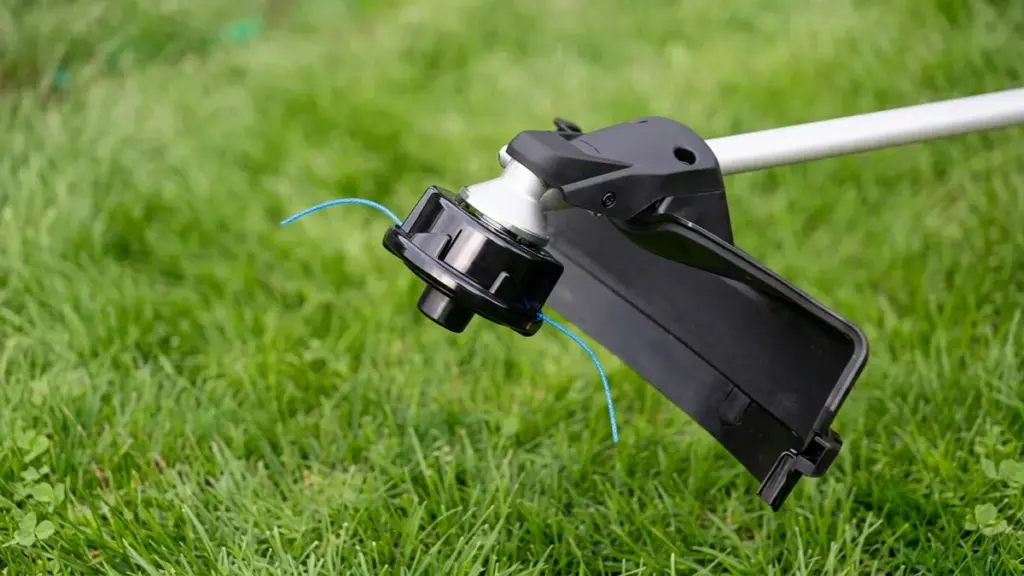
다음으로 시작하세요. 초목, 그럼 기계를 고려해보세요.
일반 잔디 및 테두리용, 일반적으로 나일론 라인 헤드가 가장 실용적인 선택입니다.. 범프피드 또는 자동피드 설계로 빈번한 라인 조정이 더 쉬워졌습니다..
두꺼운 잡초와 키가 큰 풀의 경우, 더 강한 헤드와 적절한 라인 직경을 선택하십시오. 식물이 나무 모양이나 덤불 모양으로 변하는 경우, 호환되는 금속 블레이드는 더 나은 절단 성능을 제공할 수 있습니다..
당신은 또한 고려해야합니다:
- 기계 동력: 무거운 헤드와 블레이드에는 적절한 엔진 출력이 필요합니다..
- 절단재료: 나일론 라인은 일반 트리밍에 적합합니다.; 잎은 더 거친 식물에 더 좋습니다.
- 선 직경: 라인이 두꺼울수록 내구성이 향상되지만 기계 부하가 증가합니다..
- 작동 빈도: 상업용 사용자는 쉽게 로드하거나 빠르게 공급하는 시스템의 이점을 누릴 수 있습니다..
- 유지: 빠른 서비스가 중요한 경우에는 단순한 헤드가 더 바람직할 수 있습니다..
트리머 헤드를 라인 직경과 일치시키는 방법
선 직경은 두 가지 모두와 일치해야 합니다. 트리머 헤드 및 기계 동력.
얇은 라인은 일반적으로 가벼운 잔디에 적합하며 가속하는 데 더 적은 전력이 필요합니다.. 라인이 두꺼울수록 마모 및 파손에 대한 저항력이 향상되며 빽빽한 풀과 잡초에 더 적합합니다..
하지만, 가능한 가장 두꺼운 선을 사용하는 것이 항상 좋은 것은 아닙니다.. 대형 라인은 엔진 부하를 증가시킬 수 있습니다., 회전 속도를 줄이다, 공급 메커니즘을 방해합니다..
원래 사양에서 변경하기 전에 항상 스트링 트리머 헤드 제조업체의 권장 라인 직경을 확인하십시오..
트리머 헤드가 스트링 트리머에 맞는지 확인하는 방법
교체 헤드는 기계의 기계적 및 작동 사양과 일치해야 합니다.. 확인하다:
- 장착 스레드 및 샤프트 연결
- 어댑터 요구 사항
- 회전 방향
- 최대 라인 직경
- 최대 절단 직경
- 엔진 또는 모터 출력
- 머리 무게
- 기계 모델 호환성
용어 “범용 트리머 헤드” 하나의 헤드가 모든 스트링 트리머에 적합하다는 의미는 아닙니다.. 범용 제품은 일반적으로 어댑터를 통해 여러 가지 일반적인 장착 시스템을 지원합니다..
도매 구매자 및 장비 유통업체용, 외관이나 나사산 크기만 보고 헤드를 선택하는 것보다 정확한 호환성 목록을 확인하는 것이 더 안전합니다..
다양한 용도를 위한 NEWTOP 스트링 트리머 헤드
뉴탑 다양한 잔디에 대한 스트링 트리머 헤드 및 예초기 절단 액세서리 공급, 잡초, 및 식물 응용. 제품 범위에는 다양한 예초기 모델을 지원하는 다양한 헤드 구조와 장착 구성이 포함됩니다..
유통업체 및 수입업체용, 커팅 헤드 선택은 개별 액세서리에만 관한 것이 아닙니다. 머리, 나일론 라인, 잎, 예초기, 애플리케이션은 하나의 완전한 절단 시스템으로 작동해야 합니다..
NEWTOP은 다양한 시장 요구 사항에 맞는 실외 전력 장비 및 교체 절단 부품을 찾는 고객을 지원할 수 있습니다., 제품 선택 및 도매 소싱 포함.
해당 시장에 적합한 스트링 트리머 헤드 또는 예초기 절단 시스템을 찾고 있습니다.? 적합한 모델에 대해 논의하려면 NEWTOP에 문의하세요., 명세서, 및 소싱 옵션.
자주 묻는 질문
스트링 트리머 헤드에는 어떤 유형이 있나요??
스트링 트리머 헤드는 공급 메커니즘에 따라 분류될 수 있습니다., 로딩 방법, 절단 매체, 라인 콘센트 구성, 그리고 블레이드 디자인. 일반적인 유형에는 범프피드가 포함됩니다., 자동 공급, 고정선, 수동풍, 쉽게 로드, 미리 감겨진 스풀, 나일론 라인, 금속 블레이드 헤드.
범프 피드 트리머 헤드 란 무엇입니까??
범프 피드 헤드는 내부 스풀에 라인을 저장합니다.. 줄이 닳았을 때, 작업자는 회전하는 헤드를 땅에 두드립니다.. 이는 스프링 메커니즘을 압축하여 단락을 해제합니다., 기계를 멈추지 않고도 라인 양을 제어할 수 있습니다..
범용 트리머 헤드는 정말 보편적입니까??
꼭 그런 것은 아니다. 범용 헤드는 일반적으로 시중의 모든 트리머가 아닌 여러 가지 일반적인 장착 시스템에 적합합니다.. 항상 스레드를 확인하세요., 어댑터, 회전 방향, 라인 용량, 설치 전 기계 호환성.
로드하기 가장 쉬운 트리머 헤드는 무엇입니까?
속도 공급 또는 쉽게 로드되는 범프 헤드는 재로드하기 가장 쉬운 것으로 널리 알려져 있습니다.. 구멍을 통해 라인을 직선으로 밀고 손잡이나 플레이트를 비틀어서 와인딩하는 외부 로딩 경로가 특징입니다.. 이렇게 하면 하우징을 열거나 수동으로 스풀을 감쌀 필요가 없습니다., 종종 인수 30 초.
스트링 트리머에 고정 라인 헤드를 장착할 수 있나요??
예, 고정 라인 헤드가 트리머의 아버 크기와 일치하는 경우, 실 방향, 및 전력 등급. 고정 라인 헤드는 종종 무거운 덤불과 잡초를 위해 두꺼운 라인을 사용하기 때문에, 저전력 소비자 장치보다는 대형 가스 트리머에서 가장 잘 작동합니다..
자동 및 범프 피드 트리머 헤드의 차이점은 무엇입니까?
가장 큰 차이점은 사용자 제어에 있습니다.. 범프 피드 헤드를 사용하려면 라인을 전진하려면 수동으로 지면을 두드려야 합니다., 낭비되는 라인을 최소화하는 데 도움이 되는. 자동 헤드는 라인이 짧거나 모터 부하가 변할 때 이를 감지하여 스스로 라인을 전진시킵니다., 지속적인 절단을 제공하지만 일반적으로 라인을 더 빨리 소비합니다..
