Pular para o conteúdo



When the boating season ends, many owners focus on winterizing the engine but overlook one of the most important components below the waterline—the hélice de motor de popa. Proper seasonal maintenance not only protects the propeller itself but also helps prevent hidden damage to the propeller shaft, caixa de velocidades, and seals.
Whether you use an aluminum or stainless steel propeller, spending a short amount of time on inspection and maintenance before storage can reduce unexpected failures, improve performance next season, and extend the service life of your outboard motor.
This guide explains exactly what to inspect, limpar, repair, and prepare before storing your outboard motor propeller, helping both recreational boat owners and commercial fleets reduce maintenance costs and downtime.
Why Seasonal Propeller Maintenance Matters
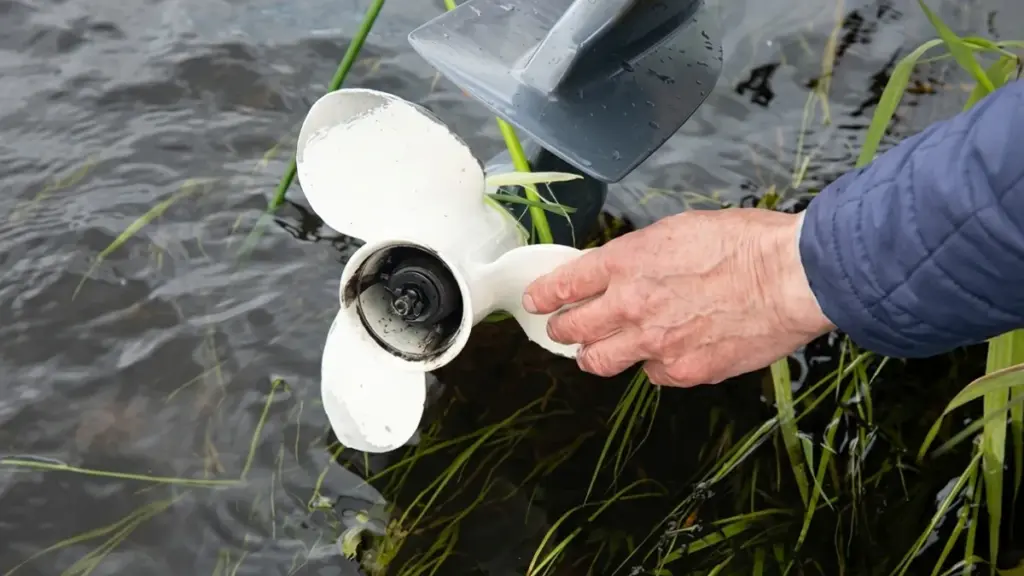
Routine seasonal propeller maintenance stops minor wear and hidden shaft debris from escalating into catastrophic lower-unit failures, protecting both fuel efficiency and drive-train longevity.
Ensuring Peak Performance and Fuel Efficiency
Hélices take the brunt of the marine workload. These high-impact components directly dictate your boat’s speed, fuel burn, and handling characteristics. A single bent blade or heavily nicked edge disrupts the hydrodynamic profile, forcing the outboard to work harder while delivering less thrust.
Routine seasonal maintenance restores the motor to its intended baseline efficiency. Catching minor deformations and correcting tom alignment early ensures you get the exact performance you expect every time you hit the throttle.
Preventing Costly Lower-Unit Damage
Fishing line, ervas daninhas, and netting constantly find their way around the propeller shaft. Operators rarely see this debris from the outside, allowing it to tighten and harden over time. Removing the propeller at the end of the season exposes wrapped monofilament before it cuts into the prop shaft seal.
A compromised seal invites water intrusion directly into the gearcase, emulsifying the gear oil. Finding and clearing these hazards early prevents a basic maintenance step from turning into an expensive lower-unit and drivetrain overhaul.
Mitigating Corrosion and Cavitation Erosion
The marine environment attacks metal relentlessly. Propellers face continuous exposure to saltwater, localized impact damage, and cavitation erosion. Regular visual inspections reveal abnormal wear patterns, deep pitting, and structural issues with critical hardware like prop pins or thrust washers.
Pulling the prop also allows technicians to clean the shaft and apply fresh waterproof marine grease. This targeted lubrication protects the metal splines from long-term galvanic deterioration and ensures the hub never seizes to the shaft.
Identifying When Replacement Is Necessary
Not all damage can be filed out or welded. Inspecting the propeller every 50 para 100 horas, or during the seasonal layup, helps operators spot critical structural defects before they fail under load. Thorough maintenance routines reveal specific signs that warrant an immediate swap.
- Visible warping: Blades that no longer track true or show severe bending.
- Deep notching: Cracks radiating from the blade root or hub area.
- Blade damage: Significant material loss that destroys dynamic balance.
Timely evaluation protects the outboard’s resale value and guarantees you avoid sudden on-water failures caused by fatigued metal or spun hubs.
What to Inspect Before Storing an Outboard Propeller
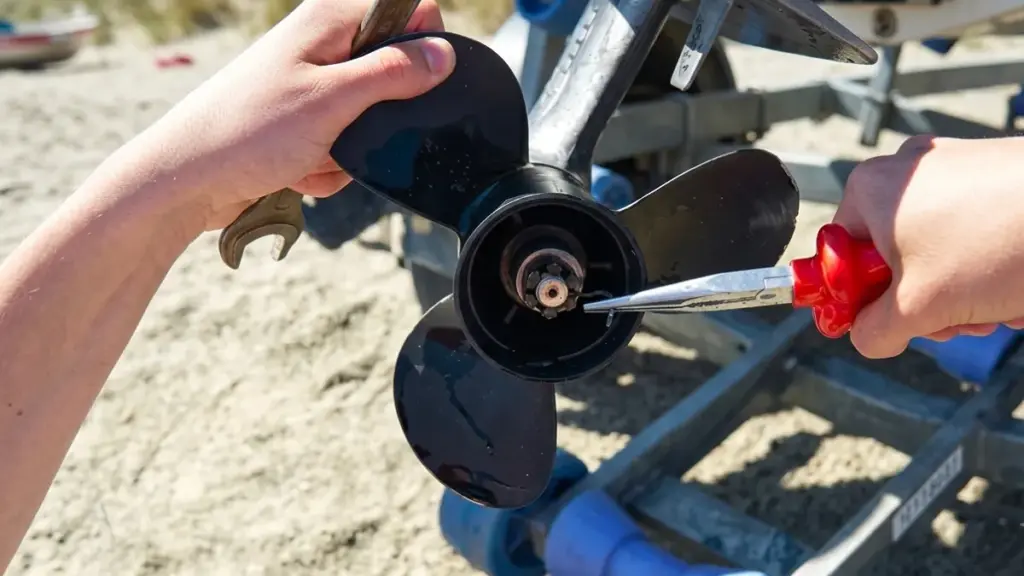
Ignoring your propeller before winter storage guarantees seized splines and compromised lower-unit seals next season. A systematic inspection now prevents catastrophic failure later.
| Componente | Inspection Focus | Primary Risk if Ignored |
|---|---|---|
| Lâminas & Surfaces | Cracks, curvas, marine growth | Imbalance, vibração, speed loss |
| Shaft & Selos | Fishing line, seal intrusion, bare splines | Water in gearcase, seized propeller |
| Hub Assembly | Slippage, looseness, debris | Spun hub, poor thrust transfer |
| Hardware | Corroded washers, reused cotter pins | Hardware failure, lost propeller |
Propeller Blades and Outer Surfaces
The outer surfaces take the brunt of impact and environmental wear. Visual checks only reveal obvious defects. A physical inspection uncovers the hidden structural damage that worsens over a long storage period.
- Blade integrity: Check each blade for nicks, dents, scratches, curvas, rachaduras, goivas, and wobble.
- Tactile inspection: Run fingers carefully along the edges to feel for hidden damage.
- Corrosion markers: Look for rust, oxidation, discoloration, and salt buildup, especially after saltwater use.
- Biological fouling: Remove weeds, algae, barnacles, and other marine growth before drying.
Prop Shaft, Splines, and Gearcase Seals
Removing the propeller exposes the critical junction between your propulsion system and the lower unit. Debris trapped here eats through seals, inviting water into the gearcase and causing massive internal failure.
- Debris removal: Remove fishing line and rope wrapped around the shaft to prevent lower-unit damage.
- Spline health: Inspect shaft splines for wear, rebarbas, or corrosion.
- Seal integrity: Examine the seal where the prop shaft enters the gearcase for compromise or water intrusion.
- Lubrificação: Apply marine-grade grease to the prop shaft before storage to help prevent seizure.
Internal Hub Assembly
The internal hub absorbs shock and transfers torque. If the rubber or mechanical components start failing, your engine will over-rev while the boat barely moves. Storage prep is the exact time to diagnose these issues.
- Physical condition: Inspect the hub for looseness, slippage, or physical signs of a spun hub.
- Performance context: Connect hub condition to performance clues from the last outing, such as vibration, cavitação, or loss of speed.
- Cavity check: Check the internal cavity for trapped debris or residue that could harden during storage.
Nuts, Washers, and Locking Hardware
Mounting hardware keeps the propeller locked safely onto the shaft under intense load. Reusing fatigued metal components or ignoring thread wear introduces unnecessary risk for your next launch.
- Nut condition: Verify the propeller nut is intact and free of thread damage.
- Supporting parts: Inspect washers and locking rings for wear, deformação, or corrosion.
- Pin replacement: Discard the old cotter pin and prepare a new one for reinstallation.
- Reassembly prep: Plan to reassemble the hardware using the manufacturer’s recommended torque.
Maximize ROI With Professional-Grade Garden Machinery

How to Check for Cracks, Bends, and Corrosion
A thorough propeller inspection requires a clean surface, good lighting, and tactile checks to catch hidden defects before they compromise your lower unit.
Preparation and Cleaning
Remove the propeller from the outboard to get an unobstructed view of the entire assembly. Wash away all marine growth, salt deposits, and oily residue. Dirt and algae easily hide fine stress lines or small chips. Once clean, dry the propeller completely. Moisture masks hairline cracks and subtle pitting that you need to spot with the naked eye.
Inspeção visual e tática da lâmina
Configure uma iluminação forte e examine as bordas principais, trailing edges, e pontas de lâmina. Procure por material faltante, sulcos profundos, e rachaduras visíveis. Suas mãos muitas vezes pegam o que seus olhos não percebem. Passe a mão nua sobre cada superfície da lâmina para sentir pontos ásperos, metal elevado, ou amassados sutis devido a pequenos impactos. Preste muita atenção à própria condição do metal. Inspecione quanto a oxidação em pó branco, deep pitting, e perda geral de material. Esta etapa é crítica para modelos de alumínio fundido, que se degradam rapidamente quando o revestimento externo protetor falha.
Avaliando o alinhamento e a geometria da lâmina
As lâminas exigem simetria perfeita para fornecer impulso eficiente. Compare o ângulo de inclinação, altura da ponta, e formato geral de cada lâmina em relação às outras. Procure atentamente por inconsistências visuais que apontem para flexão, torcendo, ou deformação de ataques submersos. Não ignore pequenas distorções. Mesmo uma pequena curvatura desequilibra a hélice. Este desequilíbrio rotacional envia vibrações destrutivas diretamente para a caixa de engrenagens, desgastando vedações e rolamentos ao longo do tempo.
Eixo, Shaft, e verificações de rotação
Inspecione o conjunto do cubo interno quanto a rachaduras, rasgo de borracha, ou folga que sinaliza que pode escorregar sob carga pesada. Verifique o eixo da hélice para ver se há linha de pesca de monofilamento enrolada. Deixado desmarcado, a linha de pesca corta diretamente a vedação do eixo de transmissão, deixando a água inundar a unidade inferior e causando corrosão interna. Finalmente, deslize a hélice de volta e gire-a lentamente com a mão. Observe o cubo e as pontas da lâmina quanto a rotação irregular ou oscilação visível. Uma hélice oscilante geralmente aponta diretamente para um eixo de hélice torto, em vez de danos isolados na lâmina.
When Propeller Repair Is Possible and When Replacement Is Better
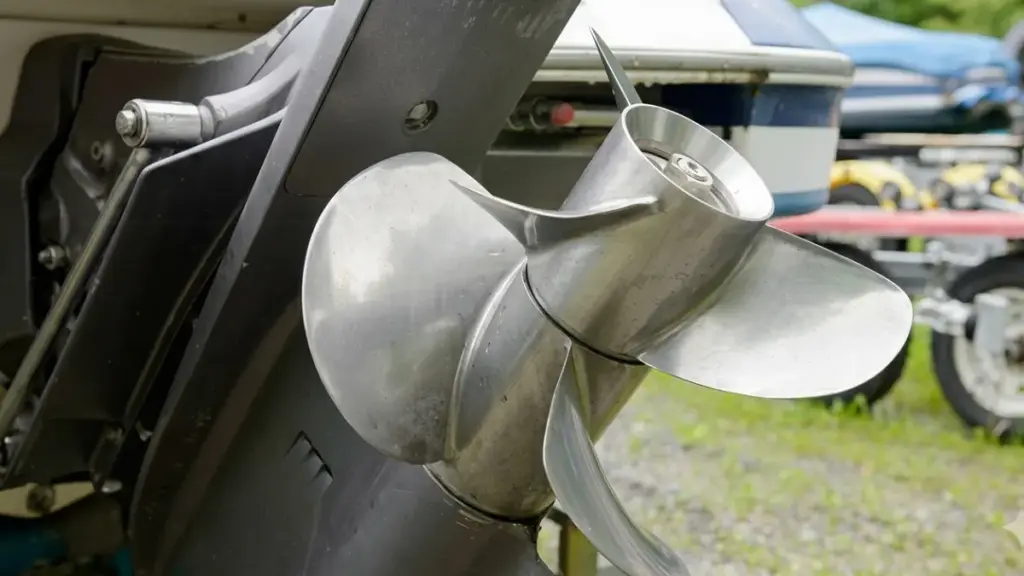
The decision depends on the severity of the damage, the propeller material, and the operating conditions.
| Tipo de dano | Repair Possible? | Replacement Recommended? |
|---|---|---|
| Small blade nick | Sim | Não |
| Minor bend | Geralmente | Às vezes |
| Surface corrosion | Sim | Não |
| Large crack | Não | Sim |
| Broken blade tip | Às vezes | Muitas vezes |
| Severe hub damage | Rarely | Sim |
| Heavy corrosion | Não | Sim |
Generally speaking:
Repair is suitable when:
- Damage is localized
- Blade geometry can be restored
- Structural strength remains intact
- Repair cost is significantly lower than replacement
Replacement is the better option when:
- Multiple blades are damaged
- Cracks continue growing
- Blade thickness has become too thin
- Repair costs approach the price of a new propeller
- The propeller repeatedly loses balance
Os operadores comerciais muitas vezes substituem as hélices danificadas mais cedo porque o tempo de inatividade custa muito mais do que a própria hélice. Para fabricantes de barcos, distribuidores de equipamentos marítimos, e fornecedores de manutenção, ter uma fonte de substituição confiável é essencial para reduzir o tempo de espera e manter os clientes operando com eficiência.
NOVOTOP fornece hélices de motor externo de alumínio e aço inoxidável de alta qualidade projetadas para desempenho confiável em diferentes aplicações marítimas. Com anos de experiência na fabricação de equipamentos elétricos para ambientes externos, NEWTOP combina produção de precisão, rigoroso controle de qualidade, e capacidade de fornecimento estável para apoiar parceiros globais com soluções de hélice consistentes.
Se você precisa de hélices de reposição padrão ou soluções personalizadas para aplicações específicas de motores de popa, trabalhando com um experiente hélice de motor de popa ma
Como remover, Limpar, e reinstalar uma hélice com segurança
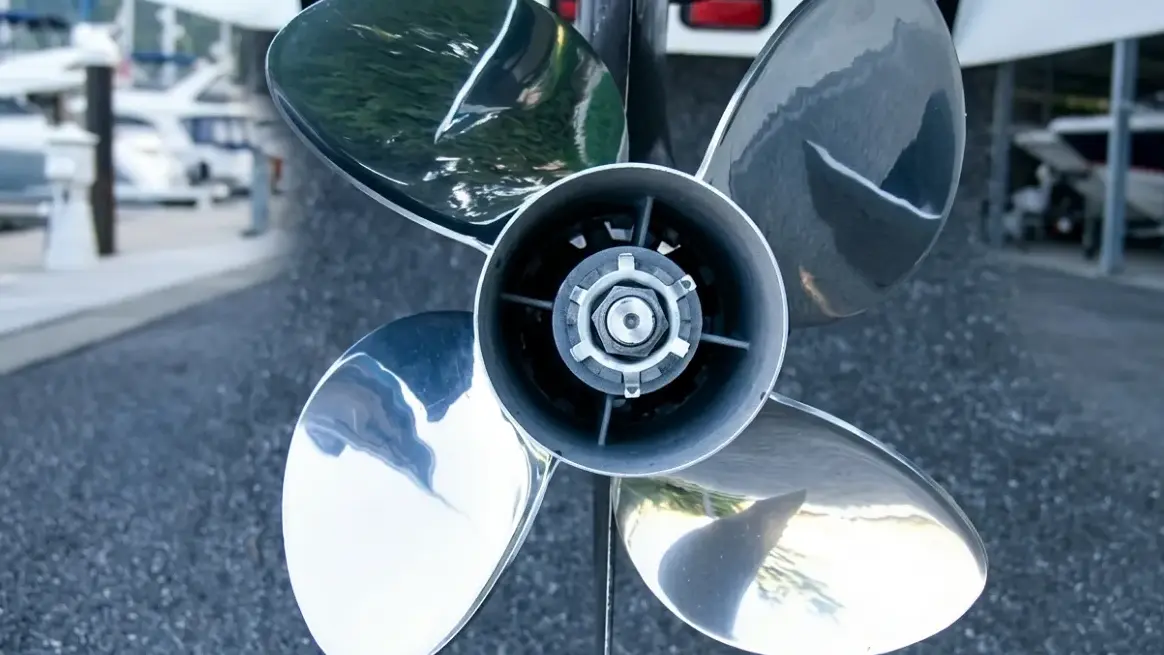
Remover e reinstalar uma hélice externa é uma tarefa de manutenção fundamental que evita estrias emperradas, detecta danos ocultos na linha de pesca mais cedo, e mantém a unidade inferior protegida.
Precauções de segurança e preparação de ferramentas
Trabalhar com pás de hélices afiadas requer protocolos de segurança rigorosos antes mesmo de você tocar em uma chave inglesa. Uma partida repentina do motor ou uma rotação inesperada da lâmina pode causar ferimentos graves.
- Desativação do motor: Remova o cordão do interruptor de desligamento e desconecte a bateria para eliminar qualquer chance de partida acidental.
- Imobilização da hélice: Coloque um bloco sólido de madeira entre as lâminas e a placa antiventilação, ou use uma ferramenta de fixação de hélice dedicada para interromper a rotação.
- Kit de ferramentas essencial: Mantenha uma chave de porca de apoio (ou conjunto de soquete), alicate de bico fino para contrapinos, uma chave de fenda, e graxa de grau marítimo ao alcance do braço.
Remoção passo a passo da hélice
Assim que a configuração estiver segura e o suporte estiver travado no lugar, você pode desmontar a montagem com segurança. Preste muita atenção à ordem das ferragens à medida que elas saem do eixo.
- Liberte o fixador: Use um alicate para endireitar e puxar a cupilha, ou pegue uma chave de fenda e um martelo para alisar suavemente as abas da arruela de pressão.
- Afrouxe a porca: Gire a porca da hélice no sentido anti-horário com a chave apropriada até desenroscá-la completamente.
- Extraia a hélice: Puxe a unidade diretamente para fora ao longo do eixo. Se você encontrar resistência, mexa suavemente de um lado para o outro. Evite usar força excessiva contra a unidade inferior.
- Verifique a arruela de encosto: Deslize a arruela para fora do eixo e inspecione a superfície em busca de ranhuras de desgaste, distorção, ou rachaduras por estresse.
Limpeza e inspeção da hélice e do eixo
Uma hélice removida oferece uma visão clara das áreas mais vulneráveis da unidade inferior. Esta é a sua principal oportunidade de detectar sinais precoces de intrusão na caixa de engrenagens.
- Limpe o eixo: Limpe toda a graxa velha. Escolha cuidadosamente qualquer linha de pesca trançada ou monofilamento enrolada na base, pois isso acabará cortando o selo de óleo.
- Inspecione o retentor de óleo: Verifique a própria vedação de borracha quanto a cortes e cortes. Procure por emulsionado, óleo de engrenagem leitoso vazando, que sinaliza um vazamento ativo.
- Examine a hélice: Lave o crescimento marinho. Verifique as lâminas quanto a dobras, chips de impacto, e corrosão por cavitação, e verifique se a inserção do cubo de borracha não mostra sinais de escorregar ou rasgar.
Lubrificação e reinstalação segura
A remontagem requer a lubrificação correta e torque preciso. Ignorar esses detalhes geralmente leva a uma hélice emperrada na próxima temporada ou a um conjunto solto sob carga.
- Lubrifique as estrias: Aplique uma luz, uma camada uniforme de graxa marinha à prova d'água nas estrias do eixo da hélice para bloquear a corrosão e garantir que a hélice deslize facilmente na próxima vez.
- Assente a arruela de encosto: Deslize a arruela de volta no eixo em sua orientação original correta. Empurre a hélice até que ela fique rente a ela.
- Aperte a porca: Substitua todos os espaçadores em ordem, rosqueie a porca manualmente para evitar rosqueamento cruzado, e use seu bloco de madeira para estabilizar o suporte. Aperte a porca com o torque especificado pelo fabricante.
- Bloqueie a montagem: Thread a brand-new cotter pin through the shaft and bend the legs securely, or fold the retainer tabs flat against the nut. Spin the prop manually to confirm smooth, unobstructed rotation.
What Spare Parts to Prepare for the Next Season
A well-stocked spare parts kit minimizes downtime and prevents minor hardware failures from ruining your boating season.
Spare Propeller Selection and Storage
You need to match your replacement propeller’s diameter, tom, material, and hub system exactly to your current engine requirements to maintain baseline performance. A mismatched spare will compromise your fuel efficiency and engine RPM limits.
Keep at least one primary spare on board at all times. If you navigate shallow, rochoso, or debris-filled waters, pack a secondary ‘get-home’ prop designed just to get you back to the dock safely. Store these spare propellers in a clean, dry area. Apply a light coat of marine grease to the hub splines and protect the blades from accidental impacts during rough weather.
Propeller Mounting Hardware
A spare propeller is useless if you lose or damage the mounting hardware during a swap. Your kit requires specific fastening components ready for immediate deployment.
- Thrust washers: Stock spares matched exactly to your specific outboard model to ensure proper prop seating and load transfer.
- Castle nuts and retainers: Keep extra nuts and locking retainers on hand. Inspect your existing hardware for corrosion or thread damage before the season starts.
- Cotter pins: Carry multiple new stainless-steel cotter pins. Used pins fatigue when bent, meaning you should never reuse them.
Marine Lubricants and Corrosion Prevention
Proper lubrication stops your hardware from seizing. Use a marine-grade propeller shaft grease to prevent spline galling. This simple step blocks saltwater intrusion and makes future propeller removals significantly easier.
Apply this lubricant directly to the shaft splines, the rear main seal area, and the mating surfaces between the thrust washer and the prop hub. Plan periodic propeller removals throughout the season. This routine lets you clean the shaft, renew the grease coating, and inspect the entire assembly for hidden corrosion before it causes mechanical failure.
Consumable Parts and Maintenance Tools
Field replacements require the right tools and small consumable components. For outboard setups that index the prop position, keep exact-match replacement shaft keys in your kit. While performing swaps, inspect the prop shaft seal area regularly. Look carefully for embedded fishing line to prevent costly water ingress into the lower unit.
To handle these tasks on the water, assemble a dedicated toolkit with the following items:
- Prop wrench: Sized specifically for your outboard nut to prevent rounding the edges.
- Torque wrench: Required to hit the manufacturer’s exact specifications and avoid overtightening.
- Needle-nose pliers: Essential for inserting, flexão, and removing stainless-steel cotter pins.
- Block of wood: Place this between the blades and the anti-ventilation plate to stop rotation during installation.
How NEWTOP Helps Reduce Replacement Downtime
When selecting a replacement outboard motor propeller, product quality and manufacturing consistency directly affect operating reliability and maintenance costs. A dependable propeller supplier helps reduce replacement delays while ensuring stable performance after installation.
NOVOTOP produces aluminum and stainless steel outboard motor propellers with strict control over materials, estrutura, and machining accuracy. As principais vantagens incluem:
- High-performance materials: Aluminum propellers use aluminum-magnesium alloy made from new aluminum ingots, providing excellent toughness and high strength. Stainless steel propellers use duplex stainless steel, offering higher yield strength and corrosion resistance than standard stainless steel.
- Strong one-piece structure: Propeller blanks are produced through dedicated molds with integrated forming technology, eliminating welding points and improving overall strength and durability.
- Better dynamic balance: The hub is pressed as an integrated part to ensure accurate positioning and smoother rotation, helping reduce vibration during operation.
- Precision blade processing: CNC machining centers with dedicated tooling ensure accurate blade dimensions, consistent blade curves, and stable propulsion performance.
NEWTOP helps global distributors, OEM customers, and marine equipment suppliers reduce replacement downtime with durable and consistent propeller solutions. Looking for a reliable outboard motor propeller supplier? Contact NEWTOP today to explore durable propeller solutions for your marine equipment needs.
Perguntas frequentes
How often should an outboard propeller be replaced?
There is no fixed timeline for replacing an outboard propeller. Replacement is driven entirely by condition, desempenho, e segurança. You should replace it when you notice structural damage like severe bends, pedaços faltando, ou rachaduras profundas, ou perda significativa de metal por corrosão. Problemas de desempenho não resolvidos, como velocidade máxima reduzida, maior consumo de combustível, ou vibração forte também indica que é hora de um novo suporte.
Devo remover minha hélice antes do armazenamento no inverno?
Sim, remover a hélice antes do armazenamento no inverno é altamente recomendado. Impede o roubo de valiosos adereços de aço inoxidável ou de alto desempenho. Também permite inspecionar o eixo da hélice em busca de linha de pesca enrolada, o que pode destruir as vedações e causar a entrada de água na caixa de engrenagens. Enquanto o suporte está desligado, você pode limpar o eixo e aplicar graxa marinha nova para evitar que ele emperre durante o inverno.
Como posso saber se minha hélice está danificada?
Os sinais visuais incluem lâminas tortas ou empenadas, bordas lascadas, rachaduras, e corrosão pesada. Você também pode notar mudanças de desempenho, such as a loss of top speed, sluggish acceleration, or increased fuel consumption. When running, a damaged propeller often causes unusual vibrations, steering pulling, or a slipping sensation where the engine over-revs without matching boat speed.
Can a bent propeller be repaired?
It depends on the material and severity. Minor bends or small dings in aluminum and some stainless steel propellers can often be reconditioned by a professional prop shop. But severe bends, deep cracks, distorted hubs, or damage to die-cast aluminum props usually require a full replacement. If structural integrity is compromised or the repair cost approaches the price of a new prop, replacement is the safer option.
What grease should be used on a propeller shaft?
Always use a high-quality, waterproof marine grease designed specifically for propeller shaft splines, such as a 2-4-C marine lubricant. This grease resists wash-out in fresh and saltwater, providing critical corrosion protection. Apply a thin, even coat to the shaft splines and threads at least once a season to ensure the propeller hub does not seize to the shaft.
How do I stop corrosion on a stored propeller?
Start by washing the propeller with low-pressure fresh water and a mild detergent to remove salt, grease, and marine growth. Dry it completely. For long-term storage, you can apply a two-part high-build epoxy primer to bare metal surfaces. Store the propeller indoors in a dry, well-ventilated area, avoiding direct contact with concrete floors or dissimilar metals.
What spare parts should I keep with a replacement propeller?
A spare propeller is only useful if you have the right hardware to install it. Keep a kit on board that includes a spare prop nut, several new stainless-steel cotter pins or lock washers, a thrust washer, and any required hub spacers. You should also pack a small tube of marine grease, a block of wood to stop prop rotation during the swap, and the correct size wrench or socket.
Can a damaged propeller affect the gearbox?
Sim, a damaged propeller can severely affect the gearbox. Bent blades or missing material create a rotational imbalance that sends vibrations directly down the prop shaft. Ao longo do tempo, this constant vibration and potential shaft misalignment increase wear on gearbox bearings, gear teeth, and shaft seals. In severe impact cases, shock loads can chip gears or bend the driveshaft, leading to expensive lower unit repairs.