When the boating season ends, many owners focus on winterizing the engine but overlook one of the most important components below the waterline—the outboard motor propeller. Proper seasonal maintenance not only protects the propeller itself but also helps prevent hidden damage to the propeller shaft, gearbox, and seals.
Whether you use an aluminum or stainless steel propeller, spending a short amount of time on inspection and maintenance before storage can reduce unexpected failures, improve performance next season, and extend the service life of your outboard motor.
This guide explains exactly what to inspect, clean, repair, and prepare before storing your outboard motor propeller, helping both recreational boat owners and commercial fleets reduce maintenance costs and downtime.
Why Seasonal Propeller Maintenance Matters
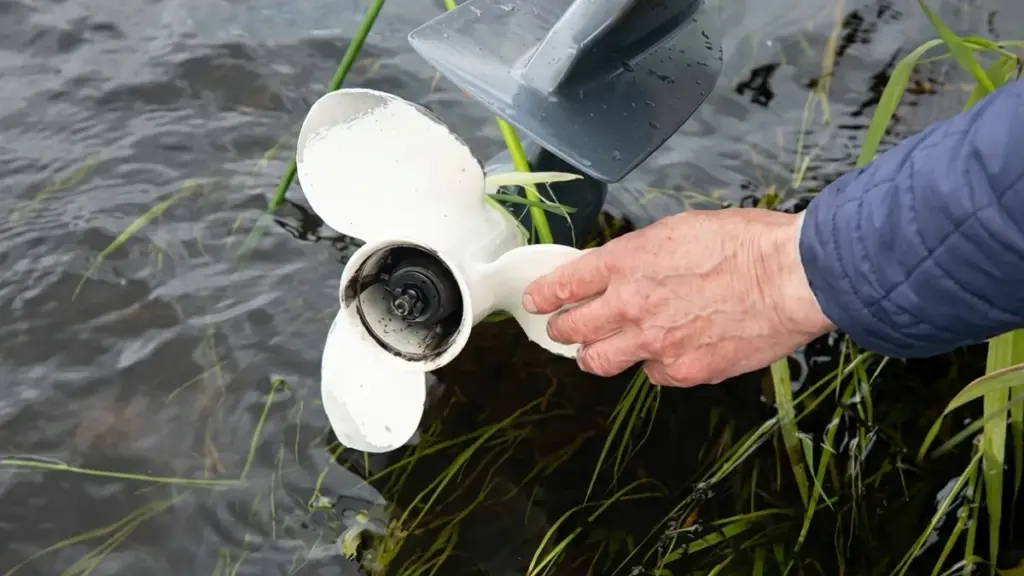
Routine seasonal propeller maintenance stops minor wear and hidden shaft debris from escalating into catastrophic lower-unit failures, protecting both fuel efficiency and drive-train longevity.
Ensuring Peak Performance and Fuel Efficiency
Propellers take the brunt of the marine workload. These high-impact components directly dictate your boat’s speed, fuel burn, and handling characteristics. A single bent blade or heavily nicked edge disrupts the hydrodynamic profile, forcing the outboard to work harder while delivering less thrust.
Routine seasonal maintenance restores the motor to its intended baseline efficiency. Catching minor deformations and correcting pitch alignment early ensures you get the exact performance you expect every time you hit the throttle.
Preventing Costly Lower-Unit Damage
Fishing line, weeds, and netting constantly find their way around the propeller shaft. Operators rarely see this debris from the outside, allowing it to tighten and harden over time. Removing the propeller at the end of the season exposes wrapped monofilament before it cuts into the prop shaft seal.
A compromised seal invites water intrusion directly into the gearcase, emulsifying the gear oil. Finding and clearing these hazards early prevents a basic maintenance step from turning into an expensive lower-unit and drivetrain overhaul.
Mitigating Corrosion and Cavitation Erosion
The marine environment attacks metal relentlessly. Propellers face continuous exposure to saltwater, localized impact damage, and cavitation erosion. Regular visual inspections reveal abnormal wear patterns, deep pitting, and structural issues with critical hardware like prop pins or thrust washers.
Pulling the prop also allows technicians to clean the shaft and apply fresh waterproof marine grease. This targeted lubrication protects the metal splines from long-term galvanic deterioration and ensures the hub never seizes to the shaft.
Identifying When Replacement Is Necessary
Not all damage can be filed out or welded. Inspecting the propeller every 50 to 100 hours, or during the seasonal layup, helps operators spot critical structural defects before they fail under load. Thorough maintenance routines reveal specific signs that warrant an immediate swap.
- Visible warping: Blades that no longer track true or show severe bending.
- Deep notching: Cracks radiating from the blade root or hub area.
- Blade damage: Significant material loss that destroys dynamic balance.
Timely evaluation protects the outboard’s resale value and guarantees you avoid sudden on-water failures caused by fatigued metal or spun hubs.
What to Inspect Before Storing an Outboard Propeller
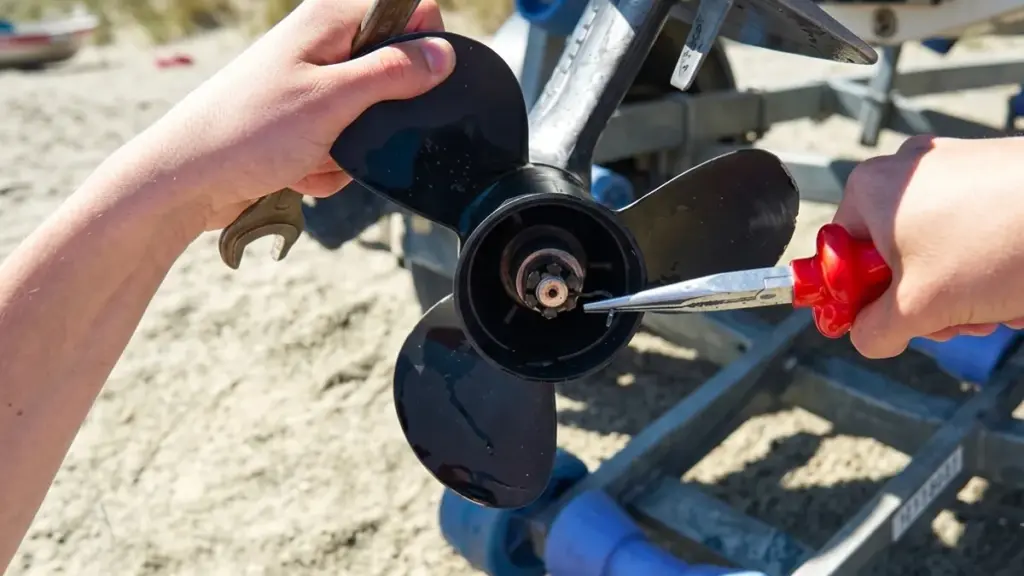
Ignoring your propeller before winter storage guarantees seized splines and compromised lower-unit seals next season. A systematic inspection now prevents catastrophic failure later.
| Component | Inspection Focus | Primary Risk if Ignored |
|---|---|---|
| Blades & Surfaces | Cracks, bends, marine growth | Imbalance, vibration, speed loss |
| Shaft & Seals | Fishing line, seal intrusion, bare splines | Water in gearcase, seized propeller |
| Hub Assembly | Slippage, looseness, debris | Spun hub, poor thrust transfer |
| Hardware | Corroded washers, reused cotter pins | Hardware failure, lost propeller |
Propeller Blades and Outer Surfaces
The outer surfaces take the brunt of impact and environmental wear. Visual checks only reveal obvious defects. A physical inspection uncovers the hidden structural damage that worsens over a long storage period.
- Blade integrity: Check each blade for nicks, dents, scratches, bends, cracks, gouges, and wobble.
- Tactile inspection: Run fingers carefully along the edges to feel for hidden damage.
- Corrosion markers: Look for rust, oxidation, discoloration, and salt buildup, especially after saltwater use.
- Biological fouling: Remove weeds, algae, barnacles, and other marine growth before drying.
Prop Shaft, Splines, and Gearcase Seals
Removing the propeller exposes the critical junction between your propulsion system and the lower unit. Debris trapped here eats through seals, inviting water into the gearcase and causing massive internal failure.
- Debris removal: Remove fishing line and rope wrapped around the shaft to prevent lower-unit damage.
- Spline health: Inspect shaft splines for wear, burrs, or corrosion.
- Seal integrity: Examine the seal where the prop shaft enters the gearcase for compromise or water intrusion.
- Lubrication: Apply marine-grade grease to the prop shaft before storage to help prevent seizure.
Internal Hub Assembly
The internal hub absorbs shock and transfers torque. If the rubber or mechanical components start failing, your engine will over-rev while the boat barely moves. Storage prep is the exact time to diagnose these issues.
- Physical condition: Inspect the hub for looseness, slippage, or physical signs of a spun hub.
- Performance context: Connect hub condition to performance clues from the last outing, such as vibration, cavitation, or loss of speed.
- Cavity check: Check the internal cavity for trapped debris or residue that could harden during storage.
Nuts, Washers, and Locking Hardware
Mounting hardware keeps the propeller locked safely onto the shaft under intense load. Reusing fatigued metal components or ignoring thread wear introduces unnecessary risk for your next launch.
- Nut condition: Verify the propeller nut is intact and free of thread damage.
- Supporting parts: Inspect washers and locking rings for wear, deformation, or corrosion.
- Pin replacement: Discard the old cotter pin and prepare a new one for reinstallation.
- Reassembly prep: Plan to reassemble the hardware using the manufacturer’s recommended torque.
Maximize ROI With Professional-Grade Garden Machinery

How to Check for Cracks, Bends, and Corrosion
A thorough propeller inspection requires a clean surface, good lighting, and tactile checks to catch hidden defects before they compromise your lower unit.
Preparation and Cleaning
Remove the propeller from the outboard to get an unobstructed view of the entire assembly. Wash away all marine growth, salt deposits, and oily residue. Dirt and algae easily hide fine stress lines or small chips. Once clean, dry the propeller completely. Moisture masks hairline cracks and subtle pitting that you need to spot with the naked eye.
Visual and Tactical Blade Inspection
Set up bright lighting and examine the leading edges, trailing edges, and blade tips. Look for missing material, deep gouges, and visible cracks. Your hands often catch what your eyes miss. Run a bare hand over every blade surface to feel for rough spots, raised metal, or subtle dents from minor impacts. Pay close attention to the metal condition itself. Inspect for white powdery oxidation, deep pitting, and general material loss. This step is critical for cast aluminum models, which degrade quickly once the protective outer coating fails.
Evaluating Blade Alignment and Geometry
Blades require perfect symmetry to deliver efficient thrust. Compare the pitch angle, tip height, and overall shape of each blade against the others. Look closely for visual inconsistencies that point to bending, twisting, or warping from submerged strikes. Do not ignore slight distortions. Even a minor bend throws the propeller out of balance. This rotational imbalance sends destructive vibrations straight into the gearcase, wearing out seals and bearings over time.
Hub, Shaft, and Rotation Checks
Inspect the inner hub assembly for cracking, rubber tearing, or looseness that signals it might slip under heavy load. Check the bare prop shaft for wrapped monofilament fishing line. Left unchecked, fishing line cuts directly through the prop shaft seal, letting water flood the lower unit and driving internal corrosion. Finally, slide the propeller back on and rotate it slowly by hand. Watch the hub and blade tips for uneven rotation or a visible wobble. A wobbling propeller often points directly to a bent prop shaft rather than isolated blade damage.
When Propeller Repair Is Possible and When Replacement Is Better
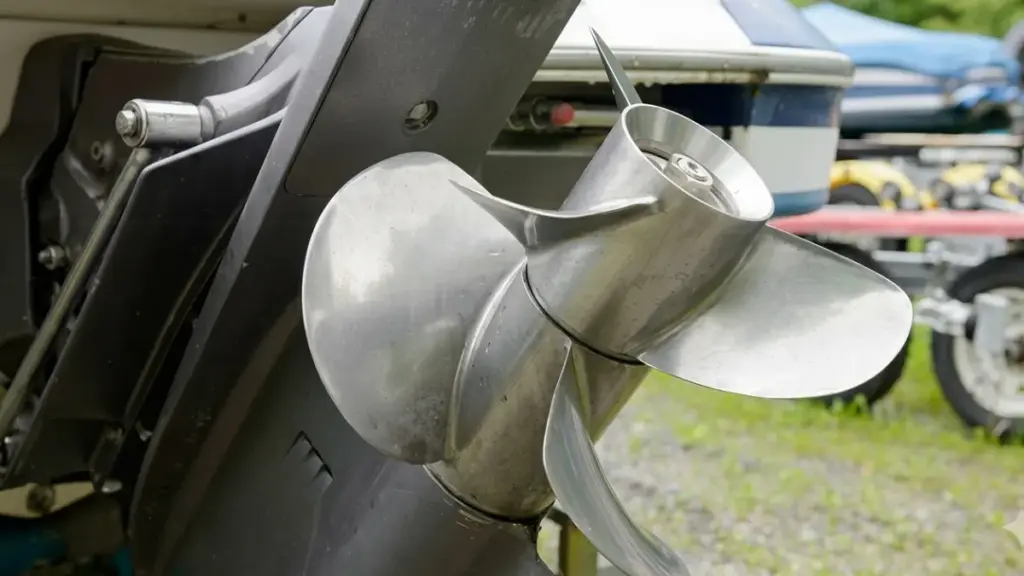
The decision depends on the severity of the damage, the propeller material, and the operating conditions.
| Damage Type | Repair Possible? | Replacement Recommended? |
|---|---|---|
| Small blade nick | Yes | No |
| Minor bend | Usually | Sometimes |
| Surface corrosion | Yes | No |
| Large crack | No | Yes |
| Broken blade tip | Sometimes | Often |
| Severe hub damage | Rarely | Yes |
| Heavy corrosion | No | Yes |
Generally speaking:
Repair is suitable when:
- Damage is localized
- Blade geometry can be restored
- Structural strength remains intact
- Repair cost is significantly lower than replacement
Replacement is the better option when:
- Multiple blades are damaged
- Cracks continue growing
- Blade thickness has become too thin
- Repair costs approach the price of a new propeller
- The propeller repeatedly loses balance
Commercial operators often replace damaged propellers sooner because downtime costs far more than the propeller itself. For boat manufacturers, marine equipment distributors, and maintenance providers, having a reliable replacement source is essential to reduce waiting time and keep customers operating efficiently.
NEWTOP provides high-quality aluminum and stainless steel outboard motor propellers designed for reliable performance in different marine applications. With years of experience in outdoor power equipment manufacturing, NEWTOP combines precision production, strict quality control, and stable supply capability to support global partners with consistent propeller solutions.
Whether you need standard replacement propellers or customized solutions for specific outboard motor applications, working with an experienced outboard motor propeller ma
How to Remove, Clean, and Reinstall a Propeller Safely
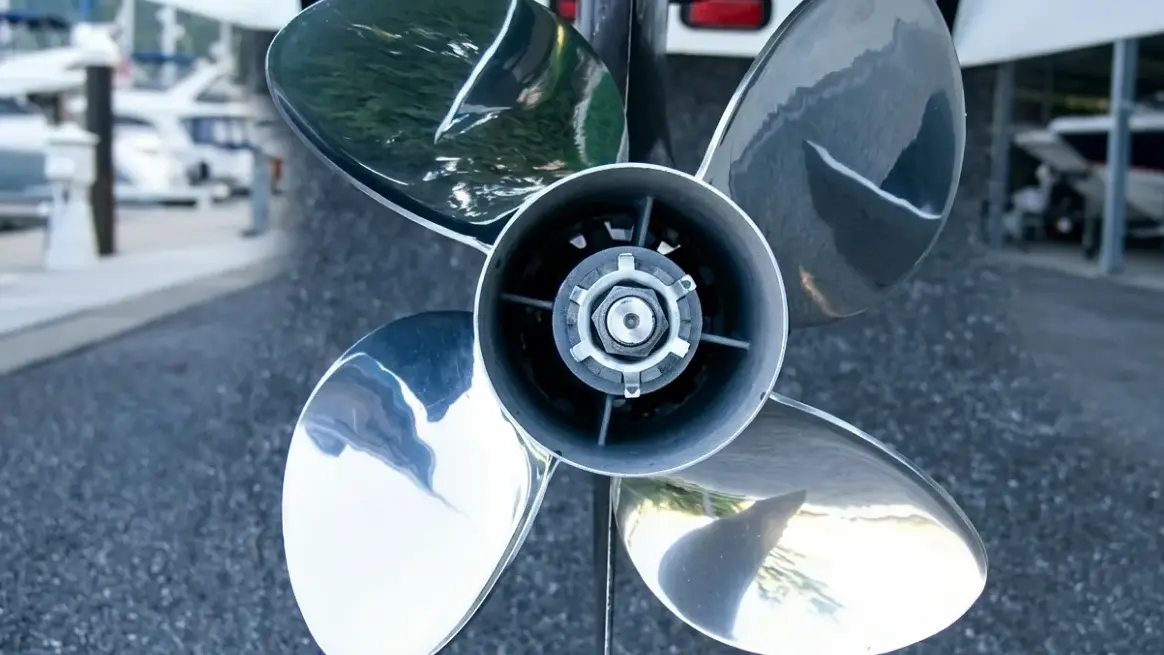
Removing and reinstalling an outboard propeller is a fundamental maintenance task that prevents seized splines, catches hidden fishing line damage early, and keeps the lower unit protected.
Safety Precautions and Tool Preparation
Working around sharp propeller blades requires strict safety protocols before you even touch a wrench. A sudden engine start or an unexpected blade rotation can cause severe injury.
- Engine disablement: Remove the kill-switch lanyard and disconnect the battery to eliminate any chance of an accidental start.
- Propeller immobilization: Wedge a solid block of wood between the blades and the anti-ventilation plate, or use a dedicated propeller holding tool to stop rotation.
- Essential toolkit: Keep a prop nut wrench (or socket set), needle-nose pliers for cotter pins, a flathead screwdriver, and marine-grade grease within arm’s reach.
Step-by-Step Propeller Removal
Once the setup is secure and the prop is locked in place, you can safely dismantle the assembly. Pay close attention to the order of the hardware as it comes off the shaft.
- Free the fastener: Use pliers to straighten and pull the cotter pin, or take a flathead screwdriver and hammer to gently flatten the lock-washer tabs.
- Loosen the nut: Turn the propeller nut counterclockwise with the appropriate wrench until it completely unthreads.
- Extract the propeller: Pull the unit straight outward along the shaft. If you meet resistance, wiggle it gently side-to-side. Avoid using excessive prying force against the lower unit.
- Check the thrust washer: Slide the washer off the shaft and inspect the surface for wear grooves, distortion, or stress cracks.
Cleaning and Inspecting the Propeller and Shaft
A removed propeller gives you a clear view of the lower unit’s most vulnerable areas. This is your primary opportunity to spot early signs of gearcase intrusion.
- Clear the shaft: Wipe away all old grease. Carefully pick out any braided or monofilament fishing line wrapped around the base, as this will eventually slice through the oil seal.
- Inspect the oil seal: Check the rubber seal itself for nicks and cuts. Look for emulsified, milky gear oil seeping out, which signals an active leak.
- Examine the propeller: Wash off marine growth. Check the blades for bends, impact chips, and cavitation pitting, and verify the rubber hub insert shows no signs of slipping or tearing.
Lubrication and Safe Reinstallation
Reassembly requires the right lubrication and precise torque. Skipping these details often leads to a seized propeller next season or a loose assembly under load.
- Grease the splines: Apply a light, even coat of waterproof marine grease to the bare prop shaft splines to block corrosion and ensure the prop slides off easily next time.
- Seat the thrust washer: Slide the washer back onto the shaft in its correct original orientation. Push the propeller on until it rests flush against it.
- Torque the nut: Replace all spacers in order, thread the nut on by hand to avoid cross-threading, and use your wood block to stabilize the prop. Tighten the nut to the manufacturer-specified torque.
- Lock the assembly: Thread a brand-new cotter pin through the shaft and bend the legs securely, or fold the retainer tabs flat against the nut. Spin the prop manually to confirm smooth, unobstructed rotation.
What Spare Parts to Prepare for the Next Season
A well-stocked spare parts kit minimizes downtime and prevents minor hardware failures from ruining your boating season.
Spare Propeller Selection and Storage
You need to match your replacement propeller’s diameter, pitch, material, and hub system exactly to your current engine requirements to maintain baseline performance. A mismatched spare will compromise your fuel efficiency and engine RPM limits.
Keep at least one primary spare on board at all times. If you navigate shallow, rocky, or debris-filled waters, pack a secondary ‘get-home’ prop designed just to get you back to the dock safely. Store these spare propellers in a clean, dry area. Apply a light coat of marine grease to the hub splines and protect the blades from accidental impacts during rough weather.
Propeller Mounting Hardware
A spare propeller is useless if you lose or damage the mounting hardware during a swap. Your kit requires specific fastening components ready for immediate deployment.
- Thrust washers: Stock spares matched exactly to your specific outboard model to ensure proper prop seating and load transfer.
- Castle nuts and retainers: Keep extra nuts and locking retainers on hand. Inspect your existing hardware for corrosion or thread damage before the season starts.
- Cotter pins: Carry multiple new stainless-steel cotter pins. Used pins fatigue when bent, meaning you should never reuse them.
Marine Lubricants and Corrosion Prevention
Proper lubrication stops your hardware from seizing. Use a marine-grade propeller shaft grease to prevent spline galling. This simple step blocks saltwater intrusion and makes future propeller removals significantly easier.
Apply this lubricant directly to the shaft splines, the rear main seal area, and the mating surfaces between the thrust washer and the prop hub. Plan periodic propeller removals throughout the season. This routine lets you clean the shaft, renew the grease coating, and inspect the entire assembly for hidden corrosion before it causes mechanical failure.
Consumable Parts and Maintenance Tools
Field replacements require the right tools and small consumable components. For outboard setups that index the prop position, keep exact-match replacement shaft keys in your kit. While performing swaps, inspect the prop shaft seal area regularly. Look carefully for embedded fishing line to prevent costly water ingress into the lower unit.
To handle these tasks on the water, assemble a dedicated toolkit with the following items:
- Prop wrench: Sized specifically for your outboard nut to prevent rounding the edges.
- Torque wrench: Required to hit the manufacturer’s exact specifications and avoid overtightening.
- Needle-nose pliers: Essential for inserting, bending, and removing stainless-steel cotter pins.
- Block of wood: Place this between the blades and the anti-ventilation plate to stop rotation during installation.
How NEWTOP Helps Reduce Replacement Downtime
When selecting a replacement outboard motor propeller, product quality and manufacturing consistency directly affect operating reliability and maintenance costs. A dependable propeller supplier helps reduce replacement delays while ensuring stable performance after installation.
NEWTOP produces aluminum and stainless steel outboard motor propellers with strict control over materials, structure, and machining accuracy. Key advantages include:
- High-performance materials: Aluminum propellers use aluminum-magnesium alloy made from new aluminum ingots, providing excellent toughness and high strength. Stainless steel propellers use duplex stainless steel, offering higher yield strength and corrosion resistance than standard stainless steel.
- Strong one-piece structure: Propeller blanks are produced through dedicated molds with integrated forming technology, eliminating welding points and improving overall strength and durability.
- Better dynamic balance: The hub is pressed as an integrated part to ensure accurate positioning and smoother rotation, helping reduce vibration during operation.
- Precision blade processing: CNC machining centers with dedicated tooling ensure accurate blade dimensions, consistent blade curves, and stable propulsion performance.
NEWTOP helps global distributors, OEM customers, and marine equipment suppliers reduce replacement downtime with durable and consistent propeller solutions. Looking for a reliable outboard motor propeller supplier? Contact NEWTOP today to explore durable propeller solutions for your marine equipment needs.
Frequently Asked Questions
How often should an outboard propeller be replaced?
There is no fixed timeline for replacing an outboard propeller. Replacement is driven entirely by condition, performance, and safety. You should replace it when you notice structural damage like severe bends, missing chunks, or deep cracks, or significant metal loss from corrosion. Unresolved performance issues such as reduced top speed, higher fuel consumption, or heavy vibration also indicate it is time for a new prop.
Should I remove my propeller before winter storage?
Yes, removing the propeller before winter storage is highly recommended. It prevents the theft of valuable stainless-steel or high-performance props. It also allows you to inspect the propeller shaft for wrapped fishing line, which can destroy seals and cause water intrusion into the gearcase. While the prop is off, you can clean the shaft and apply fresh marine grease to prevent it from seizing over the winter.
How do I know if my propeller is damaged?
Visual signs include bent or warped blades, chipped edges, cracks, and heavy corrosion. You may also notice performance changes, such as a loss of top speed, sluggish acceleration, or increased fuel consumption. When running, a damaged propeller often causes unusual vibrations, steering pulling, or a slipping sensation where the engine over-revs without matching boat speed.
Can a bent propeller be repaired?
It depends on the material and severity. Minor bends or small dings in aluminum and some stainless steel propellers can often be reconditioned by a professional prop shop. But severe bends, deep cracks, distorted hubs, or damage to die-cast aluminum props usually require a full replacement. If structural integrity is compromised or the repair cost approaches the price of a new prop, replacement is the safer option.
What grease should be used on a propeller shaft?
Always use a high-quality, waterproof marine grease designed specifically for propeller shaft splines, such as a 2-4-C marine lubricant. This grease resists wash-out in fresh and saltwater, providing critical corrosion protection. Apply a thin, even coat to the shaft splines and threads at least once a season to ensure the propeller hub does not seize to the shaft.
How do I stop corrosion on a stored propeller?
Start by washing the propeller with low-pressure fresh water and a mild detergent to remove salt, grease, and marine growth. Dry it completely. For long-term storage, you can apply a two-part high-build epoxy primer to bare metal surfaces. Store the propeller indoors in a dry, well-ventilated area, avoiding direct contact with concrete floors or dissimilar metals.
What spare parts should I keep with a replacement propeller?
A spare propeller is only useful if you have the right hardware to install it. Keep a kit on board that includes a spare prop nut, several new stainless-steel cotter pins or lock washers, a thrust washer, and any required hub spacers. You should also pack a small tube of marine grease, a block of wood to stop prop rotation during the swap, and the correct size wrench or socket.
Can a damaged propeller affect the gearbox?
Yes, a damaged propeller can severely affect the gearbox. Bent blades or missing material create a rotational imbalance that sends vibrations directly down the prop shaft. Over time, this constant vibration and potential shaft misalignment increase wear on gearbox bearings, gear teeth, and shaft seals. In severe impact cases, shock loads can chip gears or bend the driveshaft, leading to expensive lower unit repairs.